
Easy How To Do Blanket Stitch Step by Step
Blanket stitch is most often used right along the edge of a fabric as a way of giving a nice look to unfinished sides of material and helping to prevent those raw edges from fraying. The name really does come from the fact that it was originally used along the edges of blankets.
Blanket stitch is one of my favorite embroidery stitches and one that I commonly use along with felt, often as a more decorative way of stitching two pieces of felt fabric together. See how to do blanket stitch step by step with photos and written instructions.
I tend to use blanket stitch more for appliqué than as an edging and you will see a good example of where I've used it below. In many cases, I'll work this around curved shapes and not just in a straight line. Either way it's an extremely useful stitch to know how to work for many craft projects.
Note: This post may contain affiliate links for which I can be compensated.

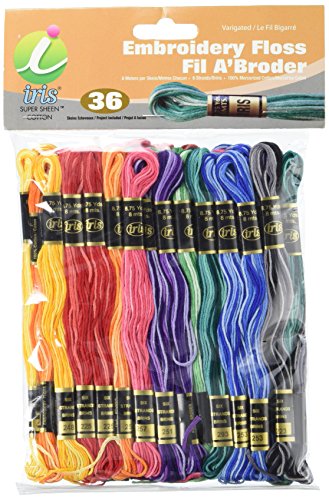
Some people like ordinary sewing threads but I always prefer to use Anchor 6 stranded embroidery floss threads simply because these are the same ones I've used since I was a young girl. There is no right or wrong with which thread to use, it's merely down to your personal preference.
SEE MY UPDATED TUTORIAL ON BLANKET STITCH - HERE
My embroidery threads are stored in clear plastic thread boxes to keep them clean and I have them organized into color groups so it is easy to find what I want when I need them.


You might like to sew with a single strand of thread but I really prefer to double up my embroidery thread so you get a thicker and more defined line of stitches.
To double up your thread, take a long strand of your chosen color and thread one end through a needle that will pass easily through the fabric you intend to sew. The needle should glide through.
Position the needle in the middle of the piece of thread: do this by holding both ends of the thread up at roughly the same height so the needle naturally falls to the center. Then place a knot near the end of your doubled-up thread.

Choose a starting point close to the edge of the fabric or applique you're working on (anywhere between 5-10mm works well for me) and push the tip of your needle up through the back of your fabric.
Gently pull the needle and the thread all the way through to the front until you feel the knot reach the back of the fabric and then stop.
If you pull this thread too quickly or with too much force, you risk pulling the knot at the end through your fabric which will probably create an unsightly hole. Just take your time until you're confident with making blanket stitch and then you can experiment with your pulling tension and speed.

Place the tip of the needle in line with the starting point of the thread but further down. How much further is up to you since this will create either a short or a long stitch depending on the spacing used.
To begin with, I'd suggest trying a measurement of approx. 5mm down while you are learning blanket stitch and until you decide on your own preference.
I generally work small and neat stitches with a spacing of 3-5mm for small applique projects and larger if working on a bigger project such as pennant banners / bunting, cushions or home decor. But then my starting point would also be larger and further away from the edge of the fabric.

Start to push the needle and thread through but don't pull it through all the way, you need to leave a small loop like the one shown in the photo on the left.
So at this point, you'll have a loop of thread at the front of your fabric and a length of thread attached to the needle coming out at the back.
We've formed part of your first stitch but if you carried on pulling your needle and thread then you would end up making a plain straight or running stitch, so leaving a small loop is necessary to the second part of the blanket stitch.

Put your needle through the loop as shown and start to pull the thread through the loop.
When you've pulled the thread all the way through, you're left with your very first stitch.
At this point, the stitch doesn't look very impressive. It looks much like the letter U on its side or a curve. It isn't until you start working the next or second stitch that the real pattern forms. So don't think you've gone wrong somewhere, you just need to be patient and wait until you've worked more stitching.

This photo shows the rather underwhelming first stitch that looks like a sideways letter U or a reverse letter C if you like.
It also shows where to place the tip of your needle to work the next part. Try and place the needle point so that your stitches are the same length apart.
To produce your second stitch, place the tip of the needle about 3-5mm down from the previous stitch (or whatever particular spacing you used) and start to push the needle and thread through the fabric but don't pull it all the way through.

As before, don't pull the thread through all the way to the back of the fabric, leave a small loop as shown in the photo here.
Push the needle through the loop and pull the thread gently through. Now you should be able to see how the edging of the stitch is forming. It's almost like you're making backwards or reverse letter Ls.
Continue working your stitches in this way from step 6 onwards to make the Blanket Stitch edging. Once you are confident with the stitch, you'll find it easy to work it around curved as well as straight edges. In reality, once you've learned this stitch by heart, it is incredibly quick to do.
Blanket stitch can also be worked in the middle of a fabric and not just along an edge. It can work as a decorative stitch to join one fabric to another as with applique. The stitch is worked in exactly the same way (along the edge of one fabric) and the only real difference is that you have to place the needle through both fabrics as you work in order to join them together.
SEE MY UPDATED TUTORIAL ON BLANKET STITCH - HERE
You can see an example of this stitch worked on my little Owl below which was made using embroidered fabric, buttons for eyes and colored craft felt.

If you've never tried this embroidery stitch before then I hope you feel like you can give it a go now because it is a great one to master. Or perhaps you've got a refresher instead. I can't wait to be sharing more techniques and tutorials with you on this blog.
Related Content You Should Also Love:
Page Last Updated:
Blanket stitch is one of my favorite embroidery stitches and one that I commonly use along with felt, often as a more decorative way of stitching two pieces of felt fabric together. See how to do blanket stitch step by step with photos and written instructions.
I tend to use blanket stitch more for appliqué than as an edging and you will see a good example of where I've used it below. In many cases, I'll work this around curved shapes and not just in a straight line. Either way it's an extremely useful stitch to know how to work for many craft projects.
Note: This post may contain affiliate links for which I can be compensated.
Easy Instructions for How to Do Blanket Stitch Sewing by Hand
Some people like ordinary sewing threads but I always prefer to use Anchor 6 stranded embroidery floss threads simply because these are the same ones I've used since I was a young girl. There is no right or wrong with which thread to use, it's merely down to your personal preference.
SEE MY UPDATED TUTORIAL ON BLANKET STITCH - HERE
My embroidery threads are stored in clear plastic thread boxes to keep them clean and I have them organized into color groups so it is easy to find what I want when I need them.

Step 1: Threading Your Needle Before Sewing
You might like to sew with a single strand of thread but I really prefer to double up my embroidery thread so you get a thicker and more defined line of stitches.
To double up your thread, take a long strand of your chosen color and thread one end through a needle that will pass easily through the fabric you intend to sew. The needle should glide through.
Position the needle in the middle of the piece of thread: do this by holding both ends of the thread up at roughly the same height so the needle naturally falls to the center. Then place a knot near the end of your doubled-up thread.
Step 2: Choose a Starting Point for Your Needle to Begin Sewing
Choose a starting point close to the edge of the fabric or applique you're working on (anywhere between 5-10mm works well for me) and push the tip of your needle up through the back of your fabric.
Gently pull the needle and the thread all the way through to the front until you feel the knot reach the back of the fabric and then stop.
If you pull this thread too quickly or with too much force, you risk pulling the knot at the end through your fabric which will probably create an unsightly hole. Just take your time until you're confident with making blanket stitch and then you can experiment with your pulling tension and speed.
Step 3: Think About Regular Spacing
Place the tip of the needle in line with the starting point of the thread but further down. How much further is up to you since this will create either a short or a long stitch depending on the spacing used.
To begin with, I'd suggest trying a measurement of approx. 5mm down while you are learning blanket stitch and until you decide on your own preference.
I generally work small and neat stitches with a spacing of 3-5mm for small applique projects and larger if working on a bigger project such as pennant banners / bunting, cushions or home decor. But then my starting point would also be larger and further away from the edge of the fabric.
Step 4: Forming a Loop of Thread
Start to push the needle and thread through but don't pull it through all the way, you need to leave a small loop like the one shown in the photo on the left.
So at this point, you'll have a loop of thread at the front of your fabric and a length of thread attached to the needle coming out at the back.
We've formed part of your first stitch but if you carried on pulling your needle and thread then you would end up making a plain straight or running stitch, so leaving a small loop is necessary to the second part of the blanket stitch.
Step 5: Making Your First Stitch
Put your needle through the loop as shown and start to pull the thread through the loop.
When you've pulled the thread all the way through, you're left with your very first stitch.
At this point, the stitch doesn't look very impressive. It looks much like the letter U on its side or a curve. It isn't until you start working the next or second stitch that the real pattern forms. So don't think you've gone wrong somewhere, you just need to be patient and wait until you've worked more stitching.
Step 6: The 2nd Stitch Starts to Form the Blanket Stitch Pattern
This photo shows the rather underwhelming first stitch that looks like a sideways letter U or a reverse letter C if you like.
It also shows where to place the tip of your needle to work the next part. Try and place the needle point so that your stitches are the same length apart.
To produce your second stitch, place the tip of the needle about 3-5mm down from the previous stitch (or whatever particular spacing you used) and start to push the needle and thread through the fabric but don't pull it all the way through.
Step 7: Creating an Edging Stitch
As before, don't pull the thread through all the way to the back of the fabric, leave a small loop as shown in the photo here.
Push the needle through the loop and pull the thread gently through. Now you should be able to see how the edging of the stitch is forming. It's almost like you're making backwards or reverse letter Ls.
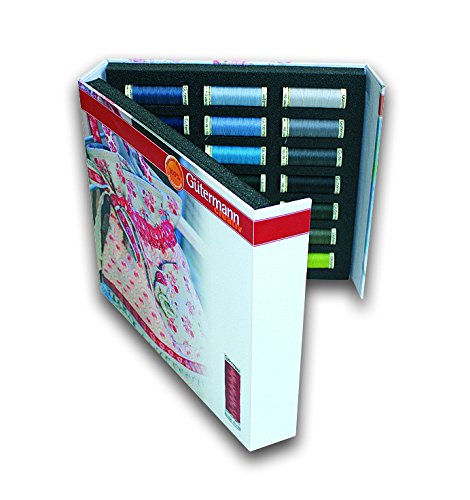
Use Stronger Polyester Gutermann Threads if Embroidery Floss Breaks Too Often

Step 8: Repeat the Process to Continue Blanket Stitching
Continue working your stitches in this way from step 6 onwards to make the Blanket Stitch edging. Once you are confident with the stitch, you'll find it easy to work it around curved as well as straight edges. In reality, once you've learned this stitch by heart, it is incredibly quick to do.
Blanket stitch can also be worked in the middle of a fabric and not just along an edge. It can work as a decorative stitch to join one fabric to another as with applique. The stitch is worked in exactly the same way (along the edge of one fabric) and the only real difference is that you have to place the needle through both fabrics as you work in order to join them together.
SEE MY UPDATED TUTORIAL ON BLANKET STITCH - HERE
You can see an example of this stitch worked on my little Owl below which was made using embroidered fabric, buttons for eyes and colored craft felt.
An Example of Blanket Stitch with My Plush Owl:
If you've never tried this embroidery stitch before then I hope you feel like you can give it a go now because it is a great one to master. Or perhaps you've got a refresher instead. I can't wait to be sharing more techniques and tutorials with you on this blog.
Related Content You Should Also Love:
My Felt Cupcake Tutorial and Free Template
Easiest Hand Stitch for Beginners
The Everything You Need to Know about Craft Felt Post
Learn to Sew the Strongest Hand Stitch
Essential Sewing Supplies for Beginners
Easiest Hand Stitch for Beginners
The Everything You Need to Know about Craft Felt Post
Learn to Sew the Strongest Hand Stitch
Essential Sewing Supplies for Beginners
Page Last Updated:
Can you use pearl cotton instead of dmc floss?
ReplyDeleteI haven't tried it myself but I would think that pearl cotton might be a little more difficult to use - I believe it is quite a bit thicker. Floss you can separate down nicely into individual strands which makes it easy to stitch with as per normal spool thread.
Delete