Free Felt Fairy House Pattern and Tutorial
If you love to stitch or sew by hand, why not create a tiny little bit of fantasy to call your own with this free fairy tree house pattern with step-by-step photo instructions. A project like this makes an unusual pincushion or a decorative felt plush sculpture that you can display on a shelf or in a cabinet.
This project is an intermediate to advanced felt plush design so not really suited to someone who has never done any sewing with felt fabrics before. If you are a beginner then you may want to check out an easier project listed near the end of this page.
The free printable pattern template can be printed as large or as small as you prefer to sew. Alternatively, you can use the basic design to make up your own set of templates to create something else. Add a touch of enchanting magic into your home or make it as a gift for someone special.
Note: This post may contain affiliate links for which I can be compensated.

Download the fairy home template to your own computer, print the design out onto card and cut out the pieces.
You can also print out the template onto paper then cut roughly around each part, glue each one onto card and then cut it out properly. The second option is a good idea if you haven't got any suitable card to print onto but you have some pieces of card from boxes around the home.
You'll need to trace around each template piece onto felt during the course of this tutorial. A water soluble fabric pen is ideal for drawing on felt and the marks will come away with just a dab of water.
If you don't have a fabric pen or if your felt is very dark in coloring, you can also use a fabric chalk marker or even a ballpoint pen. Just make sure that you carefully cut the pieces of felt out so that you're just cutting inside the pen line, i.e. cutting the ink marks away. Note that ordinary marker pens will normally bleed into the felt so are not the best choice.

Step 2a: Trace around Template C (which is the largest treetop piece) twice onto your choice of felt. I like to use dark green for this part. You'll need two pieces from this color although you're only going to use one at this stage.
You don't have to actually cut out these treetop pieces at this point. In fact I find it easier to leave mine traced on to a larger sheet of felt so I can do the initial sewing more easily.
Trace around Template D (the middle size of the treetop) onto a lighter shade of green felt if you have that. Cut this piece out and position it into the middle of one of your larger treetop pieces. No sewing required just yet.
Essential Piece of a Felt Crafter's Toolkit: A very necessary part of my felt craft toolkit is to have water soluble fabric pens which mean that I can easily trace around card templates straight onto the felt itself.
Just a small amount of water is used to dab at the pattern lines when they are no longer needed and they handily disappear. I keep 2 or 3 working fabric marker pens in my wooden craft box at all times so I never run out at a crucial point of crafting.

Step 2b: Trace around Template E (the smallest treetop piece) onto a lighter or different shade of felt. You could also use a patterned piece of fabric such as cotton for this part which can also look really good but you must sew around the edges if you are going to use a fabric that can fray.
Cut out your piece and position it in the middle of your treetop and right on top of parts C and D. Again, just position, don't sew.

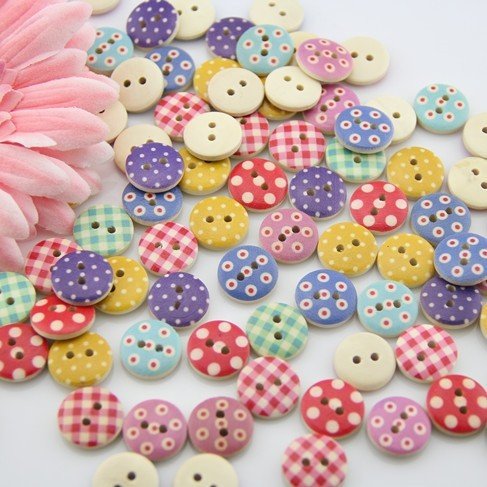
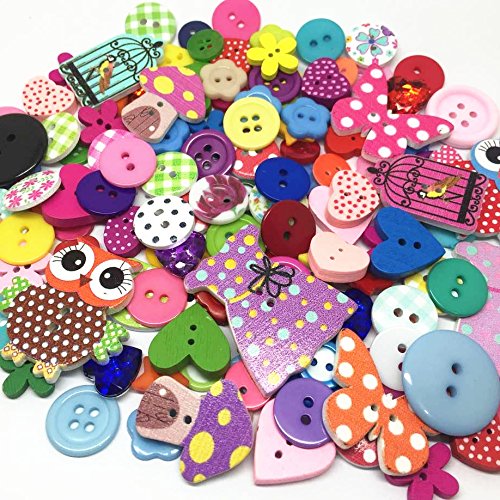
Step 2c: If you can find a cute button or a bead to pop in the middle of your treetop, this will really finish it off nicely and add some different texture and detailing into the design.
It doesn't necessarily need to be green. You could choose another earthy color like brown. Or opt for a bright red if you are making an apple fairy tree.


Step 2d: Sew on your button or bead through all the pieces of felt. This will hold all the layers of fabric in place as you sew it on.

Step 2e: This shows an example of a treetop using a piece of patterned cotton fabric instead of felt for Template E. Fabrics that have a small patterned print will work best.
Button Embellishments: I love to add cute buttons to many of my felt projects because it stops the overall design from looking very flat. Introducing a new texture to the project really livens up the finished piece.
If you've used felt, then it isn't necessary to sew down all the treetop layers and you can skip this step altogether if you want. However, I think the extra little bit of sewing is really worth the effort when you see how much nicer the sewn finished fairy house looks. Here's what I do:

Choose a thread color for the smallest treetop layer - the embroidery floss doesn't need to match the fabric shade at all, just a pretty shade of green will work. Sew down the smallest treetop. I use blanket stitch because it is one of my favorite hand embroidery stitches but you can use whatever stitch you feel comfortable with.
See How to Hand Sew Blanket Stitch Here
Choose a different shade of embroidery floss and proceed to sew the medium sized treetop into place. Then, if you haven't done so already, cut out your finished treetop and put it to one side while we make the trunk or body of the fairy home.

Step 4a: Choose a brown shade of felt for Template A which is going to make up your fairy home tree trunk. I like to use a lighter shade of brown which is just my personal preference.
Trace around Template A onto your brown felt and roughly sketch in the middle point (which is where the little fairy home door will go) and also the sewing lines at either end.
Draw out a little door shape with the one provided on the template if you need to or make your own and place it over the middle point marked out on your tree trunk. Don't sew it down yet.

Step 4b: Draw out a little window shape if you want for your door. White, cream or pale gray usually looks good for windows. This is small and fiddly so it's up to you whether you add it in. Choose an embroidery floss color to complement the shade of your door, in my case blue.

Step 4c: To sew the tiny window piece on the door, you'll find it easy to use just two stitches - a vertical one over the length and a horizontal stitch across the width of the window. This simple cross will hold the tiny window in place. It isn't essential to stitch the door into place but you can.
Cut out a small circle for the window or use my pattern. Place it to one side of the door. Just position, don't sew. Cut out a slightly smaller circle for the inner window area, again I tend to use white, cream or pale gray, and place it in the middle of the window.
As with the window area in the door, it's easiest to sew this part using just two stitches. A vertical stitch along the length and a horizontal stitch across the width of the window.
I like to use a tiny seed bead to create a tiny fairy door handle. Change the color of your floss to match the bead and sew it on just under the window in the door. You might also want to check that your sewing needle is small enough to fit through the seed bead before you start.

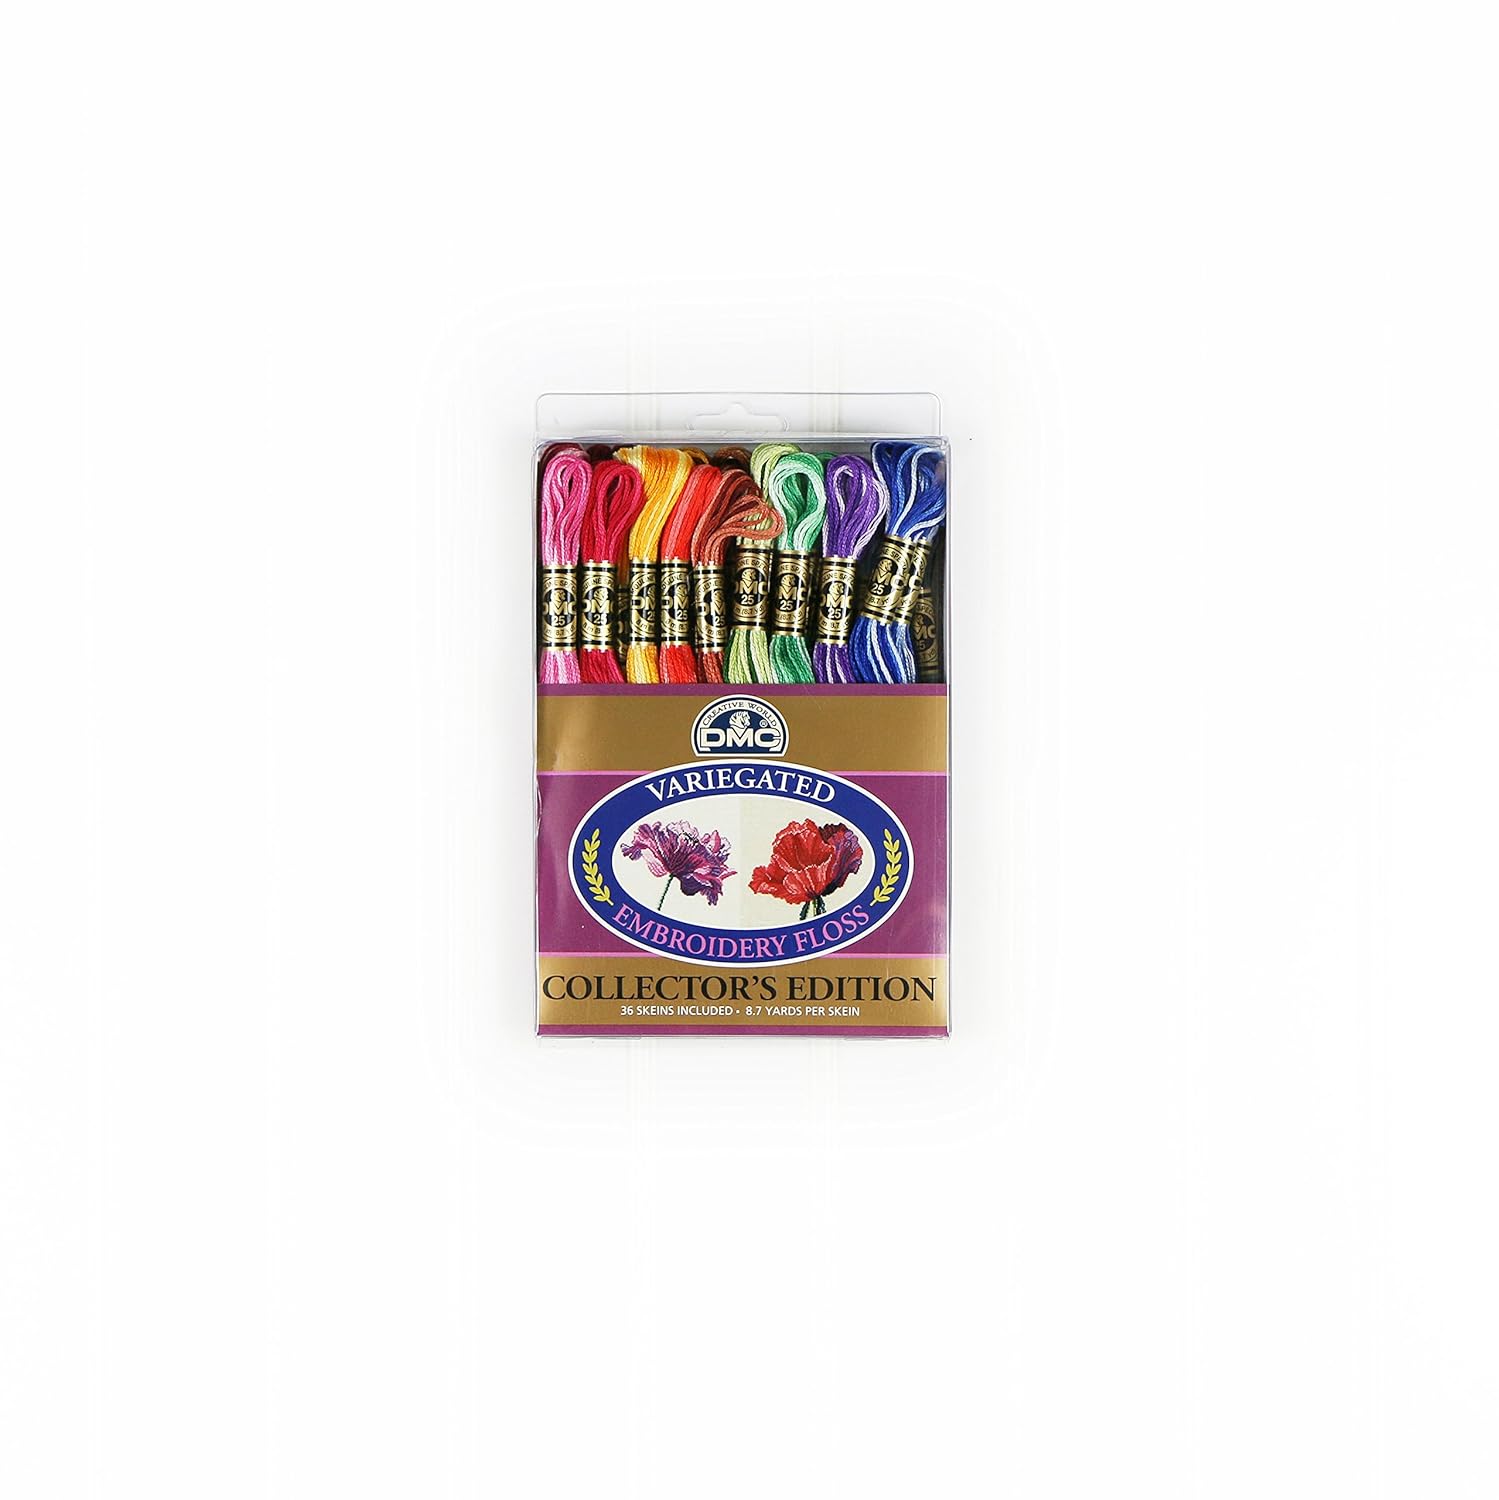
Step 4d: This is very much an optional part but one which adds just a little bit of nice detail. I like to draw in a curly vine around the fairy door. Use running stitch (or a stitch you prefer) to embroider in your vine. I love to use variegated embroidery floss threads which are perfect for this detail.
Variegated Floss: it changes shade or color as you sew. I'm a big fan of variegated embroidery floss since it allows you to add in some simple embroidery that gradually changes in shade or color. The effect can be subtle and stunning.
You can see how I used this to embroider a green trailing vine on my fairy home below. Even though the vine is made with a simple straight stitch, it looks really pretty.

Step 4e: To add a pretty detail to the vine, I've sewn on a tiny flower button. For other ideas, you can sew beads to your vine or add some French Knots. Why not have a look further down at my completed photo montage for a few ideas on other details you can add.

Step 5a: Once your tree trunk is complete, cut it out. Do not cut off the sewing guides drawn in at either end. Lightly fold your tree trunk in half with all your sewing on the inside.
Align each side so the edges are flush with each other. Pin if you need to and sew in roughly where the lines are near the edges on your felt - you might need to mark these on the back too.
I use a sewing machine for this part to get a strong hold or use running stitch. Once sewn, cut away any excess material. Just make sure not to actually cut into the stitched line.

Step 5b: Turn inside out to see your finished tree trunk. Then trace and cut out two circles using template B. These will make the grass area under the tree trunk so I use dark green felt for this; put them to one side.
To keep a great, neat shape on the tree trunk while sewing it into place on the grassy base, I use a small, rolled-up piece of thin card, just a little higher than the tree trunk and a lot longer.
Roll the card up and place it inside the tree trunk. Now push the card from the center so it forms a big circle and keeps the felt in shape as you sew. This 'trick of the trade' is simple but effective.

Step 5c: Find a floss which matches the color of your tree trunk as closely as possible. Position the tree trunk in the middle of a circular piece from pattern B that you cut out earlier, this makes a grassy base.
If you find you want a larger circular base so you can embroider in details such as a path, stones or flowers, just use a larger circle as a template. For the neatest result in sewing the trunk to the grassy circle base, use just a single strand of thread and take your time.
Bring your knotted thread through from under the circle base and up just into the bottom edge of the tree trunk, just a few mm up. Place the tip of the needle down at the very bottom edge of the tree trunk and push back down through the circle base.
Carry on sewing, with small and neat stitches, the tree trunk to the circle base. If you take your time, you can ensure that the tree trunk stays roughly in the middle of the base and doesn't wander off to one side. This is the hardest part of making these felt plushies, you'll be glad to know!

Step 5d: You'll now need to sew the other circle pattern piece B on to the bottom of your tree trunk. This is an optional step but it is worth the extra few minutes of sewing to do this because your finished piece will look a lot neater.
Choose a green thread to match the felt color. Sew on your base ideally using blanket stitch because this will give your finished piece nice, neat edging. Or choose another stitch that you prefer.

Step 5e: Your completed fairy tree trunk should look similar to the photo. Now we need to pad out this area before sewing on the top. You'll need stuffing for your tree trunk. I use a washable polyester fiber which is designed for stuffing toys.
Although I would not actually recommend washing your finished product (just wipe with a damp cloth if needs be) washable filling is essential if your item ever does get damp. Firmly push some stuffing into the tree trunk. I use a blunt ended fimo tool to push the stuffing in, you can use your fingers, a blunt pencil or even a pair of scissors with a rounded end.
It Can't Be a Felt Plush Without any Stuffing! Polyester stuffing is what you use to stuff toys with and plushies too. It is soft, easy to work with, pads nicely and inexpensive for small craft projects like this one. A bag of this should see you through many smaller felt projects.

Step 6a: At the start, you were asked to draw out 2 pieces from the pattern template C which is the treetop. You need to locate the 2nd piece (the one without all the layers sewn on) and cut it out if it isn't already. Turn this piece over on your workspace so the back is facing up towards you. Turn the fairy tree trunk upside down and position it in the middle of piece C as shown in the photo.
NOTE: If you're not sure which side is the back of piece C then do the following: place this piece of felt at the back of your Paper Template C so it matches up exactly. Place the template and your felt face down on your workspace. You can now be sure what is facing up at you is indeed the rear or back where your tree trunk will be sewn.
Start to sew your tree trunk to the top of your tree. It may look odd to be working upside down, but it's easier to sew it this way around.

Step 6b: Your fairy home tree should now look similar to the photo.

Step 6c: The final part is to sew the top of your tree on to your wee fairy home and pad it out with stuffing.

Step 6d: Place your sewn pattern piece C (the treetop with the different layers of green) on to the top of your fairy tree and make sure it all lines up nicely before you start to sew. Start to sew it on around the edge, using blanket stitch or another stitch if you prefer. When you've sewn more than half of the top on – stop.
Now is the time to start padding out the tree top. Press the stuffing in really well and try to make sure it reaches all the corners. Once your tree top is nicely stuffed, continue to sew the edges. For the best finish, you should gradually sew and stuff until you can no longer get any more stuffing in. At this point, sew your tree top closed.

Step 6e: Hurrah, your finished fantasy felt plush home.
Lots of Ideas for Your Felt Fairy Home
In this Photo Montage with Many of My Finished Pieces


How to Save the Printable Fairy House Template
Click on the design above of the fairy dwelling pattern to open it in full so you can save a copy of it to your own computer. This design is a standard .jpg picture file which is a normal file type that most computers can view and print out.
Click on the image to open up the full size which is best for printing and choose "Save As" or "Save Image As" to download it.
This free printable is for your personal use only. You are welcome to blog about how you've used this freebie along with your own photos providing that you include a link back to this page.

Related Content You Should Also Love:
Page Last Updated:
This project is an intermediate to advanced felt plush design so not really suited to someone who has never done any sewing with felt fabrics before. If you are a beginner then you may want to check out an easier project listed near the end of this page.
The free printable pattern template can be printed as large or as small as you prefer to sew. Alternatively, you can use the basic design to make up your own set of templates to create something else. Add a touch of enchanting magic into your home or make it as a gift for someone special.
Note: This post may contain affiliate links for which I can be compensated.
How to Make a Fairy Home from Felt: Free Pattern and Tutorial
Step 1) Print and Cut Out the Felt Template
You'll find the template near the end of the pageDownload the fairy home template to your own computer, print the design out onto card and cut out the pieces.
You can also print out the template onto paper then cut roughly around each part, glue each one onto card and then cut it out properly. The second option is a good idea if you haven't got any suitable card to print onto but you have some pieces of card from boxes around the home.
You'll need to trace around each template piece onto felt during the course of this tutorial. A water soluble fabric pen is ideal for drawing on felt and the marks will come away with just a dab of water.
If you don't have a fabric pen or if your felt is very dark in coloring, you can also use a fabric chalk marker or even a ballpoint pen. Just make sure that you carefully cut the pieces of felt out so that you're just cutting inside the pen line, i.e. cutting the ink marks away. Note that ordinary marker pens will normally bleed into the felt so are not the best choice.
Step 2) Start by Sewing the Treetop of the Home
Step 2a: Trace around Template C (which is the largest treetop piece) twice onto your choice of felt. I like to use dark green for this part. You'll need two pieces from this color although you're only going to use one at this stage.
You don't have to actually cut out these treetop pieces at this point. In fact I find it easier to leave mine traced on to a larger sheet of felt so I can do the initial sewing more easily.
Trace around Template D (the middle size of the treetop) onto a lighter shade of green felt if you have that. Cut this piece out and position it into the middle of one of your larger treetop pieces. No sewing required just yet.
Wrights Water Soluble Marking PenLEONIS 5 Water Erasable Marking Pens BlueDritz Disappearing Ink Marking Pen, Purple
 LEONIS 5 Water Erasable Marking Pens Blue
 Dritz Disappearing Ink Marking Pen, Purple
&
Essential Piece of a Felt Crafter's Toolkit: A very necessary part of my felt craft toolkit is to have water soluble fabric pens which mean that I can easily trace around card templates straight onto the felt itself.
Just a small amount of water is used to dab at the pattern lines when they are no longer needed and they handily disappear. I keep 2 or 3 working fabric marker pens in my wooden craft box at all times so I never run out at a crucial point of crafting.
Step 2b: Trace around Template E (the smallest treetop piece) onto a lighter or different shade of felt. You could also use a patterned piece of fabric such as cotton for this part which can also look really good but you must sew around the edges if you are going to use a fabric that can fray.
Cut out your piece and position it in the middle of your treetop and right on top of parts C and D. Again, just position, don't sew.
Step 2c: If you can find a cute button or a bead to pop in the middle of your treetop, this will really finish it off nicely and add some different texture and detailing into the design.
It doesn't necessarily need to be green. You could choose another earthy color like brown. Or opt for a bright red if you are making an apple fairy tree.
Step 2d: Sew on your button or bead through all the pieces of felt. This will hold all the layers of fabric in place as you sew it on.
Step 2e: This shows an example of a treetop using a piece of patterned cotton fabric instead of felt for Template E. Fabrics that have a small patterned print will work best.
Button Embellishments: I love to add cute buttons to many of my felt projects because it stops the overall design from looking very flat. Introducing a new texture to the project really livens up the finished piece.
Step 3) Optional Sewing on the Treetop
If you've used felt, then it isn't necessary to sew down all the treetop layers and you can skip this step altogether if you want. However, I think the extra little bit of sewing is really worth the effort when you see how much nicer the sewn finished fairy house looks. Here's what I do:
Choose a thread color for the smallest treetop layer - the embroidery floss doesn't need to match the fabric shade at all, just a pretty shade of green will work. Sew down the smallest treetop. I use blanket stitch because it is one of my favorite hand embroidery stitches but you can use whatever stitch you feel comfortable with.
See How to Hand Sew Blanket Stitch Here
Choose a different shade of embroidery floss and proceed to sew the medium sized treetop into place. Then, if you haven't done so already, cut out your finished treetop and put it to one side while we make the trunk or body of the fairy home.
Step 4) Adding in the Fairy House Detailing
Step 4a: Choose a brown shade of felt for Template A which is going to make up your fairy home tree trunk. I like to use a lighter shade of brown which is just my personal preference.
Trace around Template A onto your brown felt and roughly sketch in the middle point (which is where the little fairy home door will go) and also the sewing lines at either end.
Draw out a little door shape with the one provided on the template if you need to or make your own and place it over the middle point marked out on your tree trunk. Don't sew it down yet.
Step 4b: Draw out a little window shape if you want for your door. White, cream or pale gray usually looks good for windows. This is small and fiddly so it's up to you whether you add it in. Choose an embroidery floss color to complement the shade of your door, in my case blue.
Step 4c: To sew the tiny window piece on the door, you'll find it easy to use just two stitches - a vertical one over the length and a horizontal stitch across the width of the window. This simple cross will hold the tiny window in place. It isn't essential to stitch the door into place but you can.
Cut out a small circle for the window or use my pattern. Place it to one side of the door. Just position, don't sew. Cut out a slightly smaller circle for the inner window area, again I tend to use white, cream or pale gray, and place it in the middle of the window.
As with the window area in the door, it's easiest to sew this part using just two stitches. A vertical stitch along the length and a horizontal stitch across the width of the window.
I like to use a tiny seed bead to create a tiny fairy door handle. Change the color of your floss to match the bead and sew it on just under the window in the door. You might also want to check that your sewing needle is small enough to fit through the seed bead before you start.
Step 4d: This is very much an optional part but one which adds just a little bit of nice detail. I like to draw in a curly vine around the fairy door. Use running stitch (or a stitch you prefer) to embroider in your vine. I love to use variegated embroidery floss threads which are perfect for this detail.

&
Variegated Floss: it changes shade or color as you sew. I'm a big fan of variegated embroidery floss since it allows you to add in some simple embroidery that gradually changes in shade or color. The effect can be subtle and stunning.
You can see how I used this to embroider a green trailing vine on my fairy home below. Even though the vine is made with a simple straight stitch, it looks really pretty.
Step 4e: To add a pretty detail to the vine, I've sewn on a tiny flower button. For other ideas, you can sew beads to your vine or add some French Knots. Why not have a look further down at my completed photo montage for a few ideas on other details you can add.
Step 5) Making the Trunk of the Fairy Tree House
Step 5a: Once your tree trunk is complete, cut it out. Do not cut off the sewing guides drawn in at either end. Lightly fold your tree trunk in half with all your sewing on the inside.
Align each side so the edges are flush with each other. Pin if you need to and sew in roughly where the lines are near the edges on your felt - you might need to mark these on the back too.
I use a sewing machine for this part to get a strong hold or use running stitch. Once sewn, cut away any excess material. Just make sure not to actually cut into the stitched line.
Step 5b: Turn inside out to see your finished tree trunk. Then trace and cut out two circles using template B. These will make the grass area under the tree trunk so I use dark green felt for this; put them to one side.
To keep a great, neat shape on the tree trunk while sewing it into place on the grassy base, I use a small, rolled-up piece of thin card, just a little higher than the tree trunk and a lot longer.
Roll the card up and place it inside the tree trunk. Now push the card from the center so it forms a big circle and keeps the felt in shape as you sew. This 'trick of the trade' is simple but effective.
Step 5c: Find a floss which matches the color of your tree trunk as closely as possible. Position the tree trunk in the middle of a circular piece from pattern B that you cut out earlier, this makes a grassy base.
If you find you want a larger circular base so you can embroider in details such as a path, stones or flowers, just use a larger circle as a template. For the neatest result in sewing the trunk to the grassy circle base, use just a single strand of thread and take your time.
Bring your knotted thread through from under the circle base and up just into the bottom edge of the tree trunk, just a few mm up. Place the tip of the needle down at the very bottom edge of the tree trunk and push back down through the circle base.
Carry on sewing, with small and neat stitches, the tree trunk to the circle base. If you take your time, you can ensure that the tree trunk stays roughly in the middle of the base and doesn't wander off to one side. This is the hardest part of making these felt plushies, you'll be glad to know!
Step 5d: You'll now need to sew the other circle pattern piece B on to the bottom of your tree trunk. This is an optional step but it is worth the extra few minutes of sewing to do this because your finished piece will look a lot neater.
Choose a green thread to match the felt color. Sew on your base ideally using blanket stitch because this will give your finished piece nice, neat edging. Or choose another stitch that you prefer.
Step 5e: Your completed fairy tree trunk should look similar to the photo. Now we need to pad out this area before sewing on the top. You'll need stuffing for your tree trunk. I use a washable polyester fiber which is designed for stuffing toys.
Although I would not actually recommend washing your finished product (just wipe with a damp cloth if needs be) washable filling is essential if your item ever does get damp. Firmly push some stuffing into the tree trunk. I use a blunt ended fimo tool to push the stuffing in, you can use your fingers, a blunt pencil or even a pair of scissors with a rounded end.
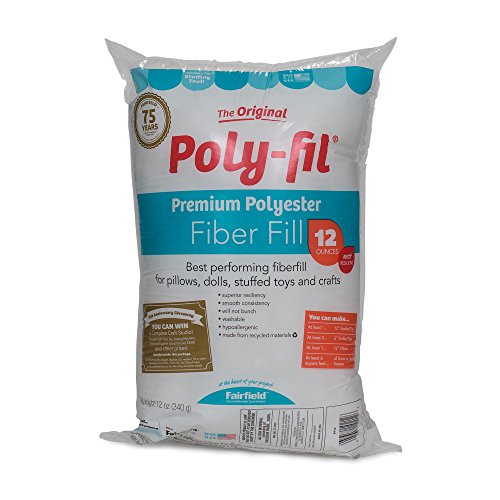
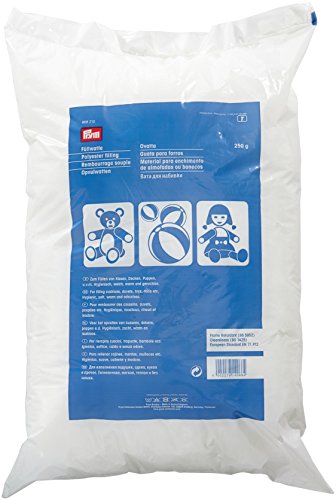
It Can't Be a Felt Plush Without any Stuffing! Polyester stuffing is what you use to stuff toys with and plushies too. It is soft, easy to work with, pads nicely and inexpensive for small craft projects like this one. A bag of this should see you through many smaller felt projects.
Step 6) Sewing the Trunk and Fairy Treetop Together
Step 6a: At the start, you were asked to draw out 2 pieces from the pattern template C which is the treetop. You need to locate the 2nd piece (the one without all the layers sewn on) and cut it out if it isn't already. Turn this piece over on your workspace so the back is facing up towards you. Turn the fairy tree trunk upside down and position it in the middle of piece C as shown in the photo.
NOTE: If you're not sure which side is the back of piece C then do the following: place this piece of felt at the back of your Paper Template C so it matches up exactly. Place the template and your felt face down on your workspace. You can now be sure what is facing up at you is indeed the rear or back where your tree trunk will be sewn.
Start to sew your tree trunk to the top of your tree. It may look odd to be working upside down, but it's easier to sew it this way around.
Step 6b: Your fairy home tree should now look similar to the photo.
Step 6c: The final part is to sew the top of your tree on to your wee fairy home and pad it out with stuffing.
Step 6d: Place your sewn pattern piece C (the treetop with the different layers of green) on to the top of your fairy tree and make sure it all lines up nicely before you start to sew. Start to sew it on around the edge, using blanket stitch or another stitch if you prefer. When you've sewn more than half of the top on – stop.
Now is the time to start padding out the tree top. Press the stuffing in really well and try to make sure it reaches all the corners. Once your tree top is nicely stuffed, continue to sew the edges. For the best finish, you should gradually sew and stuff until you can no longer get any more stuffing in. At this point, sew your tree top closed.
Step 6e: Hurrah, your finished fantasy felt plush home.
Check Out the Completed Photos and Get the Free Pattern Below!
Lots of Ideas for Your Felt Fairy Home
In this Photo Montage with Many of My Finished Pieces
Your Free Fairy Home Pattern
How to Save the Printable Fairy House Template
Click on the design above of the fairy dwelling pattern to open it in full so you can save a copy of it to your own computer. This design is a standard .jpg picture file which is a normal file type that most computers can view and print out.
Click on the image to open up the full size which is best for printing and choose "Save As" or "Save Image As" to download it.
This free printable is for your personal use only. You are welcome to blog about how you've used this freebie along with your own photos providing that you include a link back to this page.
Related Content You Should Also Love:
Make a Felt Cupcake Shaped Brooch Pin
Read the ULTIMATE Guide to Felt Craft Fabric
How to Make Hobbit Fairy Door Cookies
More Fantasy Crafts to Enjoy
How to Make Felt Plushies for Beginners
Read the ULTIMATE Guide to Felt Craft Fabric
How to Make Hobbit Fairy Door Cookies
More Fantasy Crafts to Enjoy
How to Make Felt Plushies for Beginners
Page Last Updated:


lovely! thanks for sharing this perfect and beautiful tutorial, so full of tips!
ReplyDeleteThank you, I had a lot of fun sewing up this felt fairy house.
DeleteThis is so adorable I could almost eat it! I love the little bead doorknob. Pinned!
ReplyDeleteThank you, Jess.
DeleteThese are so very cute! Thanks for sharing.
ReplyDeleteBeti
This is absolutely adorable! I love to sew by hand and can't wait to make a little village. Thanks for designing and sharing this tutorial with us.
ReplyDeleteHi. I want to thank you for sharing your pattern and tutorial. I have made three so far, and everyone I know wants one. The frustrating part of Pintrest, is there are so many crafts I would love to try my hand at, but there are never any directions. Some I can figure out, but some I can't. I just craft for fun, not to sell. So thanks to you for being brave enough to let others know how you make your lovely fairy houses. (By the way, we are socially isolating because of the Corona virus, so making these little fairy houses is saving my sanity).
ReplyDelete