Tonic Die Easy Pocket Card Tutorial
Have you ever wondered how to elegantly add gift cards, money gifts, personal photos or notes inside a handmade greeting card? This easy pocket card tutorial shows you how to do that very quickly and simply.
I'm using the Floral Cuff die from the Tonic Magazine Issue 5 which has a lovely rectangular shape just perfect to make a pocket with. You can use any similar shaped die that will stretch across the width of a card blank or, alternatively, hand cut a pocket shape yourself.
With just a few simple paper crafting techniques, you can create a beautiful handmade card with a handy pocket on the front or even tucked on the inside if you prefer. Come and see how to make gorgeous pocket cards with this tutorial.
Note: This post may contain affiliate links for which I can be compensated.

The beautiful Floral Cuff die that came included with Tonic Magazine Issue 5 is just perfect for making pretty looking pockets with for your handmade cards, scrapbooks and other card making projects.
If you don't have this die, you can use any rectangular shaped die that is large enough to stretch across the width of a greeting card blank.
Alternatively, cut your own rectangle shape from card and decorate it using pretty embellishments. Either way, you'll get plenty of ideas from this easy pocket card tutorial.

The floral cuff die I'm using from Tonic Magazine Issue 5 works absolutely perfectly with a 5 inch width card. I'm using a square card blank but this technique will also work with taller cards too.
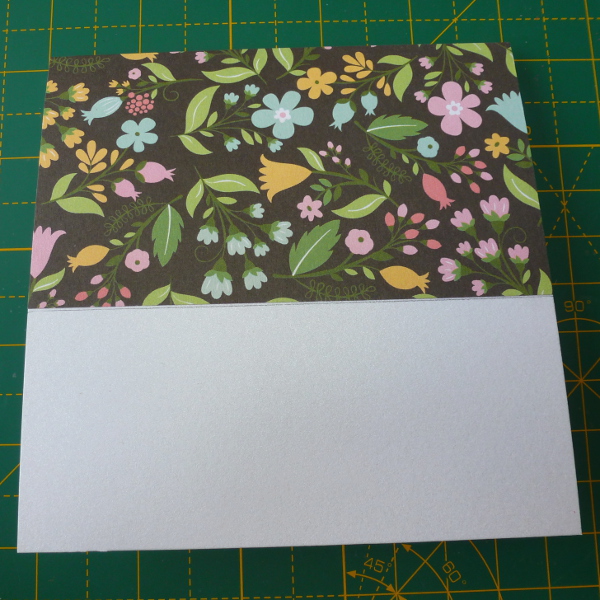
Included with the magazine are some beautiful papers. I picked a floral pattern to stick down just a little more than the top half of my card blank.
You can cover the whole front if you find this easier but I don't like to waste patterned papers and the bottom section will be covered with the die pocket.

You can choose to also cut the flowers out of the die and either leave them out of inlay them in another color - I have an example of this further below.
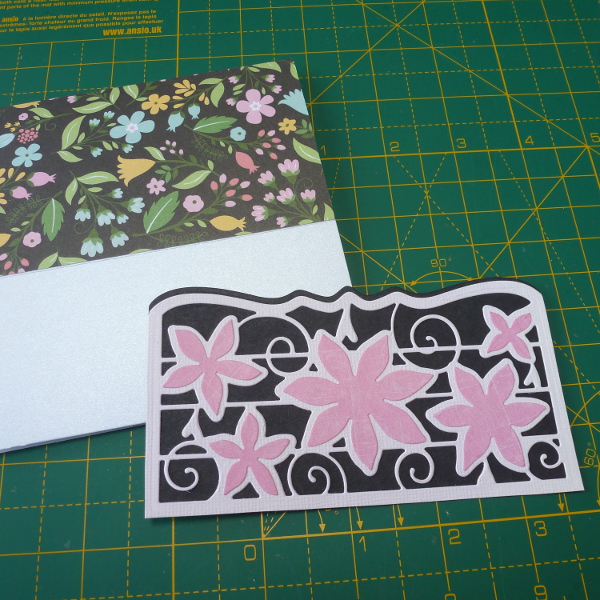
An even easier choice is to use the flower dies on a separate piece of paper or card to cut them out and glue them into place as I've done above using a darker shade of pink.
Stick this die cut on top of some card to back it and cut the whole thing out to make a fancy pocket. I used black card here for contrast. Liquid glue with a fine nozzle tip works well for sticking this intricate die down.
You can use the included Tonic edge border die to cut along the top edge although it is also easy to cut it by hand. You will need to trim the sides and bottom to fit your card blank.

I love my Tim Holtz retractable craft pick (also by Tonic) that makes easy work of lifting up the edges of the double sided tape.
I lift just a small amount of tape backing off from every piece and then align the pocket along the bottom of my card blank and stick it down.

Now you have a simple pocket on the front of your handmade card that you can pop something flat into such as a gift card, money gift, photo, sentiment, tag or a verse.
You can see this finished card on my Tonic Magazine 5 page. Even better though is the following one below. Now we'll see how I made the gorgeous Tonic tag and Floral Cuff pocket card using this same technique.

Use the technique demonstrated above to make your basic pocket card.
For this design, I chose the lighter floral bird paper to cover the card front and then chose a silver card for the die, pale blue Bazzil card for the backing and inlaid the flowers using a pale blue card with a pearl sheen.

I decided on a tag to pop into the front of the card pocket. I used the gorgeous Tonic tag set that came with the magazine Die Cutting Essentials issue 18. You can subscribe to Die Cutting Essentials at moremags.com
You can also see how I used these Tonic tags here with my rose in a teacup card page.
The largest die from this set works well with the birdcage die from TheWorks.co.uk. I cut the birdcage from silver card and used my Quickie Glue Pen to stick it down.
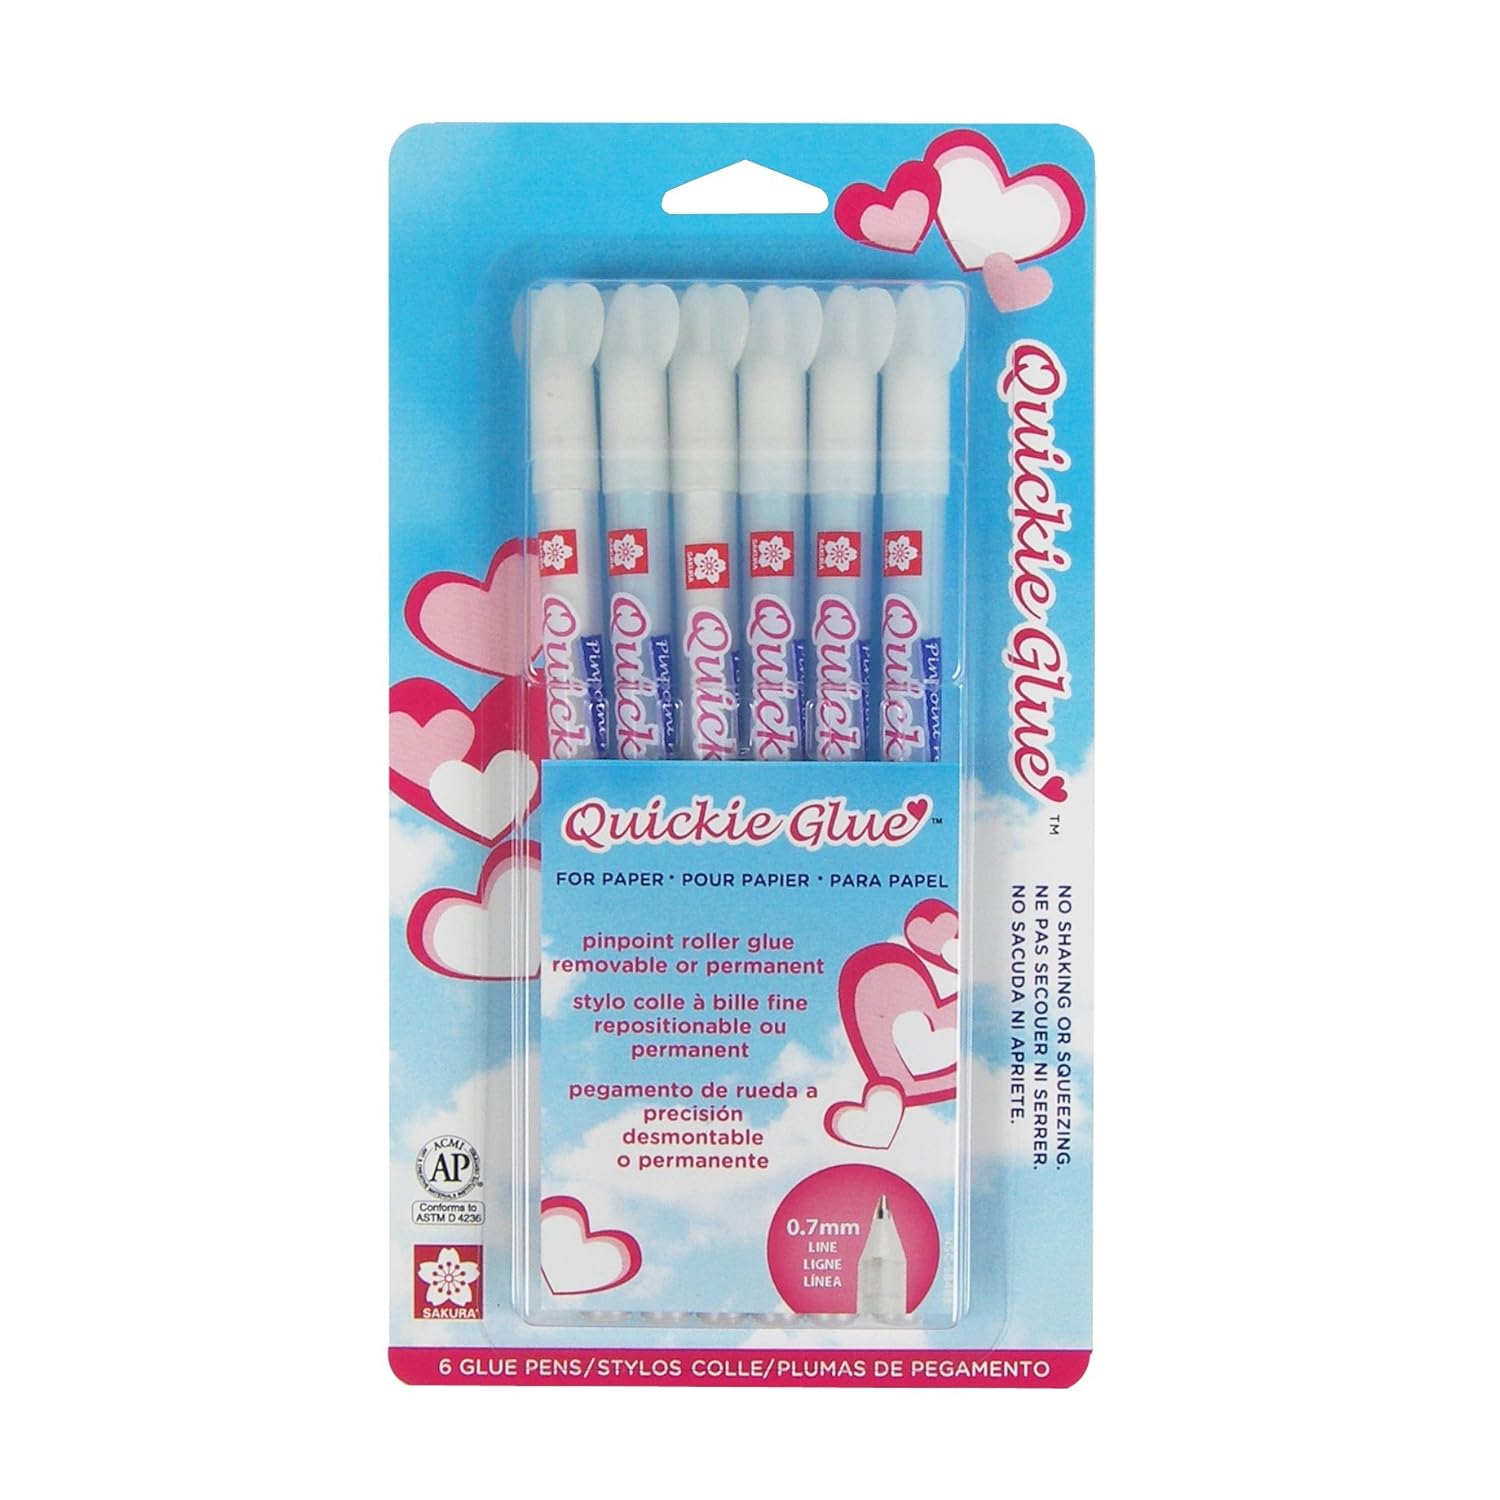
This Quickie glue pen by Sakura has a very fine nib which works perfectly with very intricate dies like this one.
I also inlaid some silver foil card pieces back into place on the die and cut the bird out again from a blue card.

Using the flower dies included in the Floral Cuff Tonic dies set, I cut several of them from a yellow scrapbook paper and then used a small yellow VersaColor ink pad (Canary) to ink around the edges of the petals.
Inking around the petal edges is fairly easy to do with the small ink pads rather than the large ones. Otherwise you can ink up some sponge daubers and use those instead.
I shaped each flower on a shaping mat with a stylus - this Heartfelt Creations Flower Shaping Kit gives you everything you need to do this. I gently rub each petal on the back of the paper and then rub around the middle on the front to get some dimension.
Layer up several flowers in different sizes using a small amount of liquid glue between the middle of each layer. My Quickie Glue pen came in very handy for sticking Swarovski gems into the middle of each flower for some added sparkle.

The tag is completed with a matching smaller flower and a sentiment which was cut from the paper pack included in the Tonic magazine.
Some pink ribbons work well threaded through the eyelet hole of the tag.
I love how the warm colors of the flowers really pop on this card design.

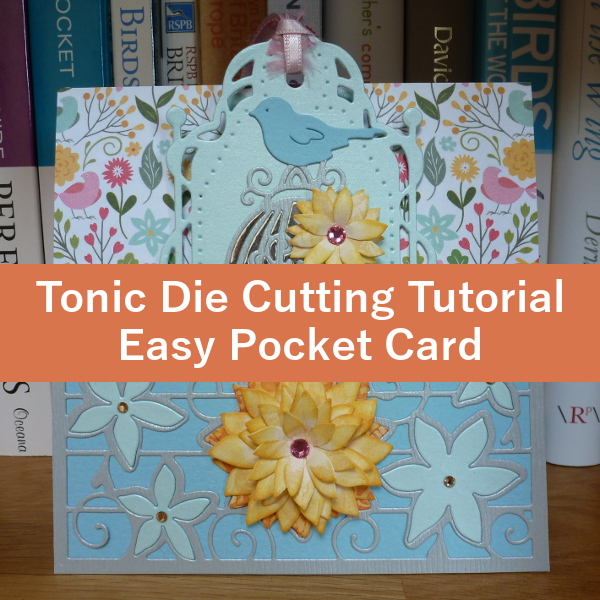
Here's the completed card with the tag placed in the front pocket. You can use the pocket to add in something else like a gift card, some money or a photo instead.
Of course you can use the same technique to add in a pretty pocket on the inside of the card as well. I hope this has given you some great ideas on how to make an easy pocket card by using this die or something similar.
Related Content You Should Also Love:
Page Last Updated:
I'm using the Floral Cuff die from the Tonic Magazine Issue 5 which has a lovely rectangular shape just perfect to make a pocket with. You can use any similar shaped die that will stretch across the width of a card blank or, alternatively, hand cut a pocket shape yourself.
With just a few simple paper crafting techniques, you can create a beautiful handmade card with a handy pocket on the front or even tucked on the inside if you prefer. Come and see how to make gorgeous pocket cards with this tutorial.
Note: This post may contain affiliate links for which I can be compensated.
Easy Pocket Card Tutorial Using a Tonic Studios Die

The beautiful Floral Cuff die that came included with Tonic Magazine Issue 5 is just perfect for making pretty looking pockets with for your handmade cards, scrapbooks and other card making projects.
If you don't have this die, you can use any rectangular shaped die that is large enough to stretch across the width of a greeting card blank.
Alternatively, cut your own rectangle shape from card and decorate it using pretty embellishments. Either way, you'll get plenty of ideas from this easy pocket card tutorial.
How to Make a Quick and Easy Card Pocket With a Die Cut

Step 1: Covering the top of your card blank
If you're using a die for your pocket, you want one that will be large enough to fill the width of a greeting card blank.The floral cuff die I'm using from Tonic Magazine Issue 5 works absolutely perfectly with a 5 inch width card. I'm using a square card blank but this technique will also work with taller cards too.
Included with the magazine are some beautiful papers. I picked a floral pattern to stick down just a little more than the top half of my card blank.
You can cover the whole front if you find this easier but I don't like to waste patterned papers and the bottom section will be covered with the die pocket.

Step 2: Making a pocket section with the die
Cut the die out onto your choice of card. I cut mine with my Sizzix Big Shot machine but there are plenty more die cutting machines that would work well including the Tonic Tangerine. I used a pale pink Bazzil card here.You can choose to also cut the flowers out of the die and either leave them out of inlay them in another color - I have an example of this further below.
An even easier choice is to use the flower dies on a separate piece of paper or card to cut them out and glue them into place as I've done above using a darker shade of pink.
Stick this die cut on top of some card to back it and cut the whole thing out to make a fancy pocket. I used black card here for contrast. Liquid glue with a fine nozzle tip works well for sticking this intricate die down.
You can use the included Tonic edge border die to cut along the top edge although it is also easy to cut it by hand. You will need to trim the sides and bottom to fit your card blank.

Step 3: Sticking the pocket to the card front
Use a narrow double sided tape around the sides and bottom edge on the back of the pocket.I love my Tim Holtz retractable craft pick (also by Tonic) that makes easy work of lifting up the edges of the double sided tape.
I lift just a small amount of tape backing off from every piece and then align the pocket along the bottom of my card blank and stick it down.

Step 4: Basic pocket made using the Floral Cuff Tonic die cut
You can then pull the backing pieces off your double sided tape once you've placed your pocket exactly where you want it.Now you have a simple pocket on the front of your handmade card that you can pop something flat into such as a gift card, money gift, photo, sentiment, tag or a verse.
You can see this finished card on my Tonic Magazine 5 page. Even better though is the following one below. Now we'll see how I made the gorgeous Tonic tag and Floral Cuff pocket card using this same technique.
Tonic Studios Pocket Card with Birdcage Tag

Use the technique demonstrated above to make your basic pocket card.
For this design, I chose the lighter floral bird paper to cover the card front and then chose a silver card for the die, pale blue Bazzil card for the backing and inlaid the flowers using a pale blue card with a pearl sheen.

I decided on a tag to pop into the front of the card pocket. I used the gorgeous Tonic tag set that came with the magazine Die Cutting Essentials issue 18. You can subscribe to Die Cutting Essentials at moremags.com
You can also see how I used these Tonic tags here with my rose in a teacup card page.
The largest die from this set works well with the birdcage die from TheWorks.co.uk. I cut the birdcage from silver card and used my Quickie Glue Pen to stick it down.
This Quickie glue pen by Sakura has a very fine nib which works perfectly with very intricate dies like this one.
I also inlaid some silver foil card pieces back into place on the die and cut the bird out again from a blue card.

Using the flower dies included in the Floral Cuff Tonic dies set, I cut several of them from a yellow scrapbook paper and then used a small yellow VersaColor ink pad (Canary) to ink around the edges of the petals.
Inking around the petal edges is fairly easy to do with the small ink pads rather than the large ones. Otherwise you can ink up some sponge daubers and use those instead.
I shaped each flower on a shaping mat with a stylus - this Heartfelt Creations Flower Shaping Kit gives you everything you need to do this. I gently rub each petal on the back of the paper and then rub around the middle on the front to get some dimension.
Layer up several flowers in different sizes using a small amount of liquid glue between the middle of each layer. My Quickie Glue pen came in very handy for sticking Swarovski gems into the middle of each flower for some added sparkle.

The tag is completed with a matching smaller flower and a sentiment which was cut from the paper pack included in the Tonic magazine.
Some pink ribbons work well threaded through the eyelet hole of the tag.
I love how the warm colors of the flowers really pop on this card design.

Here's the completed card with the tag placed in the front pocket. You can use the pocket to add in something else like a gift card, some money or a photo instead.
Of course you can use the same technique to add in a pretty pocket on the inside of the card as well. I hope this has given you some great ideas on how to make an easy pocket card by using this die or something similar.
Related Content You Should Also Love:
Get More Ideas With this Tonic Die
More Ideas on Using the Tag Set
Tonic Craft Kit Review: Is It REALLY Worth It?
More Paper Crafts to Enjoy
More Ideas on Using the Tag Set
Tonic Craft Kit Review: Is It REALLY Worth It?
More Paper Crafts to Enjoy
Page Last Updated:


Comments
Post a Comment
CraftyMarie is a craft themed website by Marie Williams Johnstone. I love to craft in the winter and garden in the summer. I make handmade cards, papercrafts, crochet and seasonal crafts. I enjoy many of the more traditional crafts and hobbies including sewing, embroidery and working with felt and fabric. Thanks for leaving me a comment. Comments do not show up until I approve them. Marie