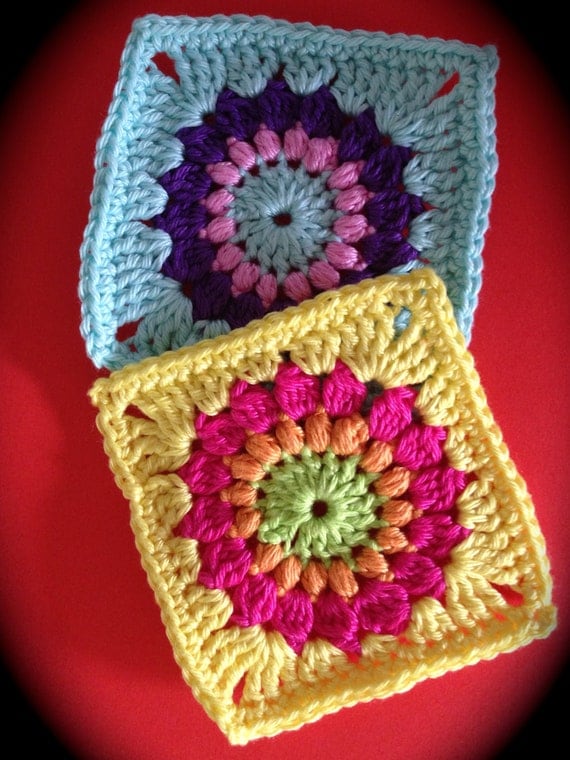
Easy Free Sunburst Granny Square Crochet Pattern

I've stuck to a simple and easy free sunburst granny square crochet pattern that is super fast to work up. It uses only basic stitches that are much more friendly for those of us who haven't been crocheting all that long. This is ideal for someone who has mastered the basics and now wants a cute pattern.
This crochet pattern doesn't require nearly as many stitches as other sunburst designs do which makes my granny square pattern very quick and easy. The completed squares are just perfect to turn into a throw, blanket or cushion. You'll love that the pattern looks impressive even though it is really easy to make.
I used up leftover yarn scraps in bright colors for the circular centers and then picked a neutral gray for the final two rounds so that the inner circles would really pop. What yarn colors will you choose for this pattern?
Note: This post may contain affiliate links for which I can be compensated.
Materials and Tools Needed for this Free Sunburst Granny Square Crochet Pattern
- A selection of different yarn colors. You can use up leftover yarn scraps for each square
- Crochet hook size 4 - 5.5 mm (F, G, H or I)
- Scissors or a pair of thread snips.
How to Make a Sunburst Granny Square Design

Before you begin to make up your granny squares, here is the pattern tutorial for part 1 of this tutorial which shows you how to make the circular centers shown above. It contains rounds 1-3:
Clover Amour Crochet Hooks are Perfect for This Sunburst Pattern
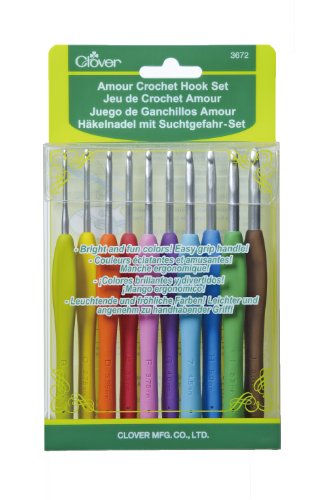


Honestly, I almost gave up on crochet because the hooks I originally chose were that bad and spoiling my enjoyment of this wonderful yarn craft.
It is really worth investing in some good quality crochet hooks like Clover which definitely improved the speed and comfort of my own crocheting.
Even better, get someone else to buy you a good set for Christmas. I have a fantastic and very detailed crochet hooks guide here to help you choose the right ones for you.
Note on This Free Sunburst Crochet Pattern and Tutorial
All stitch instructions are given in US terms. There are lots of conversion charts online if you don't follow these yourself.
This sunburst granny square uses just a basic range of stitches which therefore makes it great for those who are just past that beginning stage.
You'll need to learn how to crochet in the round if you don't already know (although I do my best to explain this) and you also need to know how to join on with new colors. YouTube is the place to visit for learning these things and I have used it loads.
Basic pattern instructions are provided at the start of each step, right after each photo, and they are highlighted in italics. If you are experienced at crocheting, you should be able to just follow these instructions for each step.
Further commentary is provided underneath the basic pattern instructions to help those who need more detailed explanations on how to work this free Sunburst granny square crochet pattern.

Step 1: Round 4: with your choice of color yarn, fasten your color into any chain 1 space made in the previous round - tutorial for this linked to above. Chain 3 or make a standing double crochet to start off.
Since my circles were all in bright shades of yarn, I decided to use a neutral gray shade for the square section of this pattern so that the circles pop out.
In this 4th round (rounds 1-3 are in the previous tutorial) you need to crochet into the chain one spaces that were worked into the last round of the circle.
You should see these spaces if you gently pull or stretch the circle. Start off with a standing double crochet or just fasten on and chain 3 instead.

Step 2: Round 4: now make two more double crochets (dc) into the same space and chain (ch) 1.
Work another two double crochet stitches into the same space so you have either three double crochets or a chain of 3 plus two double crochets all worked into the same space. Then chain one.

Step 3: Round 4: work 3 dcs then a ch 1 into the next ch 1 space along.
Into the very next chain one space around the circle, work three double crochet stitches followed by a chain one.

Step 4: Round 4: work 3 treble crochet (tr) and then ch 3 into the next ch 1 space along.
In the next chain one space around the circle, work three treble crochet stitches which are taller and then chain three.

Step 5: Round 4: into the same space, make 3 more tr then ch 1. This creates your first corner.
Work three more treble crochet stitches into the same space and then chain one. You should now see that your first corner has formed to turn this circle into a square.

Step 6: Round 4: in the next ch 1 space, dc 3 and ch 1. Move to the next ch 1 space and dc 3 and ch 1.
In the next available chain one space, make three double crochet stitches and then chain one. Move to the next chain one space along on the circle and also make three double crochet stitches and a chain one. Now you're ready to start on the next corner.

Step 7: Round 4: Go back and repeat instructions for step 4 to step 6 to create your second corner. Your square should now look similar to this photo.
Repeat the steps outlined to create your second corner and a third side to the square.

Step 8: Round 4: Go back and repeat instructions for step 4 to step 6 to create your third corner. Your square should now look similar to this photo with just the final corner waiting to be done for this round.
Repeat the steps outlined to create your third corner and an almost finished round four of the square.

Step 9: Round 4: In the next ch 1 space, work 3 tr, ch 3 and make 3 more tr to create your final corner. Ch 1.
Move to the final chain one space and work in three treble crochet stitches followed by a chain of three followed by another three treble crochet stitches. Then chain one.

Step 10: Round 4: ss back to the beginning of the round. Do not fasten off unless you want to change your color for the next round.
Slip stitch back to the beginning of the round. If you want to carry on with the same color as I have, do not fasten off at this point.

Step 11: Round 5: Ch 3 if you are keeping the same color yarn from the previous round. If you have fastened off to add a new color then fasten on in the same chain one space area and ch 3.
I wanted to make the square section all in gray. So, to do that, I simply did a chain of 3 after the slip stitch on the end of the previous round.
If you want to change the color of the yarn then you would fasten off at the end of step 10, then fasten on with a new color and chain 3.

Step 12: Round 5: working in the next ch 1 space, make 3 dc stitches and ch 1.
This looks a little odd but don't panic because it all looks wonderful when you finish this round off. It's not a mistake.
Move to the next chain one space made from the previous round and work in three double crochet stitches. Then chain one. It's all double crochet and chains on this round. Really simple.

Step 13: Round 5: in every ch 1 space from the previous round, work 3 dcs and a ch 1 except for the corner spaces. Corner spaces are worked as follows: 3 dc, ch 3, 3 dc, ch 1.
You are working around all the chain one spaces made from the previous round which was round 4. Normally this means working three double crochet stitches and then a chain one.
The corner spaces are worked a little differently. For each corner work three double crochet, a chain of three, three double crochet and then a chain one.

Step 14: Round 5: continue working the pattern as per step 13 and stop when you finish the final corner.
Carry on with the pattern as laid out in step 13 then stop when you complete the last corner area.

Step 15: Round 5: work 2 dcs into the next ch 1 space from the previous round.
When you get to the point in the photo above, it looks a little odd. This will be finished off neatly. Find the next chain one space from the previous round and work two double crochet stitches into it.

Step 16: Round 5: ss into the 3rd stitch up on the beginning ch and fasten off.
To finish off, slip stitch into the beginning chain you made at the start of this round 5. Look for the third stitch up to slip stitch into. Then fasten off to complete your sunburst granny square.
Alternatively, you may want to keep going. If so, you follow the directions for round 5 to create additional rounds as you please and make a larger square.

Whew! I'm so glad I got through all that. I've tried my best to provide really clear directions and photos so you can follow along. If you should happen to notice any error, then it's nice to let me know in the comments or by contacting me.
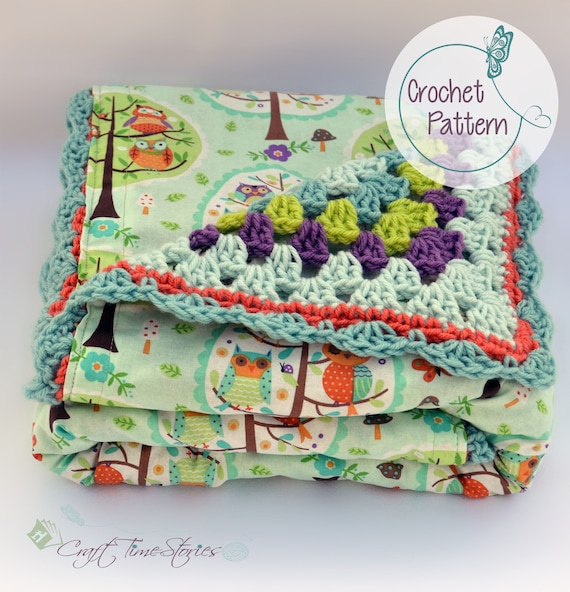
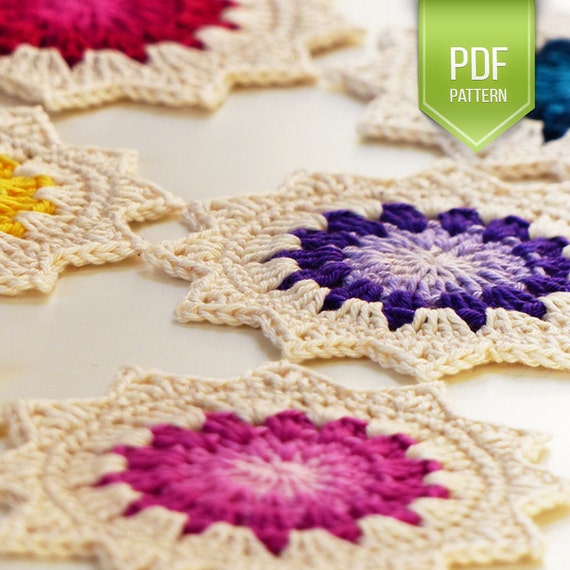
More Similar Crochet Patterns to Enjoy from Etsy

These sunburst squares are a delight to work, they look gorgeous and non-crocheters think they look hard when they're actually pretty easy - ssh, don't tell them!
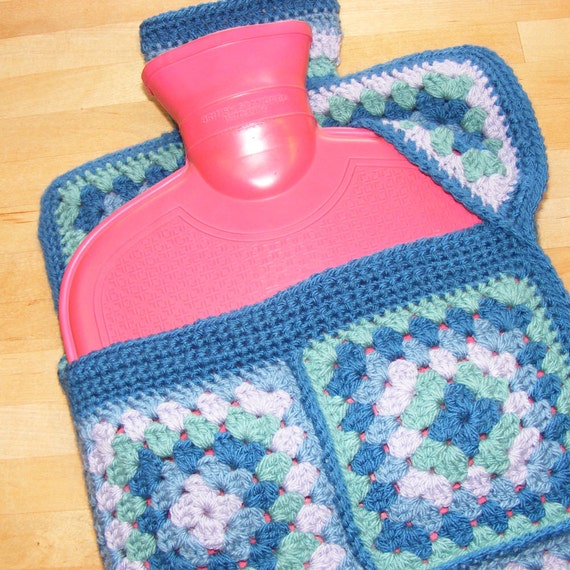
I've used this pattern over and over in a selection of color yarns because it's a great way to use those leftover pieces. Make beautiful blankets, throws, cushion covers, hot water bottle covers, bags and more using these gorgeous squares.
Sunburst granny squares are a joy to crochet. They are ideal for using up scraps of yarn since you can change colors every round if you wish.
These ones are fast to crochet. I sat and made all my circles up first before working on the square part of the pattern. This made it incredibly quick.

More Crochet Pages for You to Enjoy:
Part 1 of this Sunburst Crochet Tutorial
African Flower Hexagonal Granny Square Motif
Crocheted Banners and Bunting to Make
How to Make Yarn Tassels Craft Tutorial
More Crochet Crafts to Enjoy
African Flower Hexagonal Granny Square Motif
Crocheted Banners and Bunting to Make
How to Make Yarn Tassels Craft Tutorial
More Crochet Crafts to Enjoy
Page Last Updated:


This a wonderful pattern Marie. I'm going to share it with my sister in law who does awesome crochet. Also sharing on Pinterest. Thanks for link up at Craft Therapy Thursday!
ReplyDeleteThank you so much, Pam. It took me an age to do all the photos and get this one written up so I hope other crocheters enjoy it :)
DeleteI have only been crocheting for just over a year and I was able to makes these. The pattern is very easy. Can't wait until I am finished.
ReplyDeleteThat's wonderful, Rachelle. Well done on getting so far with crochet in a short space of time. I know just how encouraging it is when we can crochet patterns like this sunburst design that look really good. I'm currently doing this design in another colorway. It's very enjoyable.
DeleteMarie,
ReplyDeleteBeautiful job!! What did you do to connect the squares?? Thanks for sharing!
Hi Ladissa, thank you. I believe I used one of Edie Eckman's joining methods from her book called "Connect the Shapes Crochet Motifs" which is written in US terminology but unfortunately I cannot remember which one I used in the end! I was alternating at the time between watching a crochet video class by Edie on Craftsy and reading her book as well. I was having fun trying a number of methods out and I do know that whichever I used wasn't all that difficult to do. I certainly recommend Edie as being a great teacher of all things crochet. Thanks for your visit.
DeleteI love this pattern and am finally making an Afghan fif myself! I was a little confused though where you slip stitch at the end of each round and how you change colors so smoothly. I've always had a hard time transitioning into a new color. Thanks!-Leah
ReplyDeleteLove this pattern. I had two questions though. Where do you slip stitch at the end of each round and how do you change colors at the start of a new round smoothly? I am finally making myself an Afghan of my own! Any tips would be helpful. Thanks!
ReplyDeleteHi Leah, thanks for your comment on this Sunburst crochet tutorial. When finishing off a crochet round, I normally like to slip stitch right back into the beginning of the round.
DeleteThis is pretty hard to explain with just words and photos. When I was starting out with crochet, I watched a lot of videos over and over. This one was one I liked on crocheting in the round and doing a slip stitch to join: https://www.youtube.com/watch?v=xrJrTfe9uhQ The same principles apply to working a round of a square, even though the pattern is different.
As to changing colors, there are different ways of doing this and everyone has their own favorite way. Since I made this tutorial, I've learned another new way to add colors on when doing a round with double crochet stitches in it. I prefer this method and use it where possible. It is called the standing double crochet and you'll find a good photo tutorial here: http://www.mooglyblog.com/standing-double-crochet-joining/
Any techniques like this, I'd recommend searching YouTube and watching as many videos as it takes for the process to click. That's what I did when I was a beginner and what I still do when I need to learn something different. Hope that helps.
Thank you so much for this wonderful tutorial! I have never been able to make a granny square-until now! I am so excited to make a blanket. Thank you Thank you!!!!
ReplyDeleteI too LOVE this granny square! Thanks so much for sharing! It works up fast and looks absolutely gorgeous with the 'sunburst' popping out! I'm also a Craft-a-Holic and I've crocheted and knitted for years, but I have stayed away from making a granny square afghan because I didn't want to sew the squares together...shame on me. Recently I was looking online for a new afghan idea and I found your 'Sunburst Granny Square' free pattern with a picture showing how cute the squares are and also a great tutorial.
ReplyDeleteI got started right away making squares...not knowing how I was going to sew them together. I ordered Edie Eckman's "Connect the Shapes Crochet Motifs" book, but I was finished with my 63 squares before the book came. So, I went back to the internet... These two terrific ideas that I'm sharing links to from YouTube have helped me so much. (I'm so glad that people take the time to share and teach others.) I'm almost halfway finished sewing my squares together and my afghan is looking great! {By the way, Edie Eckman's book is great and has lots of motif patterns included.}
I hope these ideas will help others in sewing their granny squares together into a beautiful afghan. Don't be afraid! :-)
1. "Create the ULTIMATE Seamless Invisible Granny Square Join!" https://www.youtube.com/watch?v=9TqgRdkJpqs
2. "How to sew your Victorian Granny Squares together and achieve perfect corner joins" https://www.youtube.com/watch?v=haloFy_rfws
Thank you so much for sharing the youtube videos which are going to be so helpful for everyone reading. They look to be really informative and I shall be sitting down to study those the next time it comes to sewing crochet granny squares or motifs together. Watching crochet videos often makes a technique click for me.
DeleteYes, I think a lot of knit and crochet crafters are put off the actual sewing and joining part. It is rather intimidating when you have a great big pile of granny squares and are thinking about putting them all together! I prefer the crocheting part for sure.
I would agree on Edie Eckman. What she doesn't know about crochet might just be not worth knowing! I have taken her crochet video courses on Craftsy and they are very good. You feel like she is talking right to you.
Anyway, I'm so very glad you enjoyed this Sunburst granny square tutorial and that you have conquered your concerns over sewing the squares together. I bet your afghan looks gorgeous. Happy crocheting.
Hi, love the pattern but wondered if there is a written directions without all the pictures so I can print it as a guide? Thank you. I'll try to copy and maybe remove most of the pictures, but not sure if I can accomplish this or not.
ReplyDeleteThe easiest way I know how to do this is use CTRL+A buttons to copy all the text on the page then CTRL+V to paste into a plain text program like notepad which will strip all the pictures out and leave the text. You can then print out from there. That is probably the quickest way. Hope that helps.
DeleteHey! Loved the tutorial, but do you have any tips for if I make a bigger circle? With more circular rounds, I mean.
ReplyDeleteYou can make a bigger circle before starting on the square section but it's not something I've done so I'm unable to offer my own personal tips. Either experiment with the spacings and number of stitches on each round yourself. Or, alternatively, search up "granny circle crochet" online and get some ideas on the best way to approach this to create your own version of the pattern.
DeleteFrom 1 Marie to another! Such helpful & detailed instructions! And GREAT illustrations, as well! Thank you so much, I have already made 10 large squares & will make these into a market bag!
ReplyDelete