Paper Tea Bag Folding Instructions for Beginners
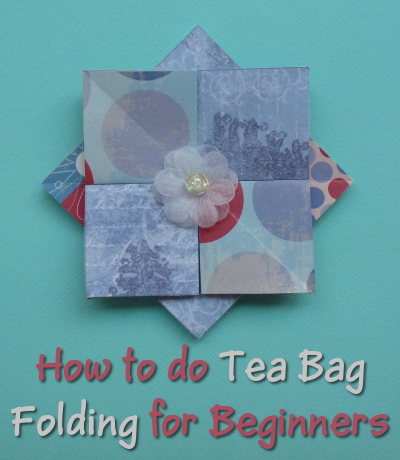
You may not yet have heard about the craft of Tea Bag folding; this is a papercraft which is more or less like a simplified and easier form of origami or at the very least an off-shoot from it. However Tea Bag folding is quite an art form all of its own accord. People often use this craft for the purpose of decorating up their handmade greeting cards and also scrapbooks. You can also use it for many other craft projects including making framed pictures, gift tags and other paper based decorations.
This is a really easy, beginner tutorial and it is a great project to start off with. It was, in fact, the very first folding pattern for this papercraft that I discovered myself many years back. So I can recommend it as being a good pattern for you to begin with. The great thing about this is that it uses no special tools or materials. All you really need are paper, scissors and adhesive as the absolute basics.
Note: This post contains affiliate links for which I may be compensated.
You can buy special tea bag patterns and papers or use free ones that you can print off online. Alternatively, and my own preference, is to use patterned papers such as scrapbook papers and combine them for a lovely and striking effect.
Easy Guide on How to Do Tea Bag Folding for Beginners
What You Need to Start this Folding Project
- 8 paper teabag tiles or square pieces of paper around 2.5 inches wide
- Some adhesive. My own preference for this craft are Zig Glue Pens
- A small, scrap piece of card or paper
- You may want an embellishment for the middle of your finished decoration

1) If you are just starting this paper craft, there really is no need to splash out on new equipment or materials to be able to enjoy it. Yes, you can get special tea bag papers to use with this folding craft but I've always preferred to use scrapbook papers instead because that way I can choose from a wealth of patterns and colors that I already have in abundance.
To make your own tiles for folding, you'll need to make a square template from a thick piece of card. The card from a cereal box is normally a good thickness to use. Measure out a square that is 2.5 inches on every side because this is a very good size to begin with. You can then decide if you need or want to work with larger or smaller squares from this point. But 2.5 inches is what I recommend.
I Love Using Scrapbook Papers for My Tea Bag Folding Projects
Once you've got your square template, you can simply draw around this on any piece of decorative paper that you want to use. That's the beauty of using your own papers instead of pre-made tiles. If you want to use metallic papers or foils for instance, you'll be able to do that.
To start this, you need either 8 squares of paper or 8 tiles. If you make your own squares, note that it's much easier when starting out to have a printed design on one side and a plain white back on the paper.
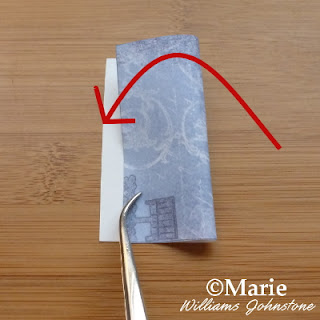
2) Pick up one of your squares of paper. Place it, patterned side down, in front of you on a flat surface. So you should be looking at the back of the paper which is white.
We start folding from right to left so hold down the left side of the paper to keep it in place and pick up the right side. You want to pull the right side over to the left, line up the edges of the paper and then make a nice, crisp vertical fold. All this means is that you've folded the square in half, vertically. The photo shows the paper being pulled over before that fold is made.

3) Now you've made the first fold, you want to open the folded paper back up into the original square shape. You should have the blank white side facing up at you but now it has a crease line down the middle.
Turn the paper around so that this crease is going across the paper from left to right, rather than up and down the paper from top to bottom.
You need to fold the paper again, exactly as you did in step 2 by grabbing the right side of the square, pulling it over to meet the left side and making a firm crease down the middle when you have lined up the edges. The photo shows the process before this crease is made.

4) You've now made 2 folds which have made a cross shaped crease on your paper. Now open the folded paper out. This time you want to place it in-front of you with the patterned side showing and the white or blank side so you can't see it.
Take hold of the top-right corner of the square and pull it down to meet the bottom-left corner of the paper. Line up the edges and then make a diagonal fold. You've folded your square into a triangle.

5) Unfold the paper again, still with the patterned side facing up. Now pick up the top-left corner and pull it down towards the bottom-right. Match up the edges perfectly before making another diagonal crease.
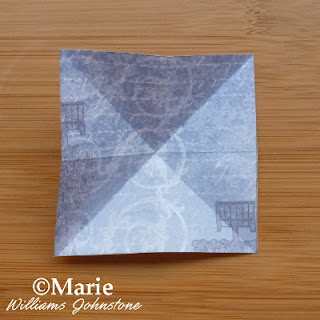
6) Unfold this triangle shape so you are back to a square of paper again with the patterned side facing up. You've now got a square with lots of creased lines around it radiating out from the middle as shown in the photo.

7) Keep the patterned side facing you, use one hand to gently steady it against your flat surface and the other to pop your index finger underneath the paper. With this index finger, push the middle of the paper up which kind of pops the central crease towards you.
Read this part carefully. Put a finger and thumb on every corner of the paper. I have my two thumbs on the bottom corners and my two index fingers on the top ones. And then slowly push inwards towards the middle. Keep pushing until the paper naturally comes together into a 3D shape which has 4 diamond shaped sides or 8 triangle areas.
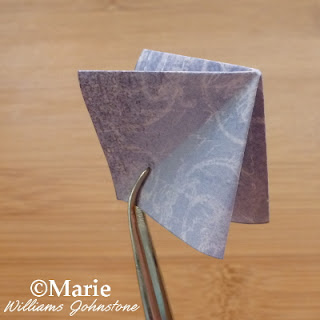
8) You need to push 2 sides together to flatten it into a folded square shape. The photo shows how this looks before I have completely flattened this down and creased over the folds again to make them nice and crisp.
Now go back to step 2 and repeat this folding process with all your squares of paper. You need 8 pieces in total. These form the most basic squared shapes that you can use in your paper craft projects.

9) We will now arrange these 8 folded tiles into what is known as a rosette. A rosette is where the tiles are placed around a mid point or central location to create a finished, decorative design that most people use for motifs on handmade cards, gift tags or scrapbooks.
Here you need to cut out a rough square shape, just a small piece and no need to measure or make straight lines. You can see mine in the photo and it’s not perfect at all. It only serves as a backing to stick your folded tiles around.
Using your adhesive (glue pens like my favorite Zig with the chisel tip) are ideal for this as they are not too messy for paper crafts and they dry quite quickly. Decide which side of your tile you want facing up so it can be seen. With the corner that is completely folded into a point, add some adhesive on the back and stick it down onto a corner of the scrap paper as shown in the photo.
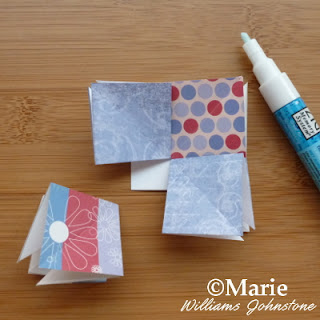
10) You now need to stick another 3 tiles around this paper backing. All the folded points need to be stuck down in the middle. If you are careful to line up the sides of each tile, you will end up with a nice, neat square when you have all 4 tiles in place on the bottom layer.

11) You now have 4 remaining tiles which are arranged on top of the first layer. It's easiest to start at the top. Pop some adhesive on the back corner of a tile, hold it so that it is in a diamond shape and stick it between the top two tiles on the first layer. It should fit where the diagonal crease lines are so they can be used as a guide to help you align the til properly.
Once you have the first one positioned and stuck down, it's then easy to move round clockwise with the rest of the tiles until you complete the second layer of your rosette.

12) Your finished rosette should look similar to this one shown here. I often add little flowers, fancy buttons or flat backed gems in the middle before using them as decorative elements on my handmade cards or gift tags. You can even make another rosette using smaller squares to start with (try 2 inch tiles or 1.75) and then layer that up on top.
I’ve gone into a lot of detail which makes this process seem like it takes a while. In fact, when you know this simple and easy fold, it will be very fast to make all the folded tiles up indeed. Once my papers are cut, I can make a completed rosette in less than 10 minutes.
Related Content You Should Also Love:
Pretty Tea Bag Folded Flower Designs to Make for Cards
Starting the Paper Craft of Teabag Folding
More Paper Crafts to Enjoy
Starting the Paper Craft of Teabag Folding
More Paper Crafts to Enjoy
Page Last Updated:


Comments
Post a Comment
CraftyMarie is a craft themed website by Marie Williams Johnstone. I love to craft in the winter and garden in the summer. I make handmade cards, papercrafts, crochet and seasonal crafts. I enjoy many of the more traditional crafts and hobbies including sewing, embroidery and working with felt and fabric. Thanks for leaving me a comment. Comments do not show up until I approve them. Marie