Perler Bead Popsicle Pattern Craft Tutorial
Get the kids busy crafting, or even yourself, with this easy to make fun summer themed Popsicle pattern made from Perler, Hama or fused beads. I love to do these patterns outside once the weather turns warmer and I can enjoy making them up on a tray out in the fresh air.
This cute and colorful little Perler bead popsicle pattern can easily be made into a magnet to display on a refrigerator or how about turning it into a cute key chain to wear off a belt loop or a bag.
Fused bead crafts are fun for all the family to enjoy and they work out to be inexpensive to make as well once you have the basic supplies already. They also make fab group crafts for girl scouts, school and homeschool craft projects and activities.
Note: This post may contain affiliate links for which I can be compensated.

My daughter and I love this bright color and fun rainbow Popsicle, ice lolly design which is quick and easy to make up. We have fun picking out different colors to represent what flavor ice we'd like to eat too.
For a fun alternative, adapt this summery design so you just make the iced part and then stick it on top of a real wooden treat or pop stick. The shape is easy to make larger so it looks more like the real sweet treat too.
A small square or a large square Perler/Hama pegboard
10 cream or brown color beads per popsicle
A selection of colored beads
The special ironing paper and an adult to iron the completed project
Any embellishments to decorate


This popsicle design is a small one and can be worked on a either a small square peg board or on a large square peg board.
With the large board, you can fit up to 8 of this design on at once which is really useful when you are making a batch load. I did this for some easy DIY party favors I made for my daughter's birthday.
You need 10 cream or brown color beads to make the stick part of the rainbow iced lolly. An alternative idea is to not make this part from the beads but instead use some mini wooden craft sticks for the stick section. Then use glue or adhesive to fix this to the back of a completed design.

1: To start the first section, make two vertical columns of 5 brown beads next to each other as shown in the image above, making sure that you leave enough space at the edge for the rest of the pattern to be worked.

2: Decide on a color for the first layer of the rainbow iced treat. As I've made so many of these, I found that you needed a color that was distinctive enough from the brown on the stick area.
Bright yellow made a very good choice to start with. You need 12 beads worked in two rows of 6 centered horizontally over the stick beads.

3: For the second layer of ice, choose another bright color which makes a great contrast with the first. Orange, red or green always worked well next to yellow beads. You need 12 beads, the same as the previous step.

4: Another layer of ice flavor should be worked onto the rainbow color design. I've gone for a pink here which looks good next to the orange. Green and orange work well together too.
You'll find the rest of the instructions below and some other ideas for this craft too.

5: The final layer of color uses only 10 beads in order to create the illusion of those rounded corners on the treat. In this example I used red beads which my daughter likes to pretend is the strawberry flavor.
The completed designs are often used in her play kitchen area as a pretend play food. You can use the exact same idea to make larger versions too.

An adult needs to iron any finished pieces using the instructions and the special ironing paper that normally come with the beads.
Once the designs are fused together, you can add decoration to them using little flat-backed gems and embellishments.
I added a small Swarovski gem to each Popsicle for a little extra sparkle. Get more ideas for using the completed pattern below.
Because I was making these as party favors as part of my daughter's birthday goody bags, I created them by working in batch which is a lot easier when you have lots to make.
You can fit up to 8 of this design onto one of the large, square pegboards. You can see from the photo how the Popsicles can be laid out to fit that many on to a single board.
Having them laid out on one board really makes the ironing process quicker and easier too since you put the special ironing paper over and iron 8 in one go instead of ironing each one individually.

This batch load should give you plenty of ideas for color combinations too since each one is slightly different. The best ones have colors and shades that are really distinctive and that pop when placed next to each other.
For a fun alternative, use mini wooden craft sticks as the Popsicle stick instead of making this part out of the fused beads. Get an adult to stick it to the back of the completed design using a hot glue gun or use some strong adhesive that will bond plastic and wood.
➡️ See How to Turn Your Perler Projects into DIY Party Favors HERE
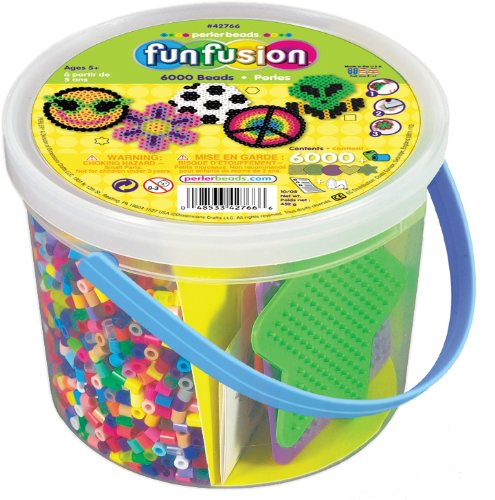
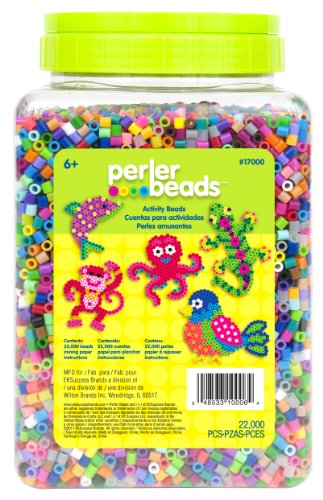
For more summer fused bead crafts, grab a Sunny Days Perler bead bucket which is filled with 5,500 summery color beads, 3 different shaped pegboards with two flowers and a butterfly. The butterfly has been very popular with my daughter.
Some sets also come with some tweezers to pick the beads up and the special ironing paper that you need to to fix or set the completed project.
This summery design works well as a cute little necklace and also as a keychain that can be hung from a bag, purse or a belt.
I use jewelry parts like these ones shown in the image. You'll need some pliers and some little jump rings too (8-12 mm) to attach the chains to your finished fused bead project.
It is not too hard to make keychains from finished pieces so long as you have the right equipment. I've written a tutorial on making keychains out of your finished pieces. Have fun with your summer crafting. If you really enjoy this craft, see more pattern pages on this site below.
Related Content You Should Also Love:
Page Last Updated:
This cute and colorful little Perler bead popsicle pattern can easily be made into a magnet to display on a refrigerator or how about turning it into a cute key chain to wear off a belt loop or a bag.
Fused bead crafts are fun for all the family to enjoy and they work out to be inexpensive to make as well once you have the basic supplies already. They also make fab group crafts for girl scouts, school and homeschool craft projects and activities.
Note: This post may contain affiliate links for which I can be compensated.
Hama and Perler Bead Popsicle Pattern Craft Photo Tutorial

My daughter and I love this bright color and fun rainbow Popsicle, ice lolly design which is quick and easy to make up. We have fun picking out different colors to represent what flavor ice we'd like to eat too.
For a fun alternative, adapt this summery design so you just make the iced part and then stick it on top of a real wooden treat or pop stick. The shape is easy to make larger so it looks more like the real sweet treat too.
Materials and Tools Needed to Make These Popsicles
A small square or a large square Perler/Hama pegboard
10 cream or brown color beads per popsicle
A selection of colored beads
The special ironing paper and an adult to iron the completed project
Any embellishments to decorate

This popsicle design is a small one and can be worked on a either a small square peg board or on a large square peg board.
With the large board, you can fit up to 8 of this design on at once which is really useful when you are making a batch load. I did this for some easy DIY party favors I made for my daughter's birthday.
You need 10 cream or brown color beads to make the stick part of the rainbow iced lolly. An alternative idea is to not make this part from the beads but instead use some mini wooden craft sticks for the stick section. Then use glue or adhesive to fix this to the back of a completed design.
Instructions to Make the Fused Bead Popsicle Pattern
1: To start the first section, make two vertical columns of 5 brown beads next to each other as shown in the image above, making sure that you leave enough space at the edge for the rest of the pattern to be worked.
2: Decide on a color for the first layer of the rainbow iced treat. As I've made so many of these, I found that you needed a color that was distinctive enough from the brown on the stick area.
Bright yellow made a very good choice to start with. You need 12 beads worked in two rows of 6 centered horizontally over the stick beads.
3: For the second layer of ice, choose another bright color which makes a great contrast with the first. Orange, red or green always worked well next to yellow beads. You need 12 beads, the same as the previous step.
4: Another layer of ice flavor should be worked onto the rainbow color design. I've gone for a pink here which looks good next to the orange. Green and orange work well together too.
You'll find the rest of the instructions below and some other ideas for this craft too.
5: The final layer of color uses only 10 beads in order to create the illusion of those rounded corners on the treat. In this example I used red beads which my daughter likes to pretend is the strawberry flavor.
The completed designs are often used in her play kitchen area as a pretend play food. You can use the exact same idea to make larger versions too.
An adult needs to iron any finished pieces using the instructions and the special ironing paper that normally come with the beads.
Once the designs are fused together, you can add decoration to them using little flat-backed gems and embellishments.
I added a small Swarovski gem to each Popsicle for a little extra sparkle. Get more ideas for using the completed pattern below.
Making the Popsicle Perler Design in Batch for Party Favors
Because I was making these as party favors as part of my daughter's birthday goody bags, I created them by working in batch which is a lot easier when you have lots to make.
You can fit up to 8 of this design onto one of the large, square pegboards. You can see from the photo how the Popsicles can be laid out to fit that many on to a single board.
Having them laid out on one board really makes the ironing process quicker and easier too since you put the special ironing paper over and iron 8 in one go instead of ironing each one individually.
This batch load should give you plenty of ideas for color combinations too since each one is slightly different. The best ones have colors and shades that are really distinctive and that pop when placed next to each other.
For a fun alternative, use mini wooden craft sticks as the Popsicle stick instead of making this part out of the fused beads. Get an adult to stick it to the back of the completed design using a hot glue gun or use some strong adhesive that will bond plastic and wood.
➡️ See How to Turn Your Perler Projects into DIY Party Favors HERE
For more summer fused bead crafts, grab a Sunny Days Perler bead bucket which is filled with 5,500 summery color beads, 3 different shaped pegboards with two flowers and a butterfly. The butterfly has been very popular with my daughter.
Some sets also come with some tweezers to pick the beads up and the special ironing paper that you need to to fix or set the completed project.


This summery design works well as a cute little necklace and also as a keychain that can be hung from a bag, purse or a belt.
I use jewelry parts like these ones shown in the image. You'll need some pliers and some little jump rings too (8-12 mm) to attach the chains to your finished fused bead project.
It is not too hard to make keychains from finished pieces so long as you have the right equipment. I've written a tutorial on making keychains out of your finished pieces. Have fun with your summer crafting. If you really enjoy this craft, see more pattern pages on this site below.
Related Content You Should Also Love:
Perler Bead Cupcake Patterns to Make
Rainbow Loom Bracelet with Beads Craft Tutorial
How to Make Perler Bead Fruit Slices
More Summer Themed Crafts
More Perler Bead Crafts
Rainbow Loom Bracelet with Beads Craft Tutorial
How to Make Perler Bead Fruit Slices
More Summer Themed Crafts
More Perler Bead Crafts
Page Last Updated:


Comments
Post a Comment
CraftyMarie is a craft themed website by Marie Williams Johnstone. I love to craft in the winter and garden in the summer. I make handmade cards, papercrafts, crochet and seasonal crafts. I enjoy many of the more traditional crafts and hobbies including sewing, embroidery and working with felt and fabric. Thanks for leaving me a comment. Comments do not show up until I approve them. Marie