How to Make a DIY Tabletop Ironing Board

My craft room is unfortunately too small to fit a full-sized ironing board inside. So, instead, I made a portable ironing pad that I could position on the side of my sewing machine. I'll show you how to make this DIY tabletop ironing board in this easy tutorial.
Wanting my portable pressing board in a hurry, I decided on an easy no-sew method to make this DIY mini board. Luckily I was able to use materials and supplies that I already had to hand. You may well have most of these materials too.
Since I made this tabletop board, my sewing and quilting projects have been much faster and easier to complete because I can iron my fabric at any time without having to leave my craft room.
Note: This post may contain affiliate links for which I can be compensated.
How to Make a DIY Tabletop Ironing Board: A Portable Pressing Board Ideal for Quilters and Sewers
Once I started the craft of quilting in earnest, I soon discovered just how annoying it can be to have to get up from the sewing machine each time seams need to be pressed into place. I found that every time I got up to iron, my craft work got interrupted and the whole project would feel like it took so long to complete.Having made my own DIY tabletop ironing board is a real bonus. It is light and portable. It sits on top of my sewing table or, alternatively, I can store it under the table once my quilting or sewing project is complete.
Materials and Tools for this Project
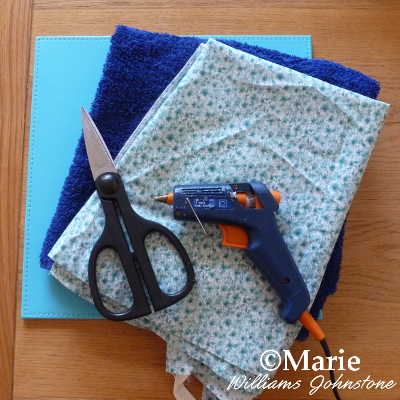
✔️ A couple of large-sized place mats or alternatives* for the base.
✔️ An old clean bath towel.
✔️ A couple of clean kitchen dish tea towels.
✔️ Piece of clean cotton fabric for the top cover.
✔️ A glue gun and scissors.
1: What You Can Use to Make the Base of Your Portable Pressing Board

Image Credit: photo belongs to the author.
* Place mat alternatives. Place mats can easily be substituted for a small sheet of plywood or some chipboard. You can even use several cardboard pieces and stick them together to make a relatively sturdy base.
What you want is a base that is nice and firm. However, you don't want it to be too heavy for you to pick up because it is meant to be portable.
⭐ A very low-cost option for this project is to use cardboard. Look for the thick and sturdy type used with packaging. Glue or stick several sheets of cardboard together to make a cheap yet functional base. Even though it is just cardboard, this option will still give you a nice, firm base to press your sewing and quilting projects on. You won't see the cardboard once it is covered either.
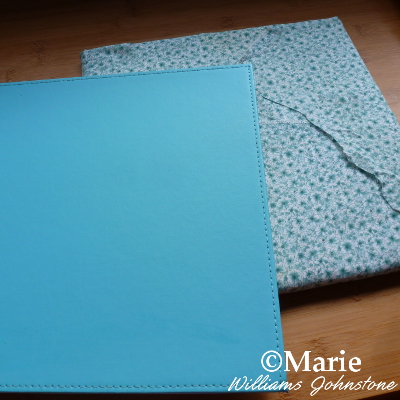
I had two large place mats available. Luckily these were just the size that I wanted for my mini ironing mat. They were the right size to fit on my sewing machine tabletop and really perfect for ironing those smaller quilting patches and seams on sewing projects.
The place mats made a really nice and sturdy base for this project. You may not have any place mats going spare which is fine. You can alternatively make this DIY project by using a piece of thin but strong plywood or even chipboard that is cut out to the exact size that you want for your board.
2: Use a Glue Gun for Speed Instead of Staples
For projects like this one, some people prefer to use heavy-duty staples. I really prefer to use my glue gun because it is very quick and easy. There are a few things that you should note about using a glue gun with this project.
⭐ Using a glue gun makes this project come together really quickly and easily. However, you must ensure that all the glue goes to the reverse side of your finished ironing board. Getting adhesive on the front of your completed project, even though it may be under fabric and padding, means that you could reactivate the glue with the warmth from the hot iron on top.
The main point to note is that you should always put the glue on the reverse side or back of the board only. Never put any adhesive over on the front of your ironing pad where you will iron your sewing and quilting projects.
3: Let's Get Started Making the Small Ironing Board

Image Credit: photo belongs to the author.
Keep in mind that you should only be placing glue on that back of your project at all times before you start.
Lay your old bath towel out on a table or on the floor in front of you. I found it helpful to lay mine out vertically and this is how I am explaining the DIY to you. You could do this process differently if you prefer as I'm sure you'll get the gist of it quite easily. Add plenty of glue from your glue gun to the middle of your base. Stick this onto the bottom edge of your old towel.
I made sure the base was firmly stuck down to the towel. I lifted up each edge of the base to ensure that the towel was stuck down firmly around the edges as well.
4: Trim the Padding to Size

Image Credit: photo belongs to the author.
When the towel is stuck fast to the base, cut any excess towel fabric away just from the bottom edge and sides of the base. There should still be plenty of towel remaining at the top. You want to leave the towel at the top as it is.
Wrap the towel around the base again and glue on the reverse side to fix the towel in place on the bottom side of your board. Essentially, keep wrapping and sticking the towel around your base which pads it out nicely.
5: Pad the Ironing Board Out Even More

Image Credit: photo belongs to the author.
When you have finished wrapping and gluing your towel over the base, you can pad the board out even more. You can use foam padding cut to size if you want. I decided to use a couple of kitchen dish towels that I no longer wanted instead. It's great to recycle old materials we no longer need.
The kitchen towels can be stretched over the front of the base and glue over on the reverse side. I stuck one on and then trimmed and cut off the excess fabric from the sides to neaten the project.
6: Finish Padding the Board

Image Credit: photo belongs to the author.
Now use another kitchen dish towel and wrap it over the front of the board. Hopefully you can cover up any cut edges from where the first one was wrapped round. Using old towels makes for a really nicely padded board that has cost nothing to make except your time.
Glue down the fabric at the back and trim off any excess material as needed. If you are placing a pretty fabric cover over the top, you may want to try and add a light colored kitchen towel on the top so you don't get any designs showing from underneath. Solid white or cream color towels are ideal or place patterned ones so the darker colors are on the reverse.
7: Cover Your Mini Ironing Board With a Pretty Fabric

Image Credit: photo belongs to the author.
Choose some pretty fabric to cover your new ironing pad with. It needs to be large enough that you can stretch it over the front and glue it on the reverse side. I picked out a pretty cotton fabric to match in with my craft room color scheme and it was easy to stretch over the sides.
Glue one side of this fabric cover at a time over on the back of the board. Stretch the fabric gently over the corners before gluing them into place at the back.
Although the cover should look great, you'll note that the back of your project now looks like a hot mess. This is where I made use of the second place mat. You can use a piece of thick cardboard or thin ply wood. Other alternatives to use on the bottom include thick felt fabric, some linoleum or faux leather cut to size. Whatever you choose to back your project with, stick it on to the reverse to finish everything off nicely.
The second place mat or board should cover the reverse side and give you a nice flat back and a soft, padded front. This really finishes the tabletop ironing board off perfectly. You're now ready to start ironing your sewing seams and quilted projects wherever you want.
A Portable DIY Ironing Pad Makes a Great Addition to Your Sewing Kit

Image Credit: photo belongs to the author.
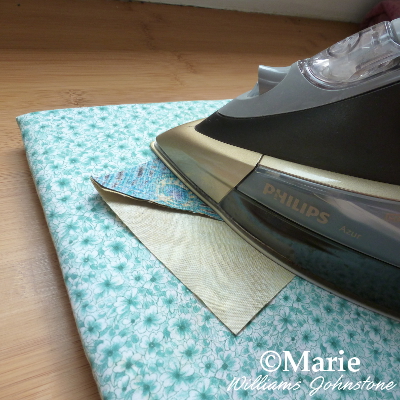
I love how my finished ironing mat looks and I hope you do too. Mine is large enough for me to press the seams on smaller quilting and sewing projects. It is ideal for patchwork and a lot more besides.
My finished DIY board is just the right size for ironing my quilting, patchwork and other small sewing projects. It makes is super easy to press any seams into place while not having to leave my craft room or even get up from my sewing machine.
My tabletop ironing board has become a really essential piece of my sewing kit. Having the board laid out on the sewing table beside me saves a great deal of time. It also means that I can now sew and do my pressing all in the same room. The board is fully portable and small enough to store away when not in use. The materials I used means that it is also light enough to move around the home as needed.
Related Content You Should Also Love:
The Ultimate Guide to Craft Felt
How to Make a Pretty Fabric and Felt Pennant Banner
More Fabric and Felt Crafts to Enjoy
How to Make a Pretty Fabric and Felt Pennant Banner
More Fabric and Felt Crafts to Enjoy
Page Last Updated:


Brilliant just what I was looking for
ReplyDelete