How to Stuff Felt Ornaments and Plushies
If you're new to making felt plushies and toys, you may be wondering about what type of filling you should use and how the process works exactly.
Learn how to stuff felt ornaments and handmade plushies like toys with the most commonly used filling which is fiber. You can choose from natural fibers and synthetic ones and the process is the same.
I'll run you through how stuffing plushies works with a visual photo demonstration so you can see it in action, step by step.
Note: This post may contain affiliate links for which I can be compensated.

Once you've got used to stuffing your felt plushies and ornaments, you will find it a pretty easy task. I'd recommend practicing on smaller and less complicated hand sewn items first so you get used to the technique. Enjoy making some sweet designs once you learn how this technique is done.
Some crafters recycle fabric scraps and yarn as stuffing although these are not always ideal either, especially fabric scraps which can make your finished creation look quite lumpy.

There are lots of different options for fiber based toy and plush stuffing. You can choose natural fibers such as cotton, wool and bamboo. One of the most common options for stuffing felt ornaments and plushies is a synthetic fiber fill.
I use polyester fiber fill which is cost effective, lightweight and works very well for padding out felt items nicely. This is often the number one choice with crafters for stuffing handmade toys and felt plushies.
Whether you opt for natural or synthetic toy stuffing fibers, they all work pretty much in the same way. I'll provide tips and techniques on how I stuff my own felt ornaments and plushies with the example below.

Before you can start to stuff or fill your felt item, you must partially sew around the edges. It helps to use an edge stitch that will keep all the stuffing well contained inside.
Blanket stitch is the choice I often use for sewing around the edges of felt ornaments and designs. This works very well at keeping the stuffing neatly inside and it looks good on the front and back of the design. It isn't the easiest choice for beginner sewers to learn so luckily there are some far easier options.
You can also use a backstitch which seals the edges nicely. Be aware though that this stitch looks messier on the reverse so it is best for front facing creations rather than 3D or double-sided ones.
Running stitch can look pretty neat on both sides and will work well providing that you sew the stitches closely together.

Once you've decided on your edge stitch, you want to sew around at least half of your design if not three-quarters. With a complicated design that has lots of fiddly areas to sew, I will choose to sew up the hardest parts first and leave the easiest section to sew for last. This is because you don't want to have a difficult area to sew while stuffing as well, if you can avoid it.
With this cupcake example, I've sewn around the curve of the design with a blanket stitch first. That is because sewing on a curve with this stitch neatly is a little more difficult than sewing the straight areas. I will sew up at least half of the design. If I don't need to change the color of thread, I will leave the thread attached to the edge for sewing later.
With just over half of the design sewn up, I will pull off a small amount of fiber fill. With the polyester kind, I will tease the fibers apart in my hands a little to take out any lumpy areas and smooth it out.
Once fluffed up, I will push a section of fiber fill it right up to the top of the felt design. It is better to pull off small pieces of fiber and add them in gradually rather than trying to stuff in a large piece in one go. The top of this design is very easy to fill but you may have awkward corner sections or small areas that need filling.
Sometimes you will need to use a blunt ended tool to help you stuff where your fingers are too large. My favorite choice of tool is an embossing stylus which has a round ball end. This is perfect to use to gently prod small pieces of fiber into areas that are normally difficult to pad out.

I call this the sew and stuff technique and I have no idea whether any one else uses this term or not. It just makes sense for me to call it this.
Once you have added padding to about half of your felt ornament or plush, you can start sewing around the edges again. I will sew a small amount, leave the thread attached and then stuff a little more fiber fill before starting to sew again.
I always find that the sew and stuff technique works better for neatly padding out a felt plush design. This is probably because I am working on stuffing the item gradually rather than trying to stuff too much in at once which can result in an unattractive bulk of fiber stuck in one area.

One newbie error that I commonly see with felt plush and toy stuffing is the corners not being stuffed properly. You can tell if they are not stuffed well because the corners will stand out as being horribly limp and flat compared with the rest of the item.
It takes just a little more time to pull off a small piece of fiber and push it carefully into each corner area of your design. Use a blunt ended tool like an embossing stylus if you need to.
How well your felt item is stuffed can really make a difference between a design that looks professional and one that does not. It's even more of an issue if you want to sell your felt creations online or at craft fairs.

Before you get down to stitching the final part of your item, a blunt ended tool can really help to fill out the remaining area of your design. You really need to ensure you have enough fiber fill inside before stitching up the last part.
I like to use an embossing stylus (also known as a metal ball stylus) because these come in a variety of sizes and have rounded ends which are less likely to damage my hand stitched designs than pointed and sharp ends. Other tools that can work well for pushing fiber into corners are bone folders.
Take care when pushing your fiber into the felt design, especially if you are using a tool to help. Pushing and prodding too hard could loosen stitching and spoil the look of your creation.

Finish sewing the edges of your felt creation and knot off at the back. You can now squish the whole outside of your design carefully with your fingers.
This squishing technique can manipulate the fiber stuffing a little and plump it up well. You should be able to see that all the corners are padded out neatly on this example design.

A typical mistake that I see made by beginners is that they do not add in enough fiber to properly fill out the felt ornament or plush. If your item is not filled properly, it will look badly made.
Normally, you need to add in more fiber than you think you do. Push small pieces in firmly but not so hard as to break or damage any of your stitching.
Related Content You Should Also Love:
Page Last Updated:
Learn how to stuff felt ornaments and handmade plushies like toys with the most commonly used filling which is fiber. You can choose from natural fibers and synthetic ones and the process is the same.
I'll run you through how stuffing plushies works with a visual photo demonstration so you can see it in action, step by step.
Note: This post may contain affiliate links for which I can be compensated.
How to Stuff Felt Ornaments and Plushies Using Natural or Polyester Fibers

Once you've got used to stuffing your felt plushies and ornaments, you will find it a pretty easy task. I'd recommend practicing on smaller and less complicated hand sewn items first so you get used to the technique. Enjoy making some sweet designs once you learn how this technique is done.
Step 1: Choose Your Fiber Based Toy Stuffing
Fibers are not the only choice of stuffing, you can also commonly use pellets as well as steel balls and shots. Balls, shots and pellets are much less desirable since they may contain harmful materials as well as be potential choking hazards to young children if they come out due to any loose stitching.Some crafters recycle fabric scraps and yarn as stuffing although these are not always ideal either, especially fabric scraps which can make your finished creation look quite lumpy.

There are lots of different options for fiber based toy and plush stuffing. You can choose natural fibers such as cotton, wool and bamboo. One of the most common options for stuffing felt ornaments and plushies is a synthetic fiber fill.
I use polyester fiber fill which is cost effective, lightweight and works very well for padding out felt items nicely. This is often the number one choice with crafters for stuffing handmade toys and felt plushies.
Whether you opt for natural or synthetic toy stuffing fibers, they all work pretty much in the same way. I'll provide tips and techniques on how I stuff my own felt ornaments and plushies with the example below.
Step 2: What Edge Stitch Should You Use for Stuffing Your Felt Plush

Before you can start to stuff or fill your felt item, you must partially sew around the edges. It helps to use an edge stitch that will keep all the stuffing well contained inside.
Blanket stitch is the choice I often use for sewing around the edges of felt ornaments and designs. This works very well at keeping the stuffing neatly inside and it looks good on the front and back of the design. It isn't the easiest choice for beginner sewers to learn so luckily there are some far easier options.
You can also use a backstitch which seals the edges nicely. Be aware though that this stitch looks messier on the reverse so it is best for front facing creations rather than 3D or double-sided ones.
Running stitch can look pretty neat on both sides and will work well providing that you sew the stitches closely together.
Step 3: Partially Sew Around Your Felt Creation Before Stuffing

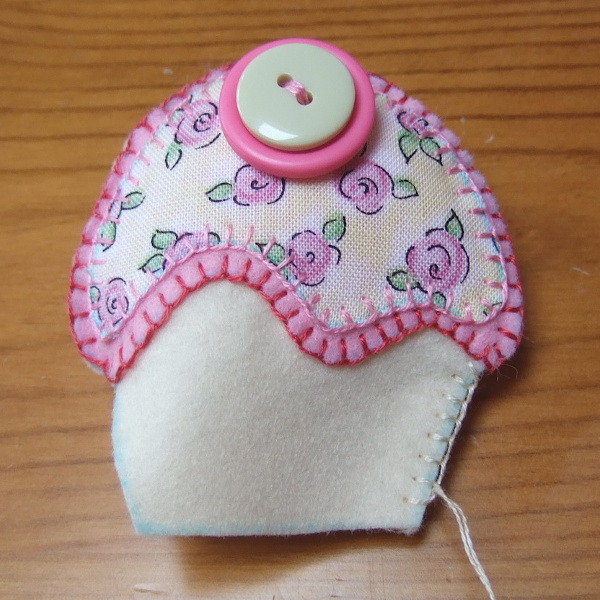
Once you've decided on your edge stitch, you want to sew around at least half of your design if not three-quarters. With a complicated design that has lots of fiddly areas to sew, I will choose to sew up the hardest parts first and leave the easiest section to sew for last. This is because you don't want to have a difficult area to sew while stuffing as well, if you can avoid it.
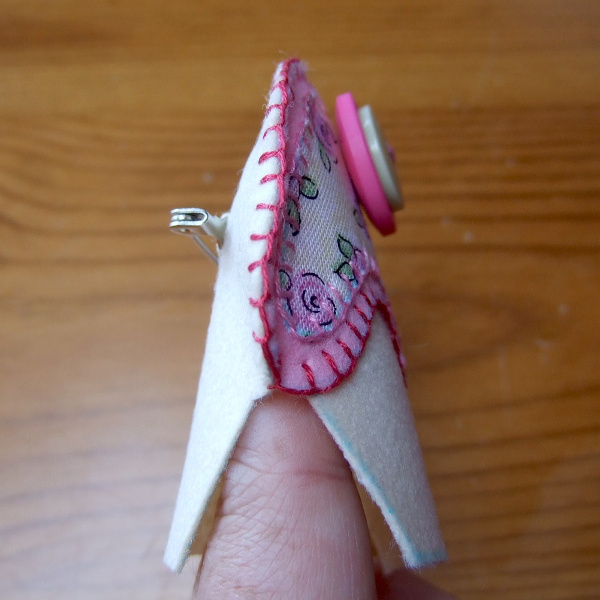
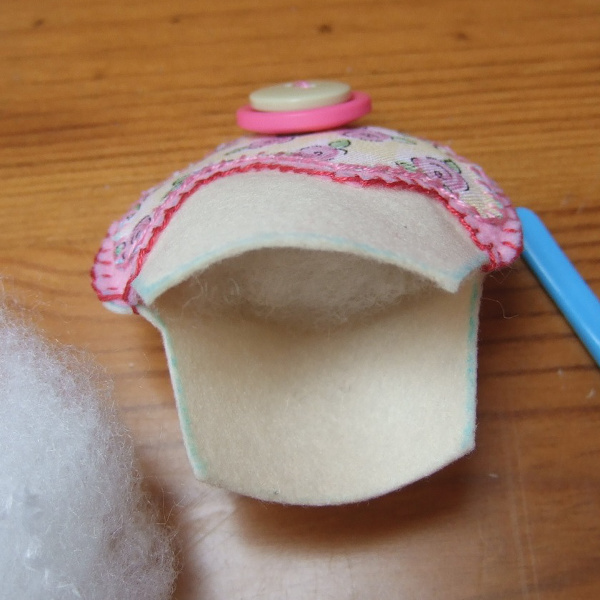
With this cupcake example, I've sewn around the curve of the design with a blanket stitch first. That is because sewing on a curve with this stitch neatly is a little more difficult than sewing the straight areas. I will sew up at least half of the design. If I don't need to change the color of thread, I will leave the thread attached to the edge for sewing later.
With just over half of the design sewn up, I will pull off a small amount of fiber fill. With the polyester kind, I will tease the fibers apart in my hands a little to take out any lumpy areas and smooth it out.
Once fluffed up, I will push a section of fiber fill it right up to the top of the felt design. It is better to pull off small pieces of fiber and add them in gradually rather than trying to stuff in a large piece in one go. The top of this design is very easy to fill but you may have awkward corner sections or small areas that need filling.
Sometimes you will need to use a blunt ended tool to help you stuff where your fingers are too large. My favorite choice of tool is an embossing stylus which has a round ball end. This is perfect to use to gently prod small pieces of fiber into areas that are normally difficult to pad out.
Step 4: Adopt a Sew and Stuff Technique

I call this the sew and stuff technique and I have no idea whether any one else uses this term or not. It just makes sense for me to call it this.
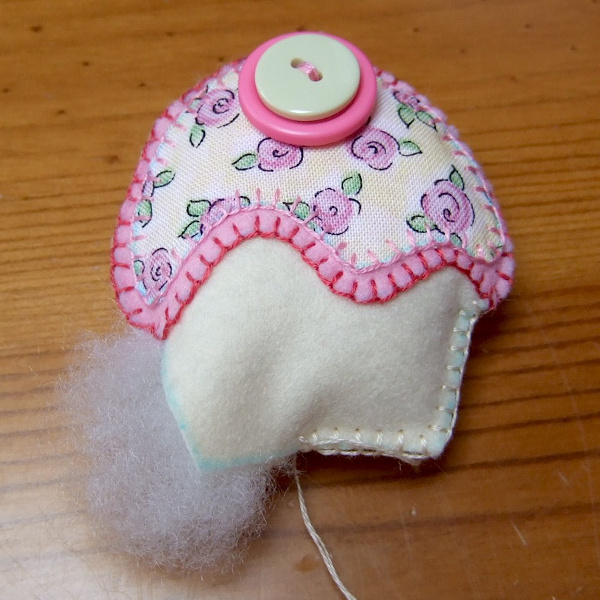
Once you have added padding to about half of your felt ornament or plush, you can start sewing around the edges again. I will sew a small amount, leave the thread attached and then stuff a little more fiber fill before starting to sew again.
I always find that the sew and stuff technique works better for neatly padding out a felt plush design. This is probably because I am working on stuffing the item gradually rather than trying to stuff too much in at once which can result in an unattractive bulk of fiber stuck in one area.
Step 5: Pad Out Corners Properly

One newbie error that I commonly see with felt plush and toy stuffing is the corners not being stuffed properly. You can tell if they are not stuffed well because the corners will stand out as being horribly limp and flat compared with the rest of the item.
It takes just a little more time to pull off a small piece of fiber and push it carefully into each corner area of your design. Use a blunt ended tool like an embossing stylus if you need to.
How well your felt item is stuffed can really make a difference between a design that looks professional and one that does not. It's even more of an issue if you want to sell your felt creations online or at craft fairs.
Step 6: A Tool Can Help You Stuff the Final Section

Before you get down to stitching the final part of your item, a blunt ended tool can really help to fill out the remaining area of your design. You really need to ensure you have enough fiber fill inside before stitching up the last part.
I like to use an embossing stylus (also known as a metal ball stylus) because these come in a variety of sizes and have rounded ends which are less likely to damage my hand stitched designs than pointed and sharp ends. Other tools that can work well for pushing fiber into corners are bone folders.
Take care when pushing your fiber into the felt design, especially if you are using a tool to help. Pushing and prodding too hard could loosen stitching and spoil the look of your creation.
Step 7: Sew up Your Felt Plushie Design

Finish sewing the edges of your felt creation and knot off at the back. You can now squish the whole outside of your design carefully with your fingers.
This squishing technique can manipulate the fiber stuffing a little and plump it up well. You should be able to see that all the corners are padded out neatly on this example design.

A typical mistake that I see made by beginners is that they do not add in enough fiber to properly fill out the felt ornament or plush. If your item is not filled properly, it will look badly made.
⭐ New to Making Plushies? Visit My Free Beginner Plush Guide and Tutorial and Get Started.
Normally, you need to add in more fiber than you think you do. Push small pieces in firmly but not so hard as to break or damage any of your stitching.
Related Content You Should Also Love:
Learn to Sew a Super Easy Felt House Plush
What is the Strongest Hand Stitch to Use?
Complete Guide on How to Make Felt Plushies for Beginners
Make a Sweet Felt Bird Ornament Tutorial
More Felt Sewing Crafts to Enjoy
What is the Strongest Hand Stitch to Use?
Complete Guide on How to Make Felt Plushies for Beginners
Make a Sweet Felt Bird Ornament Tutorial
More Felt Sewing Crafts to Enjoy
Page Last Updated:


Comments
Post a Comment
CraftyMarie is a craft themed website by Marie Williams Johnstone. I love to craft in the winter and garden in the summer. I make handmade cards, papercrafts, crochet and seasonal crafts. I enjoy many of the more traditional crafts and hobbies including sewing, embroidery and working with felt and fabric. Thanks for leaving me a comment. Comments do not show up until I approve them. Marie