How to Make a Felt Pennant Banner Tutorial
Making up pennant banners and bunting is pretty quick and easy to do using felt fabric sheets. Felt has a number of advantages over most materials that you can use since you can cut this into any shape you like and the edges do not fray. This makes it nice and easy to work with.
Another big advantage is that your completed banner will last a whole lot longer than a simple paper one will. See how to make a felt pennant banner and then you can pop this up for a celebration such as a birthday, a wedding or a special time of year like Christmas and then you can take it down, store it carefully away and re-use it again as often as you need to.
Since it's made of a fabric, you should only use this outdoors when it is dry or under a sheltered area. Do not leave it out overnight where it risks getting damp. This is ideal for an indoor decoration and can be used outdoors on a fine, dry day as a very temporary fixture. Fabric banners certainly look cuter and add a little touch of class to your occasion.
Note: This post may contain affiliate links for which I can be compensated.

Materials and Tools:

Step 1: First up, you need some templates. You can draw out your own triangles to use or you can use a free template and print it out. I went for the easier option and used an existing free triangle banner template which I printed these two pieces from onto some sturdier card.
One triangle was printed out at full size and the other at 80% to get the smaller piece that fits inside the other one. If you're drawing out your own triangles to use, remember that pennant flags tend to be quite long triangle shapes.
If you just want a really basic, no-frills, felt banner - you can opt for just one size of triangle to use and forget about adding on the smaller section of triangular fabric that is sewn or glued on top.
How decorative you want your finished design to be is totally up to you and whether you want something a little fancy or prefer to stick to a plainer design. In my case, I went for fancy because this was a project for my daughter's playroom and it's on show all the time.

Step 2: Choose some colors of felt and fabric or just felt if you want. You can also get patterned felts which you may prefer to use instead of fabric because this will mean you don't need to sew if you prefer not to. I had some fabric oddments that I wanted to use for this project because they matched up with the colors of the room where they were going.


Note that there are different qualities of felt that you can buy. Luckily, the less expensive acrylic felt Sheets and elsewhere online are actually more ideal for this project and that's because they tend to be a stiffer fabric which means they hold their shape better.
The more expensive wool felt or wool mix varieties are softer and do not keep a shape as well nor have such pronounced edges when cut. A good quality acrylic variety is perfect for this job.

Fabric edges are more susceptible to fraying so I prefer stitching these scrap pieces into the middle of the felt using a simple zig-zag stitch pattern on a sewing machine. If you just love to hand stitch, then the stitch I recommend is to use a blanket stitch which works well here.


Page Last Updated:
Another big advantage is that your completed banner will last a whole lot longer than a simple paper one will. See how to make a felt pennant banner and then you can pop this up for a celebration such as a birthday, a wedding or a special time of year like Christmas and then you can take it down, store it carefully away and re-use it again as often as you need to.
Since it's made of a fabric, you should only use this outdoors when it is dry or under a sheltered area. Do not leave it out overnight where it risks getting damp. This is ideal for an indoor decoration and can be used outdoors on a fine, dry day as a very temporary fixture. Fabric banners certainly look cuter and add a little touch of class to your occasion.
Note: This post may contain affiliate links for which I can be compensated.
How to Make a Felt Pennant Banner Step by Step Photo Tutorial with Instructions
Materials and Tools:
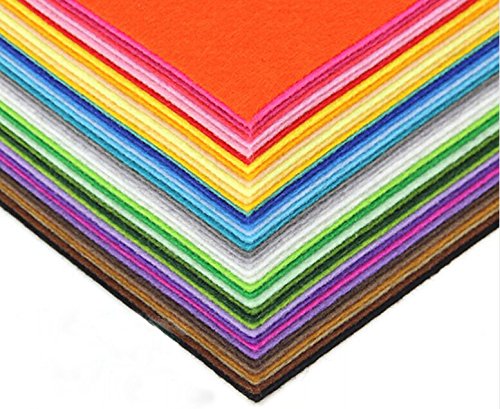
- Acrylic Felt Sheets in colors you want
- Some printed fabric scraps
- Some cardstock to make your triangle templates plus optional printer
- Different color sewing threads (optional, if you sew this project)
- Buttons for adding detail (optional embellishments)
- Ribbon, cord or twine for hanging the banner
- Sewing machine (or you can use fabric adhesive)
Step 1: First up, you need some templates. You can draw out your own triangles to use or you can use a free template and print it out. I went for the easier option and used an existing free triangle banner template which I printed these two pieces from onto some sturdier card.
One triangle was printed out at full size and the other at 80% to get the smaller piece that fits inside the other one. If you're drawing out your own triangles to use, remember that pennant flags tend to be quite long triangle shapes.
If you just want a really basic, no-frills, felt banner - you can opt for just one size of triangle to use and forget about adding on the smaller section of triangular fabric that is sewn or glued on top.
How decorative you want your finished design to be is totally up to you and whether you want something a little fancy or prefer to stick to a plainer design. In my case, I went for fancy because this was a project for my daughter's playroom and it's on show all the time.
Step 2: Choose some colors of felt and fabric or just felt if you want. You can also get patterned felts which you may prefer to use instead of fabric because this will mean you don't need to sew if you prefer not to. I had some fabric oddments that I wanted to use for this project because they matched up with the colors of the room where they were going.

Note that there are different qualities of felt that you can buy. Luckily, the less expensive acrylic felt Sheets and elsewhere online are actually more ideal for this project and that's because they tend to be a stiffer fabric which means they hold their shape better.
The more expensive wool felt or wool mix varieties are softer and do not keep a shape as well nor have such pronounced edges when cut. A good quality acrylic variety is perfect for this job.
Step 3: Here's the style of pennant flag I went for. I used the larger triangle to trace round onto a sheet of felt then cut it out and then used the smaller triangle to cut out a scrap of ordinary fabric which is positioned in the middle of the larger triangle as shown.
There are lots of different options here. You could stick to just using felt and use a different color for the smaller triangle or even a different pattern if you buy patterned felt.
Fabric edges are more susceptible to fraying so I prefer stitching these scrap pieces into the middle of the felt using a simple zig-zag stitch pattern on a sewing machine. If you just love to hand stitch, then the stitch I recommend is to use a blanket stitch which works well here.
⭐ Here's my step by step tutorial for hand sewing blanket stitch. The other option is to get hold of an adhesive that works for fabrics and particularly felt. Then you just glue them on instead.
I do think that stitching around the edges looks nicer with the finished result. It looks as though time and care has been taken but it depends how much time you have available and how long you want this to last for once it is made.
The button detail at the bottom of the flag is not just a pretty embellishment - it's actually weighing the flag down a little which keeps the finished design holding the shape better.
Step 4: Since mine was for a child's playroom, I added in some extra details like this fabric butterfly. The patterned fabric has been stitched over the top of some felt which gives it some extra stability and makes it a bit longer lasting too. You can also see the zig zag machine stitching closer up here which stops the fabric from fraying.
To make your own pretty butterfly embellishments for your banner:
- Make a little butterfly template to draw around
- Use a water soluble fabric pen or temporary fabric marker to draw around this template onto a piece of acrylic felt and a piece of patterned fabric
- Place the fabric piece over the felt and pin to stop them moving while you sew
- Sew a simple running stitch down the middle to keep both pieces in place
- Hand stitch all around the edges using blanket stitch which helps to prevent fraying yet looks decorative too
- Sew your finished butterfly onto a flag section
Step 5: Once you have enough flag pieces for the length of banner or bunting that you need, next job is to attach the tops to some ribbon, twine or cord so that you can hang it up. When I originally made this, I decided to machine stitch the flags to a long length of ribbon which you can see in the photo above. I just used the same color thread all the way along and a simple plain or running stitch.
Make sure you have enough ribbon, twine or cord left at the ends of your banner to tie these up across a length of wall or wherever they are going.
Make sure you have enough ribbon, twine or cord left at the ends of your banner to tie these up across a length of wall or wherever they are going.
If I ever made another one of these, I'd possibly do it differently. I'm not entirely convinced that the extra time I spent sewing these and trying to align the tops perfectly to the middle of a length of ribbon was a very wise investment of my time since that was quite a slow process with pinning and sewing.
If I did this again, I think I'd be tempted to get my glue gun out and use that to stick ribbon or cord along the backs of the flag pieces. I'd be testing that first to check that the adhesive doesn't come through the felt and spoil the fronts.
If I did this again, I think I'd be tempted to get my glue gun out and use that to stick ribbon or cord along the backs of the flag pieces. I'd be testing that first to check that the adhesive doesn't come through the felt and spoil the fronts.
Related Content You Should Also Love:
Everything You Need to Know on Craft Felt: The Ultimate Guide
Essential Sewing Supplies for Beginners
Free Template and Tutorial to Make a Felt Fairy Home
How to Make a DIY Tabletop Ironing Board
More Fabric and Felt Crafts
Essential Sewing Supplies for Beginners
Free Template and Tutorial to Make a Felt Fairy Home
How to Make a DIY Tabletop Ironing Board
More Fabric and Felt Crafts
Page Last Updated:


Comments
Post a Comment
CraftyMarie is a craft themed website by Marie Williams Johnstone. I love to craft in the winter and garden in the summer. I make handmade cards, papercrafts, crochet and seasonal crafts. I enjoy many of the more traditional crafts and hobbies including sewing, embroidery and working with felt and fabric. Thanks for leaving me a comment. Comments do not show up until I approve them. Marie