Alphabet Die Cut Card Making Designs
I'll admit that just sometimes I can run a little short on getting inspiration and ideas when creating handmade greeting cards, and especially when making cards for men. That's where some of these simple but effective ideas are so very useful.
In recent years, I've taken to the use of alphabet die cuts for cards. Large fonts and lettering (sometimes even letters cut out by hand instead of a machine cutter) to do most of the hard job for me.
Use the ideas here to create some great looking paper projects very easily when you're running low on inspiration too. You can use a machine cutter with alphabet dies, buy pre-cut letters or even print out and cut large words from your own computer using a simple word processing program or notepad app.
Note: This post may contain affiliate links for which I can be compensated.

As someone who enjoys things that tend to be very cute and girly, making things with males in mind is not really my ideal way to spend my limited crafting time. Here's how I use Alphabet dies to create some very cool looking cards quickly.
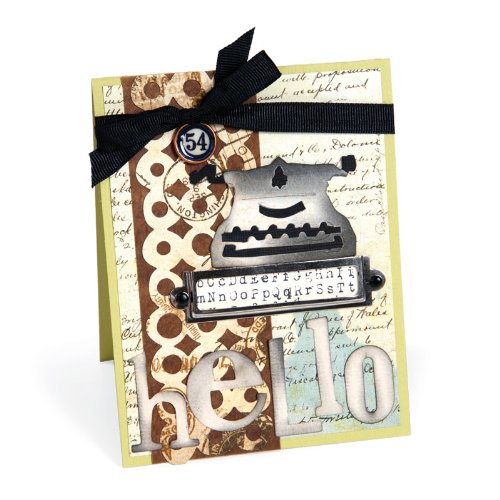
I particularly love using large letters and fonts for words as the main or central motif on a handmade greeting card, especially when I'm designing cards with men in mind.
See My Easy DAD Letter Card Design Here
Since my natural design style veers very much towards the cute factor, it doesn't ideally lend itself to creating with a more masculine edge.
So now I tend to use large alphabet die cuts and fonts to do most of the hard work for me. You get an idea of how in the photo below.

Consider how best to use letters on the space you have on a card front or scrapbook page
This card shown here is a design that I've replicated so many times for male themed birthday cards. I probably like it best on a square greeting card blank but it also looks fine on a rectangular base too.
I used my cutting machine to make a large letter B and then utilized the same font in a much smaller scale to make the rest of the letters for Birthday, spacing them around the curve of the large B.
It's a technique that you could really copy and use for many appropriate words for your crafting. Birthday is the most common one that I would use but you could do something very similar for: Christmas, Baby Girl or Baby Boy, Valentine and other light-hearted occasions.
Use a Cutting Machine for Fonts? Here's Some Favorite Dies
I have an old craft cutter that I can make my own fonts on which is particularly handy for smaller lettering.
Because I'm scissor mad, I’ll still happily print off large fonts that I love using Word and cut them out by hand. You don't get such perfect, clean cut lines but I kind of like that depending on the project at hand. These are some die cut options that I love the look of too.


The chalkboard style is very NOW and hot. It looks great used across a range of crafts and for pillows too. This looks like a brilliant range of fonts and lettering for lots of crafts.
Chalkboard Styles are HOT Right Now. I love this example with the Thank U card which is very simple but striking.
The letters are stuck onto a black background which gives the right look and the U is raised up probably with adhesive foam squares. The addition of a cute button with string embellishment just finishes it right off.
Tip on Designing with Die Cut Lettering: Get your die cut letters for your chosen word and then play around with the styling and placement of the lettering over a blank sheet of paper until you're really happy with the design you've created.
Use a pencil to draw around the letters so you have a visual reference to refer to and show you how to repeat that look for your project such as a greeting card or scrapbook layout.

Whether you print and cut your own, use pre-bought alphabets or a cutting machine, your large letter fonts and words can look a little bland on cards or scrapbook layouts unless you add in some kind of extra detailing and embellishments. There are two common tricks I use to make mine stand out just a bit more.
1) I like to tint around the edges of the cut letter with a small ink pad, the type used for rubber stamping. I like to use a shade darker, if I can, than the main color of the card or paper. If you cut by hand, this edge inking helps to disguise rougher cut sides and it gives a much nicer finish.
2) Another common tip is to use a fine tipped black pen, I like a Le Plume pen, to work a stitched look design around near the edges of the font. I just really like how this looks on the finished design and how it can stop the lettering from looking just too flat.
These are the common items that I use to enhance or embellish large lettering on handmade cards and scrapbook layouts. Colorbox pigment inks are very small ink pads which come in a great assortment of sets and color themes.
I'm much more likely to use darker shades for edging with so it stands out. The sharp pointy edges on these stamps mean that you can work round tricky edges too like scallops much easier. Just let the ink dry and check it is dry before you work with the item further.
Marvy Le Plume marker pens are among my favorites to enhance die cut lettering because of the range of colors, the fact they're double tipped with a fine point and brush marker and also you can stamp with them. They're very versatile.
Smaller letters and fonts can be used to create fun and cute little sentiments to go along with your chosen theme, such as my Bags of Fun birthday design here shown below.
These were cut by my craft cutting machine. There's just no way I could accurately cut smaller letters and wording so cleanly.
Because the font size is much smaller, there is no real need to enhance these letters like you really need to with the larger ones. They just need to be cut from a shade which will allow them to naturally pop from their background and using a great cardstock such as a textured Bazzill really works well.

Sticking on smaller lettering can be a bit trickier. A zig glue pen in an appropriate size is good or you can pass them through a Xyron sticker machine which gives them a nice, clean adhesive backing ready for when you'll use them.

How to Stick Down Fine Lettering: If you've ever tried sticking down fine cut lettering onto your projects, you'll know how fiddly that can be. A glue stick can really make a mess of the job.
My number one choice for the smaller and more intricate cut alphabets are my Zig glue pens. These come in a whole range of sizes with the rollerball tip and fine chisel tip both being the best options in this case. They are a dream to stick with when it comes to paper and cardstock.
My second choice would be my Xyron sticker machine which provides a very fine layer of adhesive backing on items fed through the machine.
The only downside is that this can be a more expensive way of crafting but it’s a nice clean option where cost is not a real factor. And you can keep the backing on all the resulting stickers until you're ready to use them.

Related Content You Should Also Love
Page Last Updated:
In recent years, I've taken to the use of alphabet die cuts for cards. Large fonts and lettering (sometimes even letters cut out by hand instead of a machine cutter) to do most of the hard job for me.
Use the ideas here to create some great looking paper projects very easily when you're running low on inspiration too. You can use a machine cutter with alphabet dies, buy pre-cut letters or even print out and cut large words from your own computer using a simple word processing program or notepad app.
Note: This post may contain affiliate links for which I can be compensated.
Alphabet Die Cut Card Making Designs
As someone who enjoys things that tend to be very cute and girly, making things with males in mind is not really my ideal way to spend my limited crafting time. Here's how I use Alphabet dies to create some very cool looking cards quickly.
Use Large Die Cut Letters as the Main Motif on a Handmade Card
I particularly love using large letters and fonts for words as the main or central motif on a handmade greeting card, especially when I'm designing cards with men in mind.
See My Easy DAD Letter Card Design Here
Since my natural design style veers very much towards the cute factor, it doesn't ideally lend itself to creating with a more masculine edge.
So now I tend to use large alphabet die cuts and fonts to do most of the hard work for me. You get an idea of how in the photo below.
Consider how best to use letters on the space you have on a card front or scrapbook page
This card shown here is a design that I've replicated so many times for male themed birthday cards. I probably like it best on a square greeting card blank but it also looks fine on a rectangular base too.
I used my cutting machine to make a large letter B and then utilized the same font in a much smaller scale to make the rest of the letters for Birthday, spacing them around the curve of the large B.
It's a technique that you could really copy and use for many appropriate words for your crafting. Birthday is the most common one that I would use but you could do something very similar for: Christmas, Baby Girl or Baby Boy, Valentine and other light-hearted occasions.
Use a Cutting Machine for Fonts? Here's Some Favorite Dies
I have an old craft cutter that I can make my own fonts on which is particularly handy for smaller lettering.
Because I'm scissor mad, I’ll still happily print off large fonts that I love using Word and cut them out by hand. You don't get such perfect, clean cut lines but I kind of like that depending on the project at hand. These are some die cut options that I love the look of too.
Cricut Chalkboard Cartridge
The chalkboard style is very NOW and hot. It looks great used across a range of crafts and for pillows too. This looks like a brilliant range of fonts and lettering for lots of crafts.
Chalkboard Styles are HOT Right Now. I love this example with the Thank U card which is very simple but striking.
The letters are stuck onto a black background which gives the right look and the U is raised up probably with adhesive foam squares. The addition of a cute button with string embellishment just finishes it right off.
The Sizzix Bigz XL Alphabet Die
Tip on Designing with Die Cut Lettering: Get your die cut letters for your chosen word and then play around with the styling and placement of the lettering over a blank sheet of paper until you're really happy with the design you've created.
Use a pencil to draw around the letters so you have a visual reference to refer to and show you how to repeat that look for your project such as a greeting card or scrapbook layout.
Embellishing Large Lettering for Cards
Whether you print and cut your own, use pre-bought alphabets or a cutting machine, your large letter fonts and words can look a little bland on cards or scrapbook layouts unless you add in some kind of extra detailing and embellishments. There are two common tricks I use to make mine stand out just a bit more.
1) I like to tint around the edges of the cut letter with a small ink pad, the type used for rubber stamping. I like to use a shade darker, if I can, than the main color of the card or paper. If you cut by hand, this edge inking helps to disguise rougher cut sides and it gives a much nicer finish.
2) Another common tip is to use a fine tipped black pen, I like a Le Plume pen, to work a stitched look design around near the edges of the font. I just really like how this looks on the finished design and how it can stop the lettering from looking just too flat.
Enhancing Die Cut Letters and Words
These are the common items that I use to enhance or embellish large lettering on handmade cards and scrapbook layouts. Colorbox pigment inks are very small ink pads which come in a great assortment of sets and color themes.
I'm much more likely to use darker shades for edging with so it stands out. The sharp pointy edges on these stamps mean that you can work round tricky edges too like scallops much easier. Just let the ink dry and check it is dry before you work with the item further.
Marvy Le Plume marker pens are among my favorites to enhance die cut lettering because of the range of colors, the fact they're double tipped with a fine point and brush marker and also you can stamp with them. They're very versatile.
Smaller Alphabets Make Fun Sentiments
Smaller letters and fonts can be used to create fun and cute little sentiments to go along with your chosen theme, such as my Bags of Fun birthday design here shown below.
These were cut by my craft cutting machine. There's just no way I could accurately cut smaller letters and wording so cleanly.
Because the font size is much smaller, there is no real need to enhance these letters like you really need to with the larger ones. They just need to be cut from a shade which will allow them to naturally pop from their background and using a great cardstock such as a textured Bazzill really works well.


Sticking on smaller lettering can be a bit trickier. A zig glue pen in an appropriate size is good or you can pass them through a Xyron sticker machine which gives them a nice, clean adhesive backing ready for when you'll use them.
How to Stick Down Fine Lettering: If you've ever tried sticking down fine cut lettering onto your projects, you'll know how fiddly that can be. A glue stick can really make a mess of the job.
My number one choice for the smaller and more intricate cut alphabets are my Zig glue pens. These come in a whole range of sizes with the rollerball tip and fine chisel tip both being the best options in this case. They are a dream to stick with when it comes to paper and cardstock.
My second choice would be my Xyron sticker machine which provides a very fine layer of adhesive backing on items fed through the machine.
The only downside is that this can be a more expensive way of crafting but it’s a nice clean option where cost is not a real factor. And you can keep the backing on all the resulting stickers until you're ready to use them.
Related Content You Should Also Love
Make Beautiful 3D Glitter Paper Butterfly Embellishments
Tutorial on Die Cut Pop Up Card Boxes
Popsicle Shaped Card Tutorial and Template
Easy Dad Card for Father's Day and Birthdays
More Paper Crafts to Enjoy
Tutorial on Die Cut Pop Up Card Boxes
Popsicle Shaped Card Tutorial and Template
Easy Dad Card for Father's Day and Birthdays
More Paper Crafts to Enjoy
Page Last Updated:


I love your cards! They are fresh, new and creative! I love the color combinations you used too!
ReplyDeleteThanks, Julie. Card making is a lot of fun and you can do a lot with die cuts and cutting machines which speed things up :)
Delete