How to Do 3D Paper Tole Beginner Tutorial

Paper or Papier Tole is a visually stunning and beautiful paper craft that is in danger of being forgotten about and dying out as new crafts spring to life. I want to get more people interested in taking up this wonderful art form with this how to do 3D paper tole beginner tutorial.
This paper craft can be as simple or as complex as you choose to make it. If you love cutting, either with scissors or a craft knife, this is something you should really enjoy. Even if you don't enjoy cutting, there are pre-cut die cuts that you can buy and use instead.
What is paper tole? Paper tole or 3D decoupage is a traditional paper craft. It involves cutting out sections taken from identical printed designs and layering these cutouts up using 3D foam squares or silicone glue. In this way, a three dimensional picture is created. This craft is often used to make special greeting cards.
Note: This post may contain affiliate links for which I can be compensated.
How to do 3D Paper Tole With a Complete Beginner Tutorial
What You Need to Start Paper Tole
✔️ 1: You may need a range of different sized scissors. I suggest a medium sized pair and a very small pair of decoupage scissors for starters. Alternatively, you can opt for a craft knife and cutting mat if that's what you're more comfortable with using.
✔️ 2: You need some 3D foam squares or silicone glue adhesive. For beginners, I recommend getting the foam squares which are very easy to use.
✔️ 3: If you really loathe cutting or find it too difficult, then look for the Papier Tole 3D Die Cut Decoupage Sheets to buy. These die cut decoupage sheets have die cut pieces that you just punch out instead of needing to cut anything.
Part of the real joy in this craft is with the relaxing time spent cutting out intricate designs. However, when you are in a hurry to make a dimensional card, die cut decoupage makes it so easy to get the look much faster.
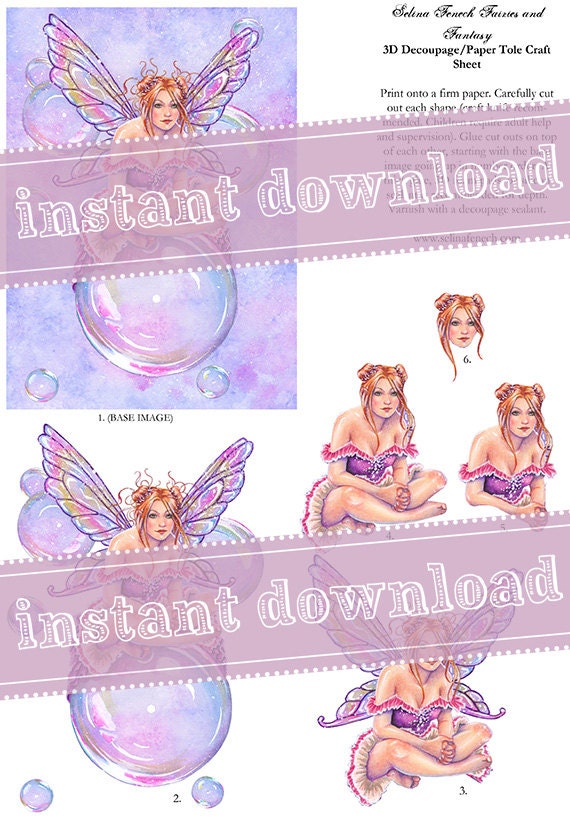
✔️ 4: If you love cutting things out, you can use pre-printed paper tole design sheets. Alternatively, if you want to try out this craft without resorting to much of an expense, you can always print off 3-5 copies of the same image to practice with.
If using your own printouts, look to use a large floral design, butterflies with a large petal flower and designs that will look good layered up.
Tutorial and Step by Step Instructions on Beginning Paper Tole

Pre-printed paper tole sheets ready to cut and layer
Step 1: The photo above shows are range of my pre-printed paper tole and decoupage sheets. These are not die cuts which you punch out as I prefer to cut all my pieces by hand. The cutting is a big part of the fun for me.
Paper Tole Kits with 6 Identical Prints


This simple to do craft requires that you use a minimum of two copies of the same image which can be a photograph, specially made Papier Tole sheets and die cuts, or free printables that you may discover online.
You cut out parts of an image with a large background section as the base. Then layer up smaller sections on top with dimensional foam squares or thick silicone adhesive.
In this way, you create a 3D design which is traditionally used for the front of handmade cards as well as framed pictures and art.
Sheets With Easy to Follow Designs to Cut and Layer Up

Depending what type of printed designs you're working from, the overall principle remains the same. I've written out instructions for whichever type of sheets you are using.
If you are working from design sheets like the ones shown above, I have another tutorial to help you with those.
These sheets already work out all the pieces that need to be cut and layered up, they sometimes come with a number order that you work to.
If your paper tole sheets are not numbered, you generally work from the largest piece of the design at the bottom to the smallest right at the top.

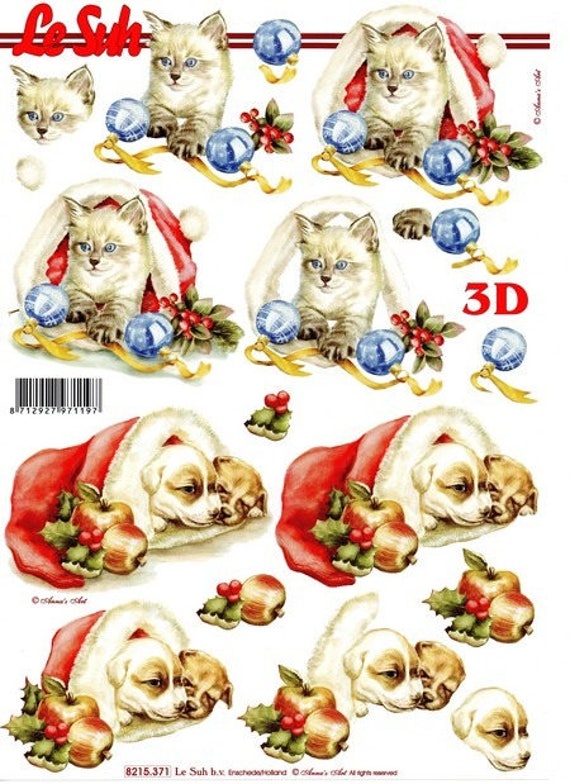
Some sheets look like this where all the prints are the same and you choose where to cut yourself. Others come with parts which are numbered and ready to cut out.
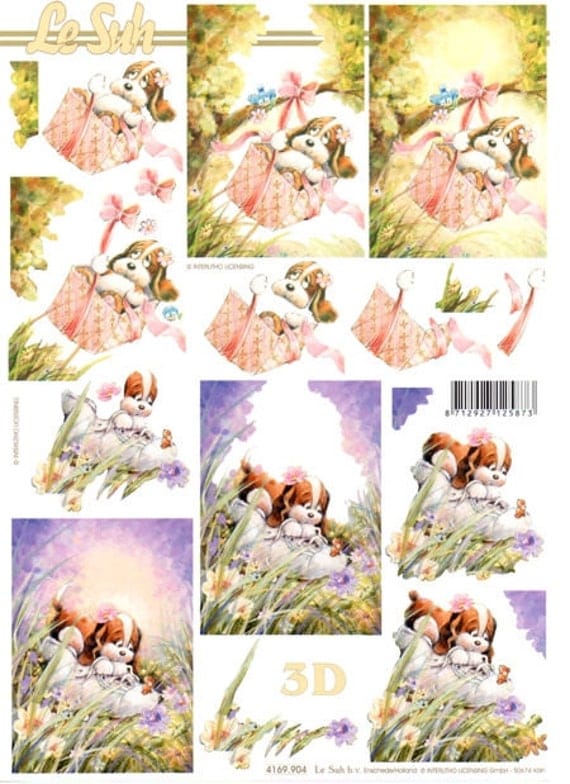
Step 2: There are times when you will work from prints that are not already divided up for you into sections but are all exactly the same. Many of the larger paper tole kits come this way.
You get some pre-printed sheets like this. Additionally, any personal photos and images that you print off are likely to be in this format too. In this way, you have to work out where to cut to make the completed design look three dimensional. I can help with this.
If you do not have any pre-printed sheets, you can make your own by using identical prints or copies of the same picture or photo. You need a minimum of 3 pictures or prints which are all identical.
I like around 4 or 5 layers if making a design to place in the middle of a handmade card but for larger and more complex images, you could use significantly more repeats of the same print.

Cut right around the first print
Step 3: This step is easy. You just cut completely around one of the prints just as it is. So, in this example, I've cut out one of the square designs with a teddy bear in the middle. This will form the base for your work.

Use 3D foam squares or dots which are easy for a beginner to this craft
Step 4: You now have one base design which you've just cut out and 3 remaining copies of the teddy design.
For the second layer, you want to cut away some of the background and focus on cutting out the main image in the design. For me it is cutting out the whole teddy bear but for you it could be cutting out a large flower or an animal.
I prefer to use small decoupage scissors for most of my cutting but you can also use a craft knife and have a cutting mat or board under the paper to protect your work surface.
I would only recommend using a knife if you're already comfortable cutting with one because it's very easy for beginners to end up ripping through the paper instead of making sharp, precise and neat cuts.
3D Foam Squares are Easy to Use for Layering Your Paper Tole Pieces Up


Get yourself some 3D foam squares or pads (some people prefer 3D glue dots) and apply them to the back of the second layer that you've cut out.
You can see where I've applied mine. You don't need the foam stickers all over but need just enough to support the paper in the middle and near the edges.

Layer sections of the design on top of one another to make the picture look 3D
Step 5: Remove the backs off from the sticky foam squares (I find curved ended tweezers good at removing the backing paper from those or long nails) and then place your next layer directly on top of where it is on the base design.
For example, you'd want the teddy right on top of the other teddy. Be careful at aligning the image properly before you stick it down because once stuck, it will be pretty hard to remove.

Choose to cut out sections that would look nearer the front or foreground in real life
Step 6: This is where it starts to get a little bit harder. You need to decide how you are going to cut out the next (3rd) layer of your design. It needs to be smaller than the 2nd layer and you need to think about what part of this design would naturally be in the foreground or nearer the front in real life.
I opted to cut out most of the bear but cut away one arm and leg which face nearer the background. You might have chosen to cut it differently and that is part of the beauty of working with prints where you decide how you want it layered. Stick this 3rd layer on top using the sticky pads as before.

Cut out more detailed parts to layer up as you progress
Step 7: For my final 4th layer, I opted to cut out some small detail sections: his nose, the bow and his left foot or paw. These were all pieces that seemed naturally to be right at the front of this design.
For smaller pieces like the ones here, you may need to cut your foam squares or glue dot down to fit on the back. I cut the foam pads while they are still attached to the sheet using my scissors.
For cutting glue dots, wrap backing paper around the sticky side (so the sticky section is covered over) and then cut with your scissors. Layer your smaller pieces on top.
If your scissor blades get sticky, you can carefully wipe them with a little nail polish remover which normally cleans them up beautifully.

Viewed from the side, you get a sense of how the picture becomes three dimensional
Step 8: You can get a sense of how this dimension shapes up with a part sideways look at the completed design which shows the different layers.
It does look really cool when you're done and a small and simple design like this takes me around 15 minutes to make (when not stopping to take photos!) so it doesn't have to take a huge amount of time up.

Some Papier Tole designs are very intricate and more challenging to cut
You can go for simple designs or more complicated ones like this red rose card above where a lot of layers and fine sections have been cut.
I really prefer using prints where I get to decide where to cut and layer. Partly because I find them a little more challenging and also because it makes the finished design really unique.


You also can do this with your own photos. Imagine taking a photo of something meaningful and applying this technique to make a picture that you can frame. If you enjoyed this, please leave a comment or share the link of this article on a favorite social media site so other people can enjoy it too.
This is one of my slower paced paper crafts and it is one I love to do when I really want to relax. I love cutting and the process of using scissors and enjoy building up a beautiful, layered image which makes for a real wow-factor of a card.
People are always impressed when they receive one of these designs because they look really intricate and hard to make. Actually they are very easy if you love sitting quietly with a coffee, or your favorite beverage, and they just take a little time.
Related Posts You Should also Enjoy:
Supplies Needed for Paper Tole Crafting
3D Decoupage Tutorial with Photos to Follow
How to Use 3D Foam Squares for Your Paper Crafts
Ideas for Alphabet Die Cut Cards
More Papercrafts to Enjoy
3D Decoupage Tutorial with Photos to Follow
How to Use 3D Foam Squares for Your Paper Crafts
Ideas for Alphabet Die Cut Cards
More Papercrafts to Enjoy
Page Last Updated:


These are so sweet! I've never seen them in the US, but when one of my cardmaking friends went to England, she brought some home for us. They were really fun and the results are stunning.
ReplyDeleteThanks Pam, yes I don't think it is a very common craft - but it should be! I find this really relaxing and fun to do with great results for cards in particular.
ReplyDeleteWhat kind of paper would you need to print your own paper told pictures?
ReplyDeleteHi Mary. If the design is quite small overall, I would just use a good quality plain printer paper and use the highest quality print setting on the printer. If it is a design that is going to be say larger than palm size once complete, I would use card because it will stand up better with all the layering rather than paper which can be a little flimsy. Another option is to use photographic paper - either glossy or matt which tends to give better looking finished prints. Photographic paper sometimes needs careful handling though not to get fingerprints over the top. Holding round the edges can help avoid this.
DeleteHi Pam,
ReplyDeleteI was wondering exactly what type of paper is best to make your own prints on? I am a digital artist and would like to paper tole some of my work. Would Epson Ultra Premium Presentation Paper be a good paper to work with? What about photographs? Is it better to print those on a thick stock photo paper or on some other media?
If you're looking for the best in terms of actual print quality then I would use a photographic paper - I haven't tried that one but on looking at the Epson page for it, it does look like it would be a good choice. The main point is to take extra care not to crease the paper and not to handle it too much on top of the actual printed area.
DeleteI will mostly just use a bog standard lightweight card with a high quality printer setting and that works fine for me. I have used matt photo paper with actual photographs because I think they look better. But if I was a digital artist, I'm sure I'd just be using a premium photo paper. It sounds like paper tole could be fantastic as a different way to showcase your work. Hope it works well for you.
Hi Marie
ReplyDeleteI just wanted to let you know that papertole or 3 dimensional art,a more advanced form of papertole is alive and well at busy b workshop in stony plain alberta.
Barb
That's so great to hear, Barb. I bet that is an amazing workshop to be involved with. Thanks so much for letting me know - wish we had something similar.
DeleteAwesome article, I am a newbie in this technique and your articles are perfect. Thank you for the advice. Huggies
ReplyDeleteThank you, Iris. I try to make my how to articles easy for beginners to follow so they can enjoy learning something new. Paper tole is a wonderful paper craft.
DeleteI am going to be giving a card making class using the paper tole/decoupage technique. I came across your articles here and am sooo impressed with them. Thank you for sharing your talent and doing such a wonderful job with it. I hope you don't mind if I use your tutorial for my class, giving you full credit for writing them of course. I know for a fact I couldn't write one as good as yours.
ReplyDeleteIn my card making classes I'm trying to incorporate some of the older techniques. They keep coming up with new flashier things all the time and some of the older ones get forgotten. I don't want this to happen with a lot of them so I'm attempting to rectify this, even if it is just for a little group in a remote area.
Hi Janine. Thank you. Yes, by all means feel free to use the tutorial for your local card making class. That sounds like fun. Some of the older and more traditional craft techniques like paper tole are still the best. I hope everyone enjoys it.
DeleteI just learned the name of these wonderful creations and decided to see how they were made. I am so glad I found your site first. You seem to have a love for the art. Your work is beautiful. Plus, you make the process easy for anyone to understand.
ReplyDeleteHi Marie,
ReplyDeleteDo you apply any type of shellac or gloss when your done?
Hi there. No I don't add any type of varnish or treatment over the paper once finished. The reason why is because I always think that the untreated paper should stay looking better for longer if well looked after - obviously if you keep it in an area with strong sunlight then the design can fade or if you keep it in a very humid room for a long time, it may also be affected.
DeleteIf you put something like a varnish over the top of the paper tole, then that could well yellow or crack over time. You can always try experimenting on a test piece to see how it looks but, what you won't know, is what it might look like in years to come.
I bought a paper tole picture about ten years ago. It was framed with glass in front. As far as I know it is still in good condition. Just one thing to be aware of. It caught my eye from across a large room and was very sweet. Two teddy bears. One carving a love heart in a tree. I bought it for a friend's little girl. Some time later when I visited, the position on the wall it was placed meant the first sight you have of it is side on. The bear with the knife looks like he is about to stab the other bear. So remember! This is a 3 Dimensional art.
Delete