How to Use Die Cut Decoupage With Hunkydory Kits
I just love the dimensional, raised effect of 3D decoupage. It makes for beautiful cards. One downside is that it can take a long time doing it the traditional way because of all the cutting involved.
Welcome to the no scissors required die cut decoupage method which is so much faster. I'll show you how to use die cut decoupage with Hunkydory kits. You can apply this method to other pre-cut decoupage sheets too such as Anita's foiled decoupage and Hot Off the Press 3D Papier Tole.
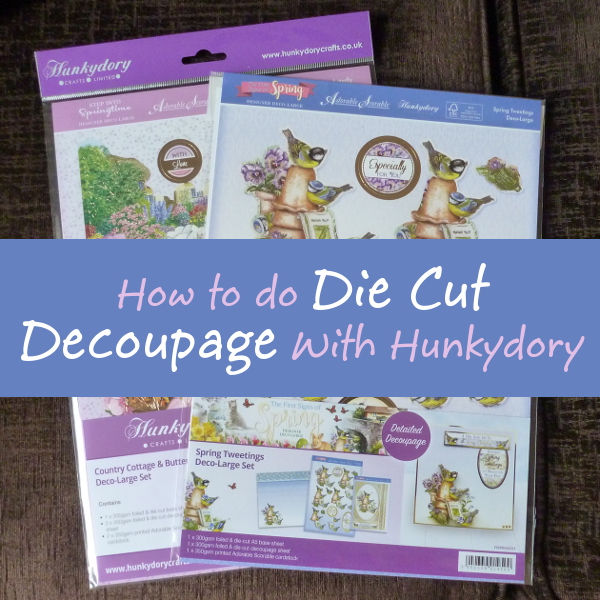
I picked the stunning Deco-Large Spring Tweetings set by Hunkydory to demonstrate how you can do die cut decoupage and just how stunning the finished results can be - with very little effort.
Note: This post may contain affiliate links for which I can be compensated.

3D decoupage (otherwise known as paper tole) has never been so fast and so easy than with pre-cut die cut decoupage sheets.
These pre-printed sheets all come with designs that are neatly cut around the edges for you, so you just need to pop them out and place them on your greeting card or papercraft project.
I'll show you how to use foiled decoupage with a Hunkydory Deco-Large kit. You can apply the exact same techniques to other brands such as Anita's foiled decoupage and Hot Off the Press 3D Papier Tole.

A blank greeting card or base for your paper project.
Some 3D foam squares or silicone glue.
Decoupage scissors or a craft pick are useful for neatening edges.
Any papercrafting embellishments.
Although this really is a no scissors required technique, I do like to use my tiny decoupage scissors to just neaten off the edges around each die cut piece when it gets removed.
Each die cut is held in place on the sheet with a few tiny paper fibers. These are known as "pips" in the industry.
The "pips" can leave the odd little raised bump around the edge of a die cut. You can barely see these but still I prefer to snip them off.
You can also use a craft pick like the Tim Holtz Tonic pick which is useful for smoothing edges around each piece.

With Hunkydory Deco-Large kits, I can normally get one really amazing layered decoupage card from a single sheet which is perfect for a special occasion.
Alternatively, I can reduce the layers down and get two very good designs from it instead.
Most die cut pieces will come away very easily from the sheet. Some of the more intricate designs need a little more coaxing to remove them. A craft pick can come in very handy for running around the cut edge to loosen it.
As a beginner to 3D decoupage, I'd recommend using all the die cut pieces and layer them up from the largest to the smallest.
If you already have some experience, you may want to carefully select a smaller amount of die cuts to layer up so you can get a couple of dimensional designs from a single sheet. This saves money and also helps you to make more projects with less.

Start with your largest die cut and add your dimensional adhesive to the back. I recommend 3D foam squares because they are very easy to use. Here's how to use 3D foam squares if you are not sure how they work.
Silicone glue is another alternative but it requires a lot more patience to use and drying time too.
If you don't have long fingernails, it can be difficult to remove the backing papers from the 3D foam squares. This is where I also use my craft pick to help.

3D foam can be carefully pulled up from most projects without tearing if you make a mistake - but not if you press it down too hard.
Silicone glue can be moved around for a long time because it can take many hours to dry and set. It can be messy to use and requires a lot of patience.
In this case, my base is an oval card topper that came with my Hunkydory Deco-Large kit. Your base may be a greeting card, a topper, a scrapbook page or just a piece of card cut to size.

Here's a side view of all the layers on this bird design.

I had one flat design which was not foiled in gold, an oval topper with several layers and another topper that had less layers but still looked wonderful.
Here's what I did with each design.

From my little kit, I made 3 cards. The front one is a flat notecard using cardstock, a sentiment and corners from the set.
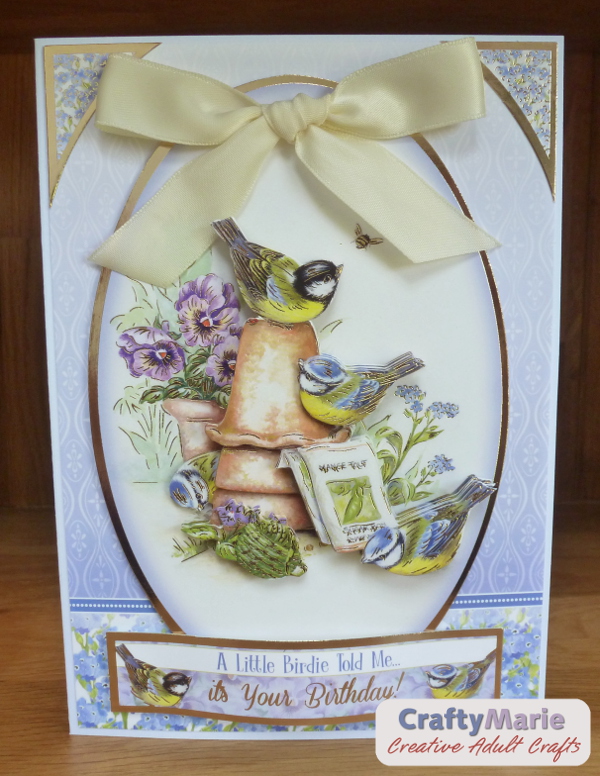
My large oval topper was placed onto my own greeting card blank using some of the matching card, sentiment and corners from the kit. The only thing I added was a ribbon bow.
For the last card, I used a scalloped edge square card blank and paper from my own stash. I used a border from the kit, my decoupage birds, a sentiment and a knotted ribbon.

Here's the largest card that I made. The sentiment at the bottom has been shaped and curved over my craft pick and stuck down curved along the bottom edge of the card.

I love how I only needed a small piece of paper and ribbon from my stash to create my second card from the foiled kit.

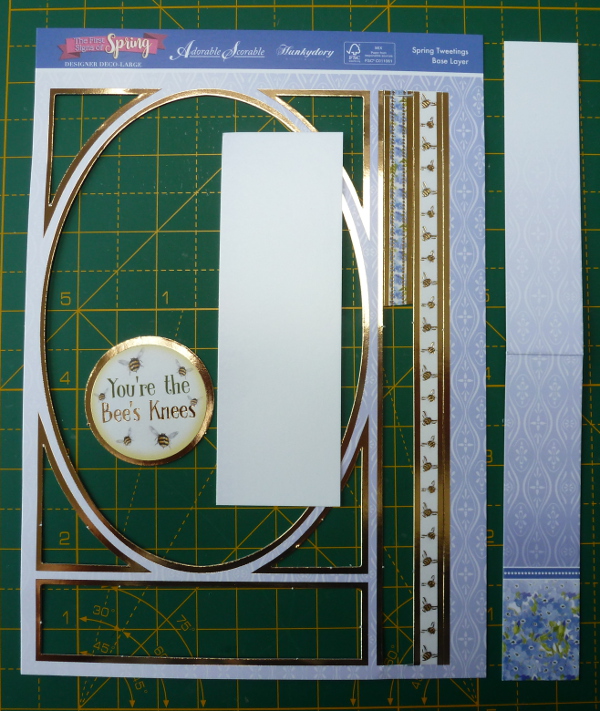
This image shows exactly what I had left over from my set. As you can see, I worked hard to use most of it up. I will use the bee sentiment and border on a separate project.
Die cut decoupage is really fun to do. It can be done so much faster than traditional 3D decoupage and paper tole because you don't need to cut around the pieces yourself.
I love how quick and easy it is to make stunning looking cards. You can see too that you don't need any fancy folding cards with this technique. The die cut decoupage looks gorgeous enough on a simple card blank.
Related Content You Should Also Love:
Page Last Updated:
Welcome to the no scissors required die cut decoupage method which is so much faster. I'll show you how to use die cut decoupage with Hunkydory kits. You can apply this method to other pre-cut decoupage sheets too such as Anita's foiled decoupage and Hot Off the Press 3D Papier Tole.
I picked the stunning Deco-Large Spring Tweetings set by Hunkydory to demonstrate how you can do die cut decoupage and just how stunning the finished results can be - with very little effort.
Note: This post may contain affiliate links for which I can be compensated.
How to Use Die Cut Decoupage With Hunkydory and Other Pre-Cut Kits

3D decoupage (otherwise known as paper tole) has never been so fast and so easy than with pre-cut die cut decoupage sheets.
These pre-printed sheets all come with designs that are neatly cut around the edges for you, so you just need to pop them out and place them on your greeting card or papercraft project.
I'll show you how to use foiled decoupage with a Hunkydory Deco-Large kit. You can apply the exact same techniques to other brands such as Anita's foiled decoupage and Hot Off the Press 3D Papier Tole.

What You Need for Die Cut Decoupage
A die-cut decoupage sheet or kit.A blank greeting card or base for your paper project.
Some 3D foam squares or silicone glue.
Decoupage scissors or a craft pick are useful for neatening edges.
Any papercrafting embellishments.
Although this really is a no scissors required technique, I do like to use my tiny decoupage scissors to just neaten off the edges around each die cut piece when it gets removed.
Each die cut is held in place on the sheet with a few tiny paper fibers. These are known as "pips" in the industry.
The "pips" can leave the odd little raised bump around the edge of a die cut. You can barely see these but still I prefer to snip them off.
You can also use a craft pick like the Tim Holtz Tonic pick which is useful for smoothing edges around each piece.

Step 1: Remove the die cuts you need from the sheet
Some die cut decoupage sheets and kits are a lot more generous than others. Hunkydory print amazing foiled designs onto beautiful thick cardstock. The quality is the best I've seen.With Hunkydory Deco-Large kits, I can normally get one really amazing layered decoupage card from a single sheet which is perfect for a special occasion.
Alternatively, I can reduce the layers down and get two very good designs from it instead.
Most die cut pieces will come away very easily from the sheet. Some of the more intricate designs need a little more coaxing to remove them. A craft pick can come in very handy for running around the cut edge to loosen it.
As a beginner to 3D decoupage, I'd recommend using all the die cut pieces and layer them up from the largest to the smallest.
If you already have some experience, you may want to carefully select a smaller amount of die cuts to layer up so you can get a couple of dimensional designs from a single sheet. This saves money and also helps you to make more projects with less.

Step 2: Add dimensional adhesive to the back of the first die cut
With this craft you normally work from the largest die cut piece at the bottom of your design to the smallest on top.Start with your largest die cut and add your dimensional adhesive to the back. I recommend 3D foam squares because they are very easy to use. Here's how to use 3D foam squares if you are not sure how they work.
Silicone glue is another alternative but it requires a lot more patience to use and drying time too.
If you don't have long fingernails, it can be difficult to remove the backing papers from the 3D foam squares. This is where I also use my craft pick to help.

Step 3: Stick down the first die cut decoupage piece
Carefully place the die cut down onto the base of your craft project. If you are sticking your first piece onto a matching design, take care to place it directly over the top.3D foam can be carefully pulled up from most projects without tearing if you make a mistake - but not if you press it down too hard.
Silicone glue can be moved around for a long time because it can take many hours to dry and set. It can be messy to use and requires a lot of patience.
In this case, my base is an oval card topper that came with my Hunkydory Deco-Large kit. Your base may be a greeting card, a topper, a scrapbook page or just a piece of card cut to size.

Step 4: Keep on layering die cuts to build up your design
Keep on layering up die cuts working from the largest to smallest pieces. The more layers of die cuts that you add to your decoupage, the more dimensional your finished project will be.Here's a side view of all the layers on this bird design.

Step 5: Your completed designs can be used on cards, boxes, tags and other projects
From my Hunkydory foiled die cut decoupage set, I was able to get 3 different designs.I had one flat design which was not foiled in gold, an oval topper with several layers and another topper that had less layers but still looked wonderful.
Here's what I did with each design.

From my little kit, I made 3 cards. The front one is a flat notecard using cardstock, a sentiment and corners from the set.
My large oval topper was placed onto my own greeting card blank using some of the matching card, sentiment and corners from the kit. The only thing I added was a ribbon bow.
For the last card, I used a scalloped edge square card blank and paper from my own stash. I used a border from the kit, my decoupage birds, a sentiment and a knotted ribbon.

Here's the largest card that I made. The sentiment at the bottom has been shaped and curved over my craft pick and stuck down curved along the bottom edge of the card.

I love how I only needed a small piece of paper and ribbon from my stash to create my second card from the foiled kit.

This image shows exactly what I had left over from my set. As you can see, I worked hard to use most of it up. I will use the bee sentiment and border on a separate project.
Die cut decoupage is really fun to do. It can be done so much faster than traditional 3D decoupage and paper tole because you don't need to cut around the pieces yourself.
I love how quick and easy it is to make stunning looking cards. You can see too that you don't need any fancy folding cards with this technique. The die cut decoupage looks gorgeous enough on a simple card blank.
Related Content You Should Also Love:
3D Decoupage Beginner Craft Tutorial
Ideas on Using Hunkydory's Little Books Range
How to Make a Folded Easel Card With a Step by Step Tutorial
NOW Make a Fun and Easy Pop Up Box Card
Loads More Paper Crafts to Enjoy
Ideas on Using Hunkydory's Little Books Range
How to Make a Folded Easel Card With a Step by Step Tutorial
NOW Make a Fun and Easy Pop Up Box Card
Loads More Paper Crafts to Enjoy
Page Last Updated:


Very nice to see how you made the most of the kit.Thanks very much
ReplyDelete