How to Make a Felt Cupcake Ornament or Brooch Pin
Craft something that is super cute today with an easy to sew and adorable little felt cupcake that comes complete with my free printable template.
This how to make a felt cupcake ornament or brooch pin is a complete step by step tutorial. It shows you how to make a small plush cupcake that can be fashioned into a wearable brooch pin, a keychain, bag clip, a decorative hanging ornament or a sweet decoration to adorn your home.
See how I make a plush brooch pin with the free template pattern, then apply the same technique to make whatever you like. You can even make up much bigger versions, simply print an enlarged copy of the free pattern template, and then create mini cushions and even plush toy designs.
Note: This post may contain affiliate links for which I can be compensated.

Step 1: Print out your free cupcake pattern template, provided further down this page, onto card and cut the pieces out to make templates that you can draw around.
Alternatively, you can print them straight onto paper, glue the parts onto any spare cardboard you have (like the back of a cereal packet) and cut out.

From your chosen colors of craft felt felt, cut out 2 pieces from Template A: cream or white felt is a good choice for this.
Cut out 1 piece from Template B: I used pink felt for this part because it makes the topping.
Then cut 1 piece for Template C: you can choose another color of felt or some cute fabric for this which forms the frosting. The photo for this step shows all 4 pieces which should now be cut.


I like to mark out designs using a fabric transfer or water soluble fabric marker which makes strong and clear blue lines that can be dabbed off with a little water when you want to remove them.
I always use embroidery transfer or water soluble pens to trace around my templates onto felt. After the pattern is complete, I gently dab at any remaining visible lines with a small amount of water on a soft cloth in order to remove them.
Learn more about Fabric Marking Pens HERE
Learn How to Transfer Patterns onto Felt HERE
You can also learn more on marking out patterns onto felt with Part 1 of my Ultimate Guide to Felt which has a section called: How to Transfer a Design onto Felt.

Step 2: Layer piece B (the topping) onto a part A piece. This just means placing the main felt topping directly over the top of a whole cupcake piece.
There is no sewing or stitching yet, just positioning sections in place.

Step 3: Place your inner cupcake part C (your fabric or felt piece - I used a fabric with a small floral print) into the middle of the topping as shown in the photo.
It helps to pin or baste this into place through all the layers in order to hold them together while you sew.

Step 4: I have used blanket stitch to sew the fabric on which immediately secures all the layers together. This is a great edging stitch to work by hand although you can choose another stitch such as running stitch that you prefer or are familiar with.
If you are sewing fabric on top of the felt, know that most fabrics (except felt) fray and blanket stitch helps to protect those raw edges from doing so. I prefer to use embroidery floss but you can also use sewing thread from a spool.

Step 5: Choose a couple of cute buttons that work with the colors you've already used for your design; ideally have one button that fits neatly inside the other.
If you don't have any buttons, you can always cut out a couple of circles from felt instead. Sew on your button detail near the top of your design.

Step 6: If you are sewing on a brooch pin back, these are the instructions. Locate the second complete cupcake part in felt which is part A. This is the back of your cupcake design. Turn it over on your workspace so the back is facing upwards.
If you're not sure which side is the back then do the following: place this piece of felt at the back of your Template A so it matches up exactly.
Place the template and your felt face down on your workspace and you can be sure what is facing up at you is indeed the rear or back where your brooch clip will be sewn.
➡️ LEARN ALL ABOUT MAKING FELT BROOCH PINS HERE
Place a brooch clip centrally, towards the top of the felt cupcake piece. This is generally a good location for brooch clips because if your pin is heavy and you place the clip too low, then the finished item will sag forward unattractively when clipped into place on a garment.
Start to sew this clip into place. Try to pick a thread close in color to the felt as this gives a neater finish to your completed item.
Bar pins are what you need to make a wearable brooch pin. If you want to make a brooch pin out of your felt cupcake as I'm demonstrating here, you'll need to buy some bar brooch pin backs. You can pick these up from Amazon or your local Art and Craft store may have some.

Step 7: I like to use blanket stitch to sew completely around the topping which is part B on the front of your cake design. If you prefer to use running stitch then use that instead.
Either way, only sew along the bottom of the topping as shown in the photo. Just as you get to the left edge, assuming you are sewing right to left, then stop sewing.

Step 8: Position part B (the back piece of felt with your brooch pin sewn on) directly behind your cupcake front and line up into place. Now continue to sew around the topping until you get right back around to where you started.
The photo for this step shows how the back and front of your cupcake brooch are now stitched together securely at the top.

Step 9: Open out your cupcake at the bottom and firmly push some stuffing into the top section of the felt. I use a blunt ended Fimo tool to push the stuffing in, you can use your fingers, a blunt pencil or even a pair of scissors with a rounded end.
Fill up the top half of your cupcake until it feels nice, firm and plump between your fingers. It is surprising how much stuffing will fill such a small area; you can pack a lot more filling in than you might expect.
You'll need some polyester toy stuffing (fiberfill) to fill out your felt plush and plump it up. This is what people use to stuff toys with.
Although I would not actually recommend washing your finished product because it is felt (just wipe with a damp cloth if needs be) washable polyester filling is essential if your sewn item ever does get damp.
I know some people like to stuff with fabric scraps or other items that are not necessarily washable nor good for lasting and plump stuffing.

Step 10: Start to sew down one side of the design. I am still using blanket stitch simply because it is a favorite stitch of mine but you can use your own choice of stitch.
Continue sewing until you're about halfway around and then stop. It is time to start filling using the stuffing again. Push some polyester stuffing into the bottom of your cupcake.
Step 11: Continue to sew and stuff all the rest of the way. Make sure there are no empty gaps in the stuffing and pack it in firmly.
Step 12: Sew up the final part, knot your thread at the back and cut off the remaining strands. If you've used a blue water soluble fabric marker on your felt and fabric, don't forget to dab it off with some water. Enjoy your little cupcake and don't forget to see the completed photos below plus grab the free pattern template too.
Check Out the Completed Photos and Get the Free Cupcake Pattern Below!

Make a keychain or a bag clip instead. Once you know how to make felt plush brooches, you can use the exact same cupcake pattern to create key chains (look for keychain findings) keyrings or bag clips to hang from your favorite wallet or handbag.
To make a key chain or bag clip, do the following. Instead of placing a brooch clip on the back, just sew ribbon attached to your choice of clip into the inside of the back piece of felt for your design. You'll need to do this before you start sewing the front and back pieces together.

Instead of making brooches or clips using the pattern provided, you can applique just the front of the design onto something else like a fabric tote bag, a pocket, or a needle book for example.
Think about the different ways that you can make your item to give it your individual style and bring something unique to the design.
What colors will you use? Pink and brown are great colors or how about lilac and cream? Will you add some beading to your design or some fancy stitches? Do you prefer to keep it looking as simple as possible?
These are all choices that you can make while creating your own cute plush while using this tutorial. I love to encourage you to take a design and make it your own because that way you'll love it even more.

How to Save this Printable Cupcake Template: This design is a standard .jpg picture file which is a normal file type that most computers can view and print out. First click on the actual pattern to bring up the full size of the image.
Next right-click with your mouse, trackpad or computerized drawing pen (or tap and hold with your finger on a touch screen) and then choose save image or save image as to get a copy of this pattern template onto your own computer.
Note: This free printable is for your personal use only. You are welcome to blog about how you've used this freebie along with your own photos providing that you include a link back to this page.
This craft is a lot of fun to make and especially if you're a fan of this sweet confection. They also make wonderful handmade gifts that you can start to sew up now so that they're ready for gift-giving this Christmas or for Birthday treats. I just hope you don't get too hungry as you make them!
Related Content You Should Also Love:
Page Last Updated:
This how to make a felt cupcake ornament or brooch pin is a complete step by step tutorial. It shows you how to make a small plush cupcake that can be fashioned into a wearable brooch pin, a keychain, bag clip, a decorative hanging ornament or a sweet decoration to adorn your home.
See how I make a plush brooch pin with the free template pattern, then apply the same technique to make whatever you like. You can even make up much bigger versions, simply print an enlarged copy of the free pattern template, and then create mini cushions and even plush toy designs.
Note: This post may contain affiliate links for which I can be compensated.
How to Make a Felt Cupcake Ornament or Brooch Pin
Step 1: Print out your free cupcake pattern template, provided further down this page, onto card and cut the pieces out to make templates that you can draw around.
Alternatively, you can print them straight onto paper, glue the parts onto any spare cardboard you have (like the back of a cereal packet) and cut out.
From your chosen colors of craft felt felt, cut out 2 pieces from Template A: cream or white felt is a good choice for this.
Cut out 1 piece from Template B: I used pink felt for this part because it makes the topping.
Then cut 1 piece for Template C: you can choose another color of felt or some cute fabric for this which forms the frosting. The photo for this step shows all 4 pieces which should now be cut.
![LEONIS 5 Water Erasable Marking Pens Blue [ 78008 ]](https://images-na.ssl-images-amazon.com/images/I/41sHjgnHLWL.jpg)

I like to mark out designs using a fabric transfer or water soluble fabric marker which makes strong and clear blue lines that can be dabbed off with a little water when you want to remove them.
I always use embroidery transfer or water soluble pens to trace around my templates onto felt. After the pattern is complete, I gently dab at any remaining visible lines with a small amount of water on a soft cloth in order to remove them.
Learn more about Fabric Marking Pens HERE
Learn How to Transfer Patterns onto Felt HERE
You can also learn more on marking out patterns onto felt with Part 1 of my Ultimate Guide to Felt which has a section called: How to Transfer a Design onto Felt.
Step 2: Layer piece B (the topping) onto a part A piece. This just means placing the main felt topping directly over the top of a whole cupcake piece.
There is no sewing or stitching yet, just positioning sections in place.
Step 3: Place your inner cupcake part C (your fabric or felt piece - I used a fabric with a small floral print) into the middle of the topping as shown in the photo.
It helps to pin or baste this into place through all the layers in order to hold them together while you sew.
Step 4: I have used blanket stitch to sew the fabric on which immediately secures all the layers together. This is a great edging stitch to work by hand although you can choose another stitch such as running stitch that you prefer or are familiar with.
If you are sewing fabric on top of the felt, know that most fabrics (except felt) fray and blanket stitch helps to protect those raw edges from doing so. I prefer to use embroidery floss but you can also use sewing thread from a spool.
Step 5: Choose a couple of cute buttons that work with the colors you've already used for your design; ideally have one button that fits neatly inside the other.
If you don't have any buttons, you can always cut out a couple of circles from felt instead. Sew on your button detail near the top of your design.
Step 6: If you are sewing on a brooch pin back, these are the instructions. Locate the second complete cupcake part in felt which is part A. This is the back of your cupcake design. Turn it over on your workspace so the back is facing upwards.
If you're not sure which side is the back then do the following: place this piece of felt at the back of your Template A so it matches up exactly.
Place the template and your felt face down on your workspace and you can be sure what is facing up at you is indeed the rear or back where your brooch clip will be sewn.
➡️ LEARN ALL ABOUT MAKING FELT BROOCH PINS HERE
Place a brooch clip centrally, towards the top of the felt cupcake piece. This is generally a good location for brooch clips because if your pin is heavy and you place the clip too low, then the finished item will sag forward unattractively when clipped into place on a garment.
Start to sew this clip into place. Try to pick a thread close in color to the felt as this gives a neater finish to your completed item.
Bar pins are what you need to make a wearable brooch pin. If you want to make a brooch pin out of your felt cupcake as I'm demonstrating here, you'll need to buy some bar brooch pin backs. You can pick these up from Amazon or your local Art and Craft store may have some.
Step 7: I like to use blanket stitch to sew completely around the topping which is part B on the front of your cake design. If you prefer to use running stitch then use that instead.
Either way, only sew along the bottom of the topping as shown in the photo. Just as you get to the left edge, assuming you are sewing right to left, then stop sewing.
Step 8: Position part B (the back piece of felt with your brooch pin sewn on) directly behind your cupcake front and line up into place. Now continue to sew around the topping until you get right back around to where you started.
The photo for this step shows how the back and front of your cupcake brooch are now stitched together securely at the top.
Step 9: Open out your cupcake at the bottom and firmly push some stuffing into the top section of the felt. I use a blunt ended Fimo tool to push the stuffing in, you can use your fingers, a blunt pencil or even a pair of scissors with a rounded end.
Fill up the top half of your cupcake until it feels nice, firm and plump between your fingers. It is surprising how much stuffing will fill such a small area; you can pack a lot more filling in than you might expect.
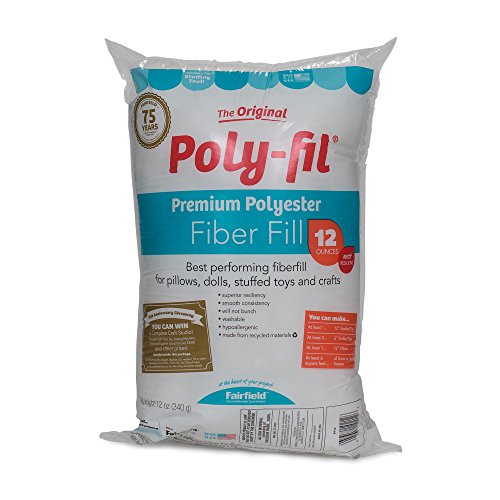
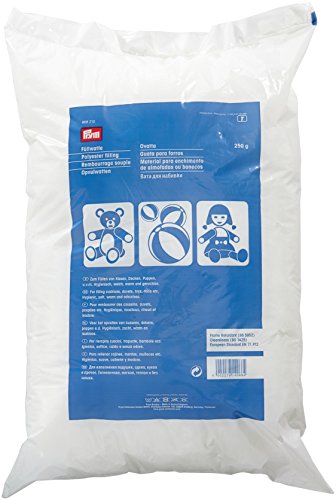
You'll need some polyester toy stuffing (fiberfill) to fill out your felt plush and plump it up. This is what people use to stuff toys with.
Although I would not actually recommend washing your finished product because it is felt (just wipe with a damp cloth if needs be) washable polyester filling is essential if your sewn item ever does get damp.
I know some people like to stuff with fabric scraps or other items that are not necessarily washable nor good for lasting and plump stuffing.
Continue sewing until you're about halfway around and then stop. It is time to start filling using the stuffing again. Push some polyester stuffing into the bottom of your cupcake.
Step 11: Continue to sew and stuff all the rest of the way. Make sure there are no empty gaps in the stuffing and pack it in firmly.
Step 12: Sew up the final part, knot your thread at the back and cut off the remaining strands. If you've used a blue water soluble fabric marker on your felt and fabric, don't forget to dab it off with some water. Enjoy your little cupcake and don't forget to see the completed photos below plus grab the free pattern template too.
Check Out the Completed Photos and Get the Free Cupcake Pattern Below!
Make a keychain or a bag clip instead. Once you know how to make felt plush brooches, you can use the exact same cupcake pattern to create key chains (look for keychain findings) keyrings or bag clips to hang from your favorite wallet or handbag.
To make a key chain or bag clip, do the following. Instead of placing a brooch clip on the back, just sew ribbon attached to your choice of clip into the inside of the back piece of felt for your design. You'll need to do this before you start sewing the front and back pieces together.
Add Ribbon and a Clip to Make a Bag Clip or Keychain
Instead of making brooches or clips using the pattern provided, you can applique just the front of the design onto something else like a fabric tote bag, a pocket, or a needle book for example.
Think about the different ways that you can make your item to give it your individual style and bring something unique to the design.
What colors will you use? Pink and brown are great colors or how about lilac and cream? Will you add some beading to your design or some fancy stitches? Do you prefer to keep it looking as simple as possible?
These are all choices that you can make while creating your own cute plush while using this tutorial. I love to encourage you to take a design and make it your own because that way you'll love it even more.
Your Free Cupcake Pattern Template Below

How to Save this Printable Cupcake Template: This design is a standard .jpg picture file which is a normal file type that most computers can view and print out. First click on the actual pattern to bring up the full size of the image.
Next right-click with your mouse, trackpad or computerized drawing pen (or tap and hold with your finger on a touch screen) and then choose save image or save image as to get a copy of this pattern template onto your own computer.
Note: This free printable is for your personal use only. You are welcome to blog about how you've used this freebie along with your own photos providing that you include a link back to this page.
This craft is a lot of fun to make and especially if you're a fan of this sweet confection. They also make wonderful handmade gifts that you can start to sew up now so that they're ready for gift-giving this Christmas or for Birthday treats. I just hope you don't get too hungry as you make them!
Related Content You Should Also Love:
My Ultimate Guide to Craft Felt: Everything You Need to Know
How to Make Plushies for Complete Beginners
Essential Sewing Supplies for Beginners
How to Make a Felt Brooch Pin
More Felt Crafts to Enjoy
How to Make Plushies for Complete Beginners
Essential Sewing Supplies for Beginners
How to Make a Felt Brooch Pin
More Felt Crafts to Enjoy
Page Last Updated:


Cute cupcake craft! I like the idea of lilac and cream. I bet these would be pretty as sachets too.
ReplyDeleteThank you, Ruth. Lilac and cream sounds like a really good combo and sachets are a fab idea :)
DeleteI am revitalizing my stitching skills primarily in hand embroidery. I was searching on the internet on how to hand sew a brooch pin back onto fabric. I was so relieved to finally come across your site on how to do this. I didn't want to use glue and your instructions were really helpful. I would definitely like to stitch your felt cupcake. It is adorable.
ReplyDeleteI'm so glad that you found the instructions helpful. I always think sewing looks better than using glue and it is relaxing to sit and do by hand. Hope you have fun and enjoy reviving your sewing skills.
Delete