
Free Mini Crochet Strawberry Pattern
Summer starts here! Well, not officially but we have been blessed with some amazing sunny and warm weather just recently which is really helping to kick off the summer season crafting - and what better for this than some sweet, crochet strawberries to make and enjoy with this free mini crochet strawberry pattern.
I'll be stringing mine up on a garland for my daughter's girly birthday party. But they do look cute presented in a bowl and I can imagine what cute additions and embellishments they'd make on a little cushion too.
The basic crochet strawberry pattern is below for you. It is my own pattern that I've worked on. I've seen these made up before but not exactly to my own tastes so I worked out my own pattern to get the exact shape and style that I was after.
Note: This post may contain affiliate links for which I can be compensated.

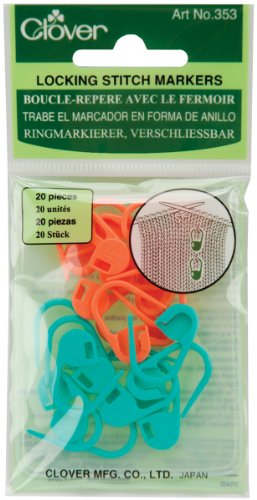
Patterns are in US terms. It is easy to substitute US sc for UK dc. Both the body and stalk area are worked in continuous rounds so you will definitely find it helpful to use a Crochet Stitch Marker to keep track of the end of each row as you work.


Of course you can use any combination of yarn and hook that you prefer. You really want quite tight stitches as you are stuffing this so you may need to go down a size of hook to achieve that.
I used plain DK or double knitting yarns and you can easily use any worsted weight for this pattern. Use your leftover yarns if you like!
Get a Full Photo Tutorial of Making These Here or Use the Written Pattern Below

Make a slip knot and a chain 4 loop for working in the round.
This means: chain 4 (ch4) then insert the hook back down into the first chain made and slip stitch (ss) into it to make a circular chain. Or create a magic ring to work your stitches in instead.
1) 6 single crochet (sc) worked into the loop for a total of 6 stitches [6]
2) 1sc into each st around [total of 6 stitches]
3) 2sc into each st [12]
4) 1sc into each st [12]
5) *1sc then 2sc in next st; repeat * to end of row [18]
6) *2sc then 2sc in next st; repeat * to end of row [24]
7) 1sc into each stitch around [24]
8) 1sc into each stitch around [24]
9) 1sc into each stitch around [24]
Start to stuff the strawberry at this point.
10) *2sc then sc2tog; repeat * to end of row [18]
11) *1sc, sc2tog; repeat * to end of row [12]
Finish stuffing strawberry
12) sc2tog until end of row [6]
13) *sc2tog; repeat twice then fasten off and sew in end of yarn.

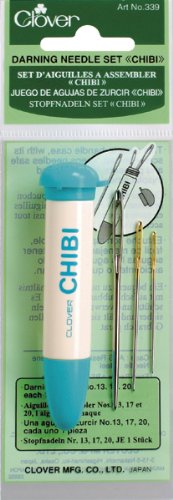
Use a long darning needle with a blunt end for sewing and a wide enough eye to accommodate your yarn or thick piece of embroidery thread.
Using a long piece of yarn, start sewing at the fat end of the fruit where you have worked the more untidy decrease stitches and work in a small straight stitch.
Learn More About Darning Needles Here
Then pop your needle somewhere else in the body to work another small stitch. Do this randomly around the body to make your pips and then fasten off back at the end you started at, sewing in any loose threads.

Make a chain 4 loop for working in the round. This means: chain 4 (ch4) then insert the hook back down into the first chain made and slip stitch (ss) into it to make a circular chain. Or create a magic ring to work your stitches in instead.
1) 6 single crochet (sc) worked into the loop for a total of 6 stitches [6]
2) *1sc then 2sc in next st; repeat * to end of row [9]
3) *2sc then 2sc in next st; repeat * to end of row [12]
4) 1sc *1sc, ch4 up, ss into 2nd ch from hook, 2sc, 1sc in next stitch, 1sc, ch6 up, ss into 2nd ch from hook, 4sc, 1sc in next stitch; repeat from * all the way round row to make your stalk. SS to fasten off.
You can leave a long length of yarn to sew this to your strawberry.
If you get stuck or encounter any issues, you may find it helpful to look at the photo tutorial I linked to up top since that also has a lot more explanation as well as handy videos on some techniques that you may not yet be familiar with. If you encounter any mistakes, please do let me know.
Related Content You Should Also Love:
Page Last Updated:
I'll be stringing mine up on a garland for my daughter's girly birthday party. But they do look cute presented in a bowl and I can imagine what cute additions and embellishments they'd make on a little cushion too.
The basic crochet strawberry pattern is below for you. It is my own pattern that I've worked on. I've seen these made up before but not exactly to my own tastes so I worked out my own pattern to get the exact shape and style that I was after.
Note: This post may contain affiliate links for which I can be compensated.
Free Mini Crochet Strawberry Pattern Instructions
Patterns are in US terms. It is easy to substitute US sc for UK dc. Both the body and stalk area are worked in continuous rounds so you will definitely find it helpful to use a Crochet Stitch Marker to keep track of the end of each row as you work.

Of course you can use any combination of yarn and hook that you prefer. You really want quite tight stitches as you are stuffing this so you may need to go down a size of hook to achieve that.
I used plain DK or double knitting yarns and you can easily use any worsted weight for this pattern. Use your leftover yarns if you like!
Get a Full Photo Tutorial of Making These Here or Use the Written Pattern Below
What Crochet Tools and Materials You Need
- Crochet hook: I used a 4mm Clover Soft Touch Hook also at amazon.co.uk
- Red or pink yarn for body
- Green yarn for stalk area
- Yellow yarn for pips
- Polyester Toy Stuffing and also at amazon.co.uk
- Stitch markers
- Darning needle and sewing pins
1: Pattern to Crochet the Main Strawberry Body in a Pink or Red Yarn
Make a slip knot and a chain 4 loop for working in the round.
This means: chain 4 (ch4) then insert the hook back down into the first chain made and slip stitch (ss) into it to make a circular chain. Or create a magic ring to work your stitches in instead.
1) 6 single crochet (sc) worked into the loop for a total of 6 stitches [6]
2) 1sc into each st around [total of 6 stitches]
3) 2sc into each st [12]
4) 1sc into each st [12]
5) *1sc then 2sc in next st; repeat * to end of row [18]
6) *2sc then 2sc in next st; repeat * to end of row [24]
7) 1sc into each stitch around [24]
8) 1sc into each stitch around [24]
9) 1sc into each stitch around [24]
Start to stuff the strawberry at this point.
10) *2sc then sc2tog; repeat * to end of row [18]
11) *1sc, sc2tog; repeat * to end of row [12]
Finish stuffing strawberry
12) sc2tog until end of row [6]
13) *sc2tog; repeat twice then fasten off and sew in end of yarn.
2: Sew on the Seeds in a Yellow Yarn
Use a long darning needle with a blunt end for sewing and a wide enough eye to accommodate your yarn or thick piece of embroidery thread.

Using a long piece of yarn, start sewing at the fat end of the fruit where you have worked the more untidy decrease stitches and work in a small straight stitch.
Learn More About Darning Needles Here
Then pop your needle somewhere else in the body to work another small stitch. Do this randomly around the body to make your pips and then fasten off back at the end you started at, sewing in any loose threads.
3: Pattern to Crochet the Strawberry Stalk in a Green Yarn
Make a chain 4 loop for working in the round. This means: chain 4 (ch4) then insert the hook back down into the first chain made and slip stitch (ss) into it to make a circular chain. Or create a magic ring to work your stitches in instead.
1) 6 single crochet (sc) worked into the loop for a total of 6 stitches [6]
2) *1sc then 2sc in next st; repeat * to end of row [9]
3) *2sc then 2sc in next st; repeat * to end of row [12]
4) 1sc *1sc, ch4 up, ss into 2nd ch from hook, 2sc, 1sc in next stitch, 1sc, ch6 up, ss into 2nd ch from hook, 4sc, 1sc in next stitch; repeat from * all the way round row to make your stalk. SS to fasten off.
You can leave a long length of yarn to sew this to your strawberry.
If you get stuck or encounter any issues, you may find it helpful to look at the photo tutorial I linked to up top since that also has a lot more explanation as well as handy videos on some techniques that you may not yet be familiar with. If you encounter any mistakes, please do let me know.
Related Content You Should Also Love:
Sunburst Crochet Granny Square Pattern for Pillows and Blankets
Granny Triangle Crochet for Garlands and Bunting
See How to Make a Yarn Pom Pom Garland
Discover How to Make Your Own DIY Yarn Tassels
More Crochet Crafts to Enjoy
Granny Triangle Crochet for Garlands and Bunting
See How to Make a Yarn Pom Pom Garland
Discover How to Make Your Own DIY Yarn Tassels
More Crochet Crafts to Enjoy
Page Last Updated:
thank you for sharing, beautiful
ReplyDeleteThank you, Liz. Glad you like it :)
ReplyDeleteNice
ReplyDelete